
Configuration Settings
To configure the extension,
- Go to the Magento 2 Admin Panel.
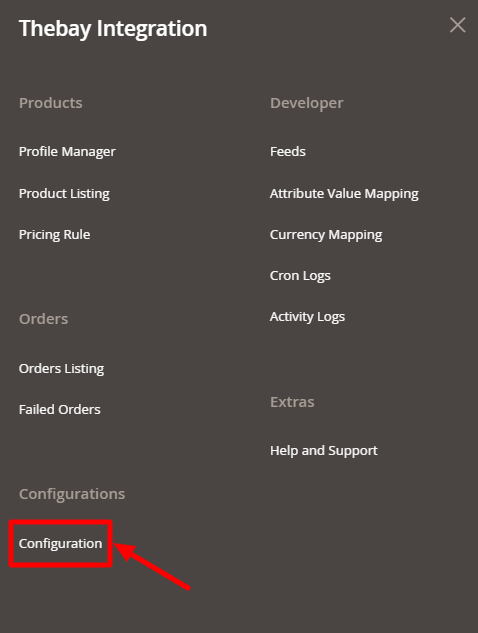
- On the left navigation bar, click on The Bay Integration menu.
The menu appears as shown below:
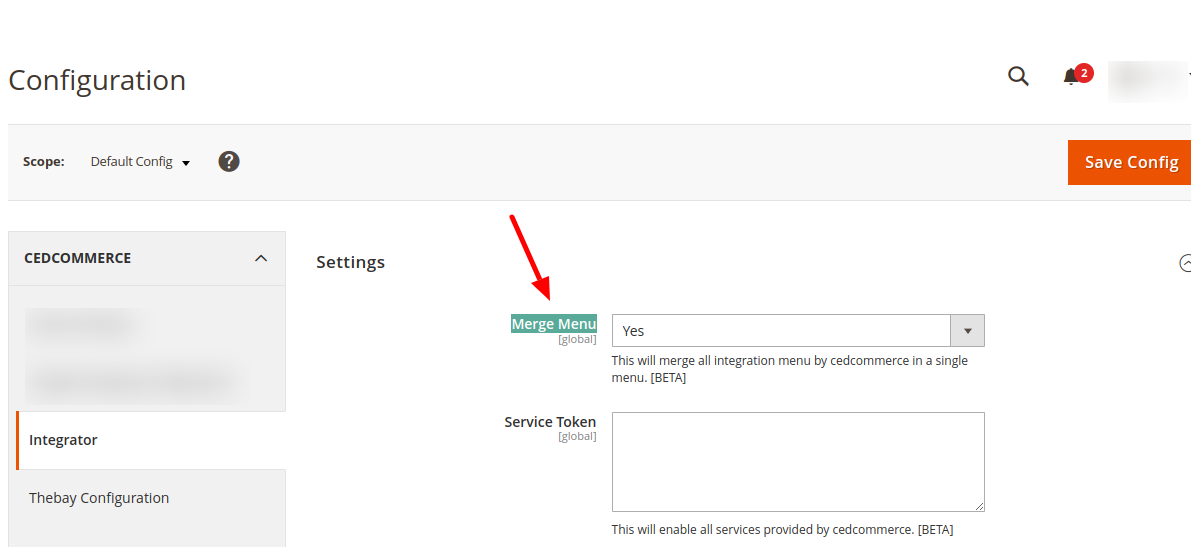
 Note: To merge the menu of all the CedCommerce modules, you can enable it by selecting the Yes option in the integrator as shown below:
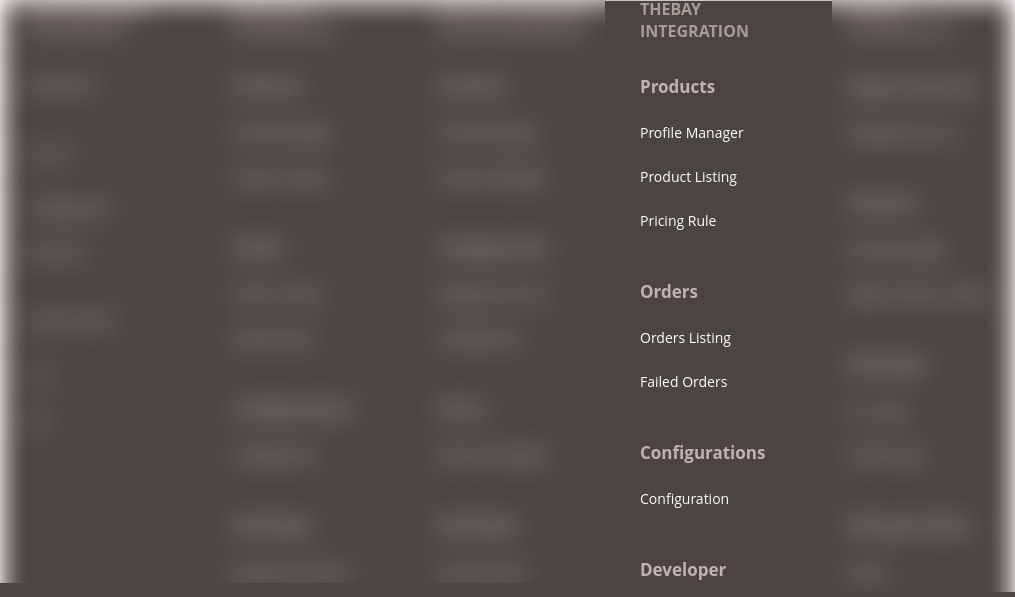
The menu will then appear as:
- Click on Configuration.
The Configuration settings page appears as shown below:
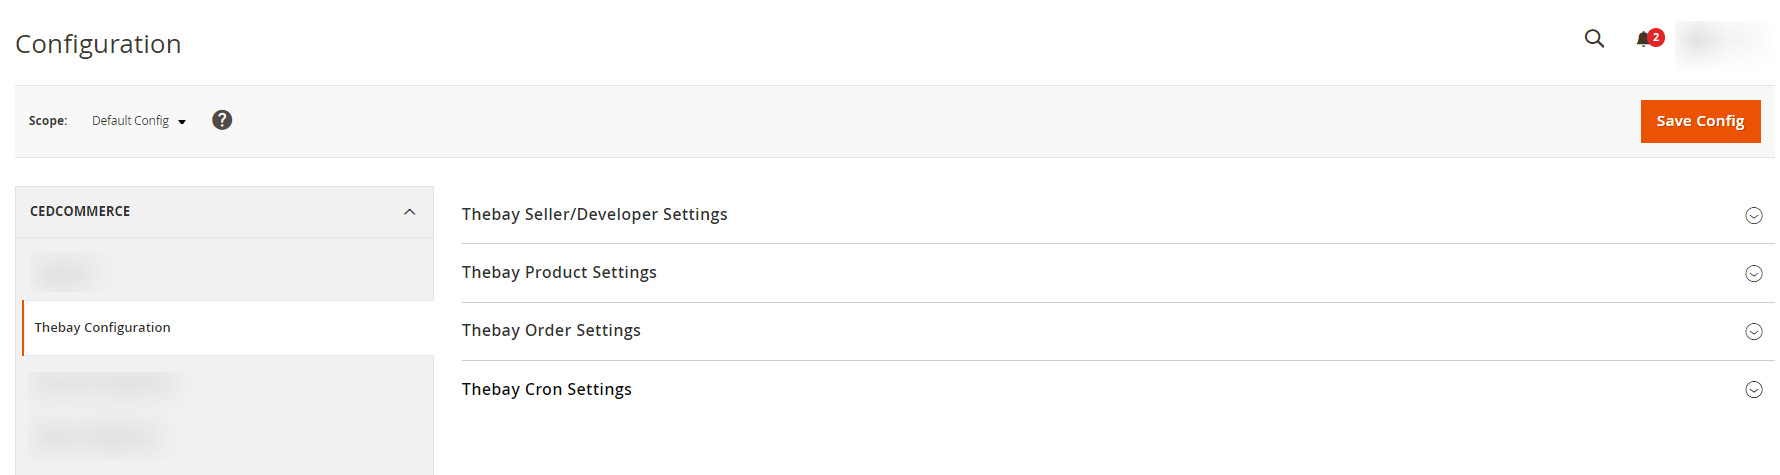
- Click on Thebay Seller/Developer Settings. The section is expanded as shown below:
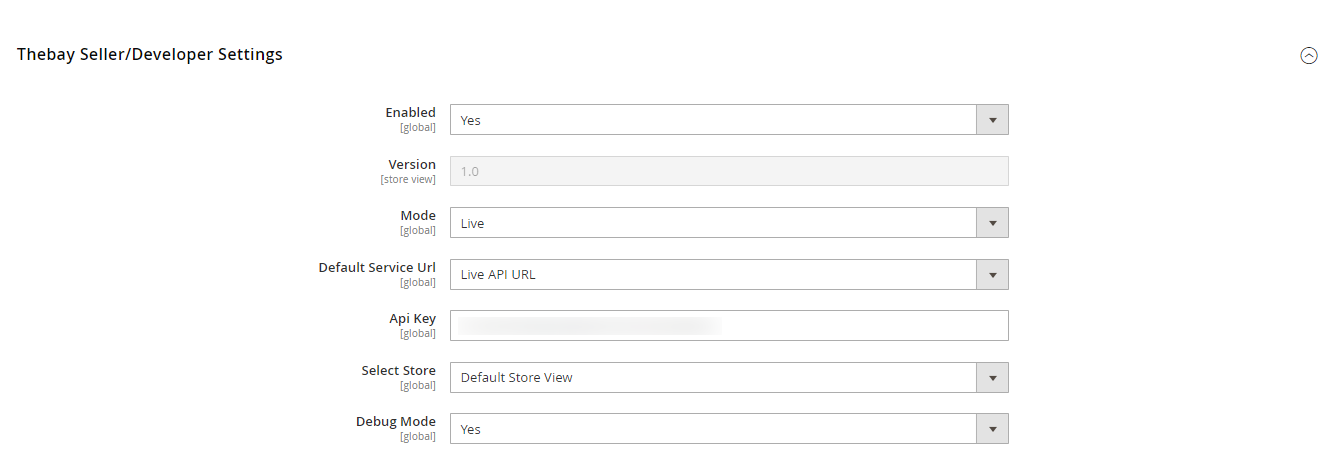
- Under Thebay Seller/Developer Settings do the following steps:
- In the Enabled list, select the Yes option.
- In the Mode list, select the mode of store Sandbox/Live.
- In Default Service Url, enter the store Url if you have selected Sandbox then sandbox URL else the Live Url.
- In Api Key, copy the API Key generated on the Seller page and paste it here.
Note: To fetch the API Key, click here. - In the Select Store list, select the required store.
- In Debug Mode, select Yes if you want the logs to be created.
- Now scroll down and click on Thebay Product Settings. The section is expanded as shown below:
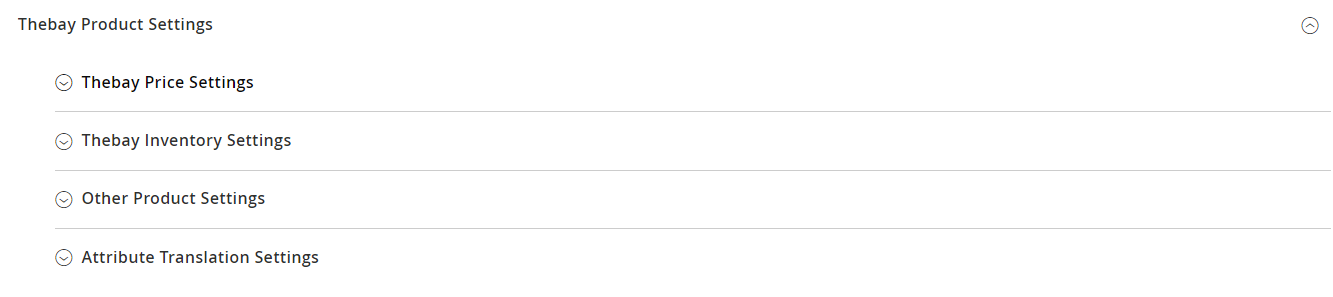
- Under Thebay Product Settings do the followings steps:
- Click on Thebay Price Settings, the section is expanded as shown below:

- Under Thebay Price Settings do the following steps:
- In the Product Price list, select one of the following options:
- Select Default Magento Price, if you want to set the price as default.
- Increase by Fixed Price: If selected, then the Modify by Fix Price field appears.
- Increase by Fixed Percentage: If selected, then the Modify by Percentage Price field appears.
Enter the numeric value to increase the price of The Bay, product price by the entered value % of Magento 2 price.
For Example,
Magento 2 price + 5% of Magento 2 price.
Magento 2 Price = 100
Select the Increase By Fixed Percentage option
Modify by Percentage Price = 5
100 + 5% of 100 = 100 + 5 = 105
Thus, The Bay Product Price = 105 - Decrease by Fixed Price: If selected, then the Modify by Fix Price field appears.
- Decrease by Fixed Percentage: If selected, then the Modify by Percentage Price field appears.
Enter the numeric value to decrease the price of The Bay product price by the entered value % of Magento 2 price
For Example,
Magento 2 price – 5% of Magento 2 price.
Magento 2 Price = 100
Select Decrease By Fixed Percentage option
Modify by Fix Price = 5
100 – 5% of 100 = 100 – 5 = 95
Thus, The Bay Product Price = 95
- In the Product Price list, select one of the following options:
- Click on Thebay Inventory Settings, the section is expanded as shown below:
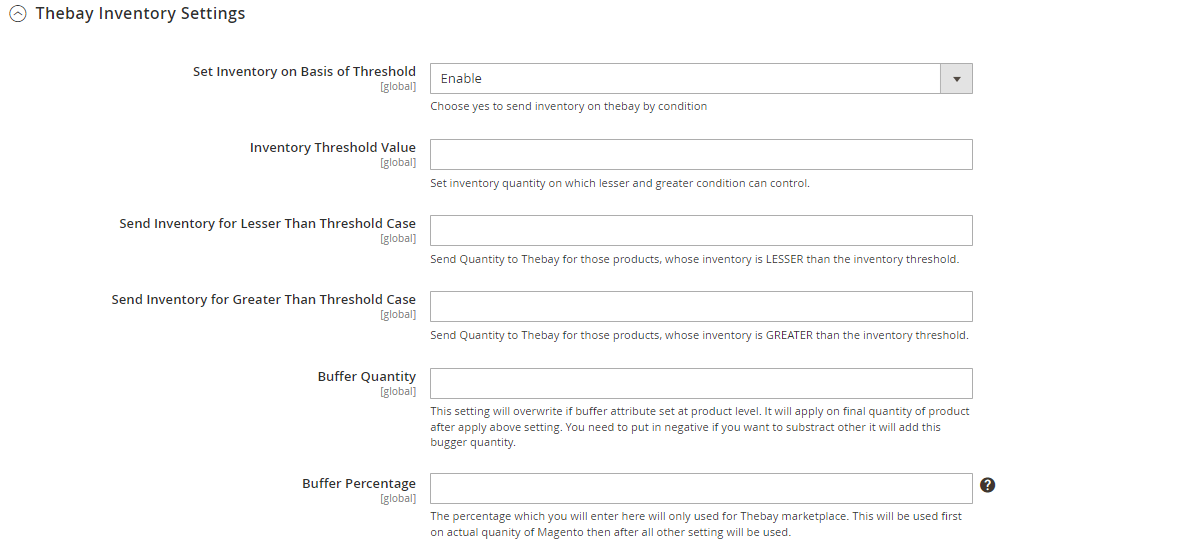
- Under Thebay Inventory Settings do the following steps:
- In the Set Inventory on Basis of Threshold list, select the Enable option is required to set the inventory based on a threshold.
Note: Only when the admin selects Enable, other fields appear. Threshold Inventory is the minimum count of an item that the store owner wants to keep in stock. - In the Inventory Threshold Value box, enter the required value.
- In the Send Inventory for Lesser Than Threshold Case box, enter the required value.
- In the Send Inventory for Greater Than Threshold Case box, enter the required value.
- In Buffer Quantity, enter the buffer quantity. This setting will overwrite if the buffer attribute is set at the product level. It will apply to the final quantity of product after applying. You need to put in negative if you want to subtract otherwise it will add this bugger quantity.
- In Buffer Percentage, enter the buffer percent. The percentage which you will enter here will only be used for The bay marketplace. This will be used first on the actual quantity of Magento then after all other settings will be used.
- In the Set Inventory on Basis of Threshold list, select the Enable option is required to set the inventory based on a threshold.
- Click on Other Product Settings, the section is expanded as shown below:
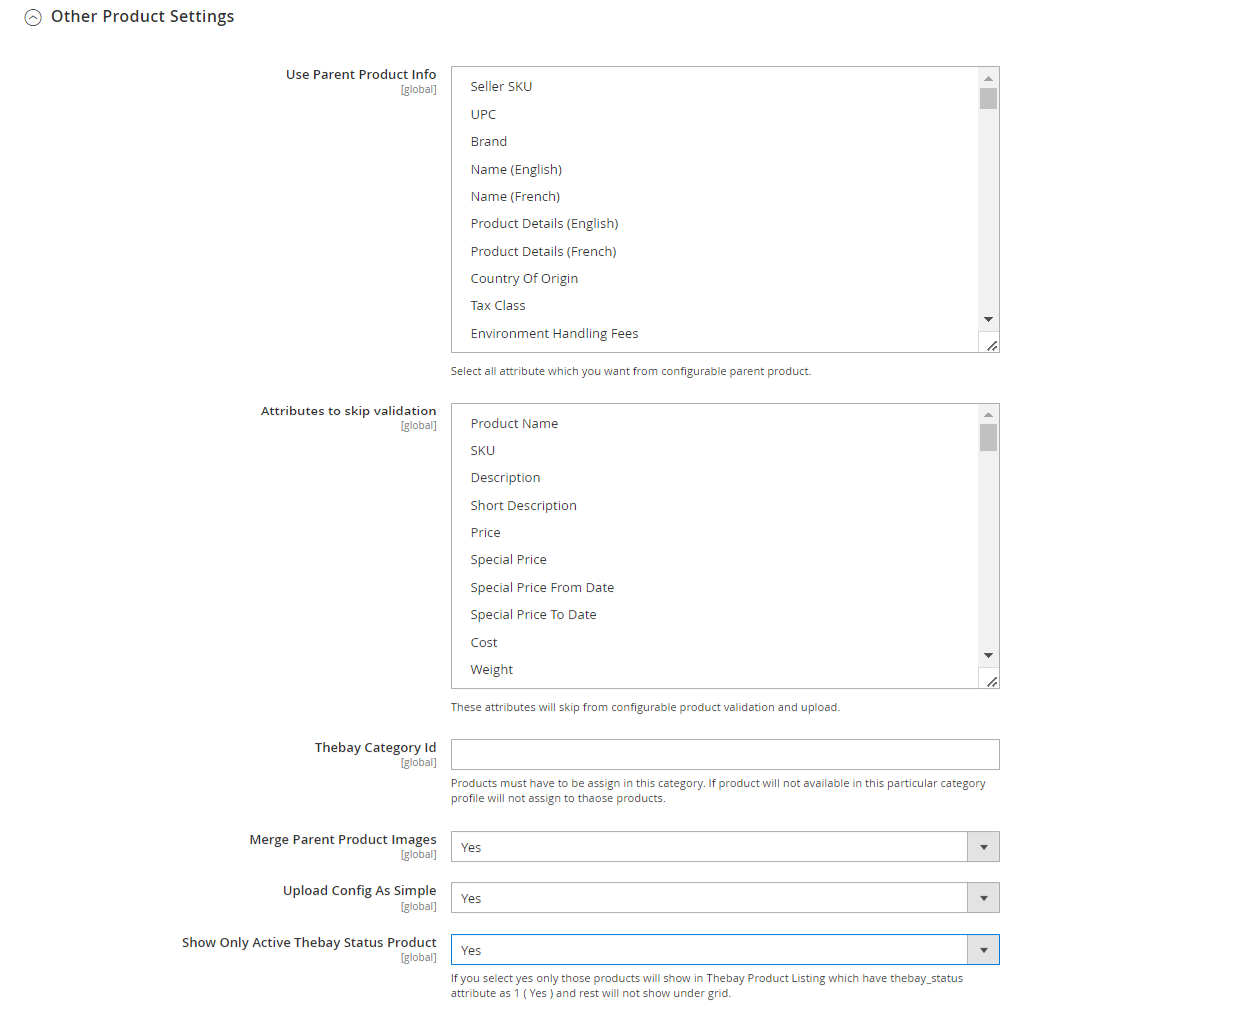
- Under Other Product Settings do the following steps:
- In Use Parent Product Info, select all attributes that you want from the configurable parent product.
- In Attributes to Skip Validation, select the attributes that will skip from configurable product validation and upload.
- In Thebay Category Id, enter the category id to which you want to assign the products.
- In Merge Parent Product Images, select Yes if you want to merge the parent product image.
- In Upload Config as Simple, select Yes if you want to upload the configurable products as simple products.
- In Show Only Active Thebay Status Product, if you select Yes only those products will show in The Bay Product Listing which has thebay_status attribute as 1 ( Yes ) and the rest will not show under the grid.
- Now click on Attribute Transalation Settings, the section is expanded as shown below:
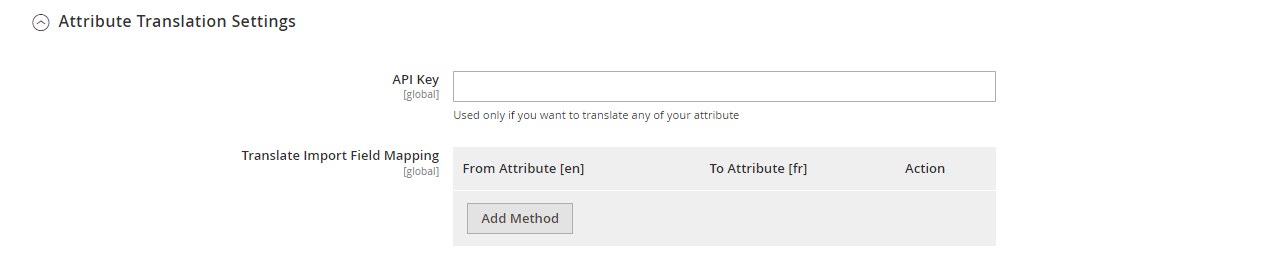
- Under Attribute Transalation Settings, do the following steps:
- In API Key, enter the API Key to translate the attribute.
Note- To set up the Google Translate API Key, click here. - In Translate Import Field Mapping, choose the attribute that you want to translate.
Note- To fetch the carrier code which you will use to map click here.
- In API Key, enter the API Key to translate the attribute.
- Click on Thebay Price Settings, the section is expanded as shown below:
- Scroll down and click on Thebay Order Settings. The section is expanded as shown below:

- Under Thebay Order Settings, do the following steps:
- In Order Status to Fetch, select the status of the order for fetching.
- In Use Thebay Order Id as Magento Increment Id, if you want The Bay and Magento Increment Id to be used as same.
- In Thebay Order Id Prefix box, enter the required order Id prefix.
- In the Order Notification Email box, enter the required email Id.
- In Auto Order Accept, select Yes if you want the orders to be accepted automatically.
- In the Enable Default Customer list, select the Yes option to enable the default customer.
- In Default Customer Email, enter the mail id of the default customer.
- In Refund Order on Thebay, select Yes for the item refund on The Bay marketplace.
- In Refund Reason for Thebay, select the reason that will be applied for the refund items.
- In Carrier Mapping, map the Magento carriers with Thebay carriers.
- Now scroll down and click on Thebay Cron Settings, the section is expanded as shown below:
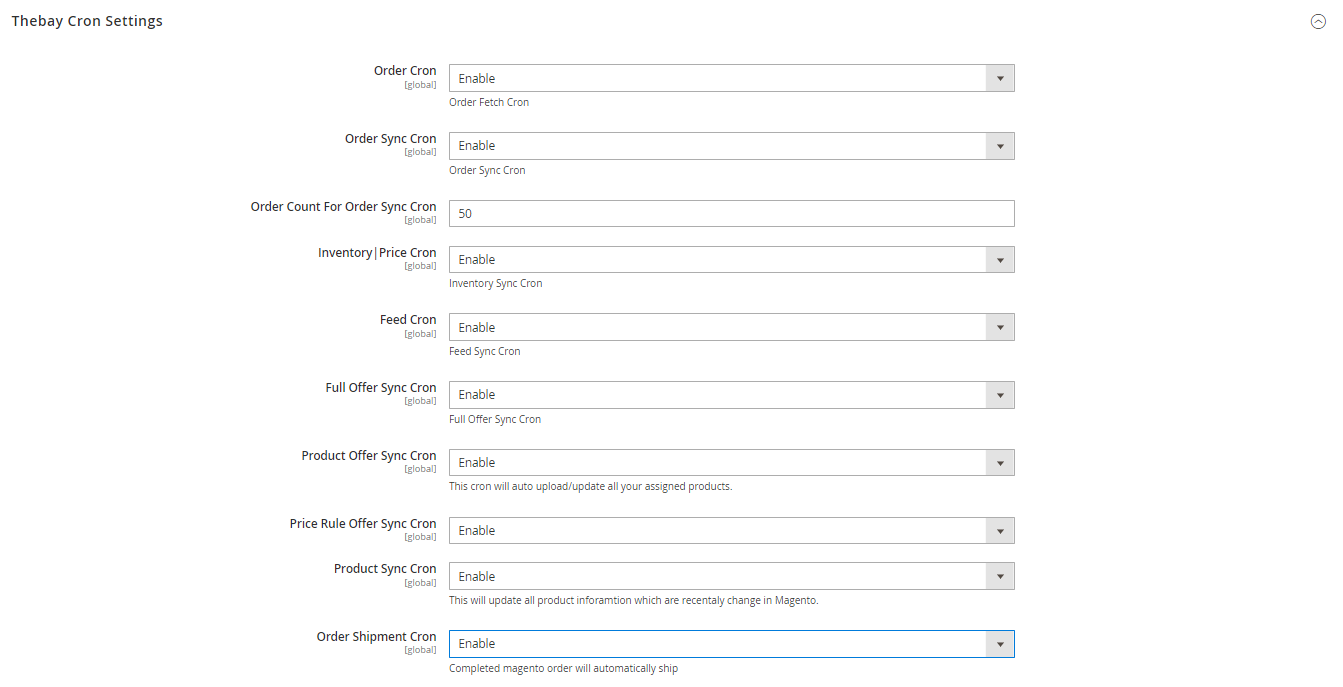
- Under Thebay Cron Settings, do the following steps:
- In the Order Cron list, select the Enable option to enable the fetch order cron.
- In Order Sync Cron, select Enable to enable the order syncing cron.
- In Order Count For Order Sync Cron, enter the quantity for order syncing.
- In the Inventory |Price Cron list, select the Enable option to enable the Inventory & Price Sync cron.
- In Feed Cron, select Enable option to enable the feeds syncing through cron.
- In Full Ofer Sync Cron, select Enable option to full offer syncing through cron.
- In Product Offer Sync Cron, select Enable to upload/update the assigned products.
- In Price Rule Sync Cron, select Enable to synchronise the product price.
- In Product Sync Cron, select Enable to synchronise the products.
- In Order Shipment Cron, select Enable Option to ship Magento orders automatically.
- Click the Save Config button to save the entered values.
×


