3.1.Add New Store Details ↑ Back to Top
To add new store details
- Go to the Admin panel.
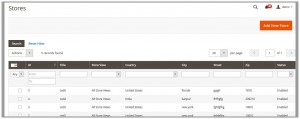
- On the left navigation bar, click the STORE LOCATOR menu, and then click Add Locations.
The Stores page appears as shown in the following figure:

- In the upper-right corner of the page, click the Add New Store button.
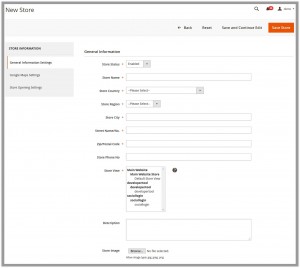
The New Store page appears as shown in the following figure:

- In the right panel. Under General Information, enter the following details:
- Store Status: select Enabled to keep the store active.
- Store Name: enter the name of the store.
- Store Country: enter the country name.
- Store Region: enter the region of the store.
- Store City: enter the city of the store.
- Street Name/No.: enter the address.
- Zip/Postal Code: enter the PIN code.
- Store Phone No: enter the phone number of the store.
- Store View: select the required store view.
- Description: enter the description of the store.
- Store Image: select the store image.
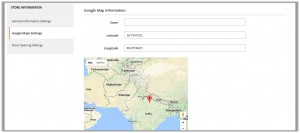
- In the left navigation panel, click the Google Maps Settings menu.
The page appears as shown in the following figure:

- In the right panel, under Google Map Information, enter the following details (these details are optional):
- Zoom
- Latitude
- Longitude
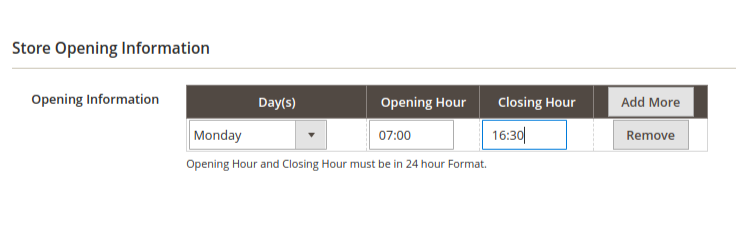
- In the left navigation panel, click the Store Opening Settings menu.
The page appears as shown in the following figure:

- In the right panel, under Store Opening Information, enter the following details:
- Opening Hour (In 24hr format): Select the time when the store opens.
- Closing Hour (In 24hr format): Select the time when the store is closed.
- Opening Day: Select the day when the store opens.
- Closing Day: Select the day when the store is closed.
- Click the Save Store button.
The new store is added and listed on the Stores page.
×


