
Shopee Configuration
Once the extension is successfully installed in the Magento 2 store, the SHOPEE INTEGRATION menu appears on the left navigation bar of the Admin Panel. The merchant has to first create a seller account in the Shopee seller panel.

Once the seller account is created and is approved by Shopee, they provide the username and password of the seller account to the admin. The Magento 2 store owner can use the Shopee Username and Password while setting up the Shopee Configuration settings in the Magento 2 Admin panel.
To set up the configuration settings in the Magento 2 Admin panel
- Go to the Magento Admin panel.
- On the left navigation bar, click the SHOPEE INTEGRATION menu.
The menu appears as shown in the following figure: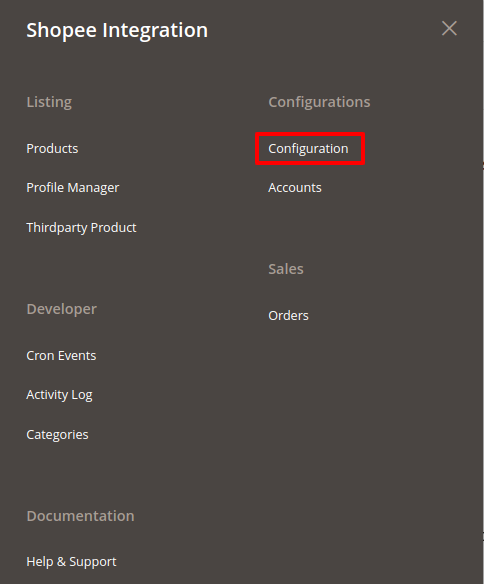
- Click Configuration.
The Configuration page appears as shown in the following figure:
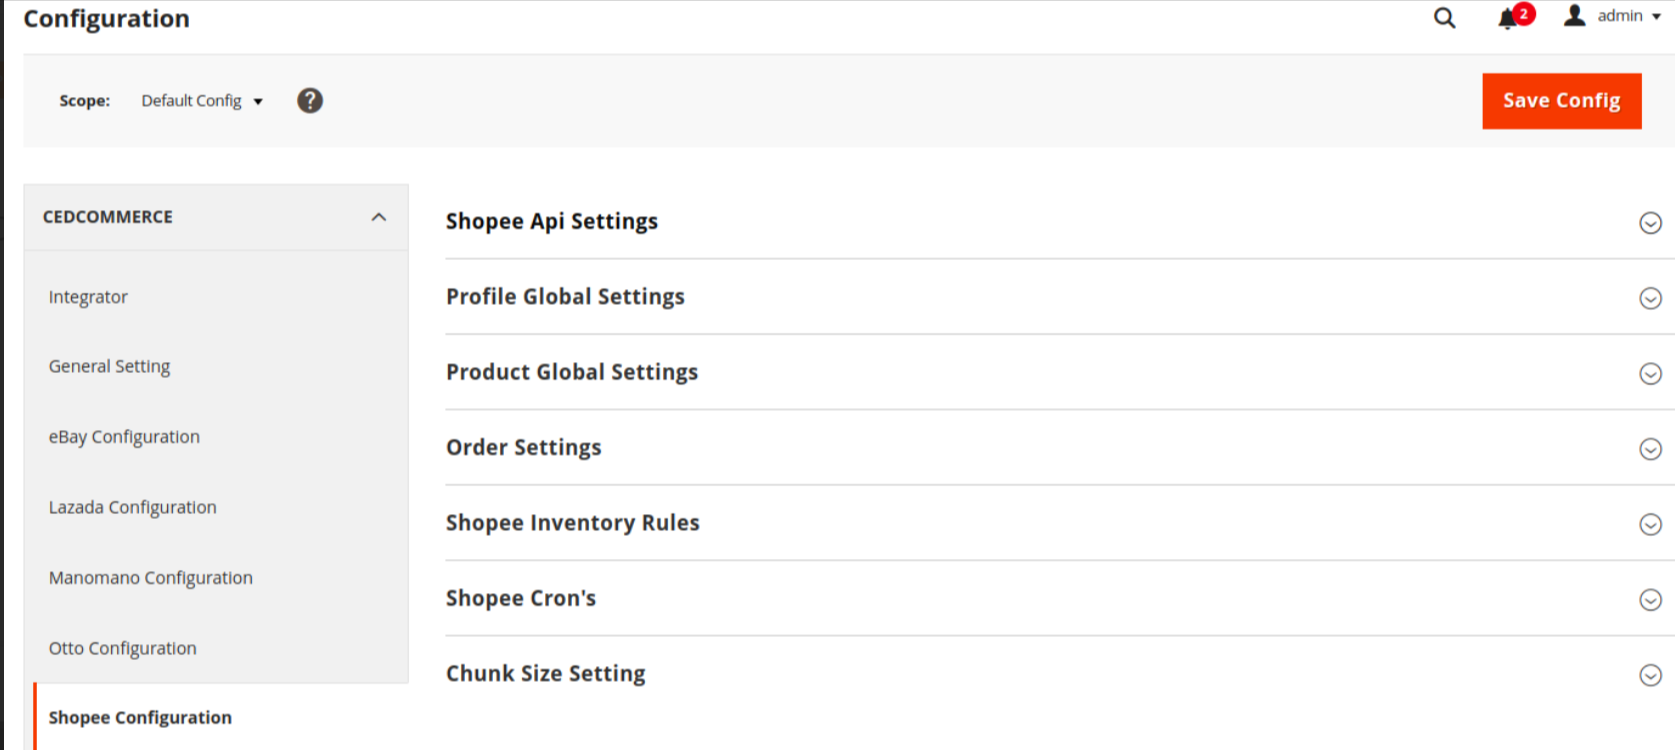
- You can notice the following seven categories:
- Shopee API Settings
- Product Global Settings
- Order Settings
- Shopee Inventory Rules
- Shopee Cron’s
- Chunk Size Setting
- On clicking on this section, additional settings appear
- In the right panel, click on Shopee API Settings, and the section expands as:
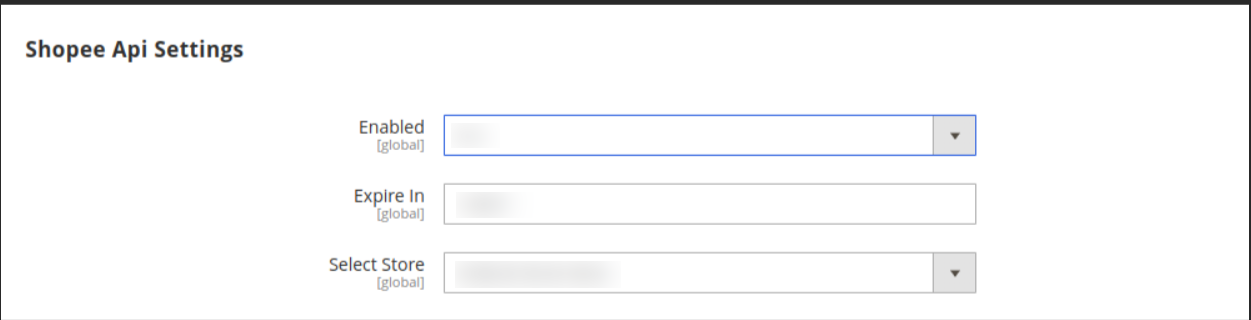
- Under Shopee Api Settings, do the following steps:
- In the Enabled list, select Yes to enable the extension features.
- In order to use the extension enabling it is a must.

- Now the section will look as:

- It is to be noted that the integration consists of 2 mods:
- The sandbox mode – Limited access like attribute and category
- The Production mode – Full Access

- In the Mode column select production from the drop-down menu.
- In order to fill in the below two details, you need to understand this-
- In order to sell on Shopee via Integration you need to have the following two accounts:
- The Shopee Seller Account
- The Shopee Developer Account
- The details such as Partner ID and Signature are available in the Shopee Developer account.
-
In case you don’t have a Shopee developer account, you can create one by visiting here

- In the Partner ID box, enter the Id provided by CedCommerce.
- In the Signature box, enter the signature provided by CedCommerce.
- In the Debug Log list, select Yes to start Shopee Integration in the debug mode.
It captures the log for the debug process.
- Select the view of the store you wish to, from the next section of Select Store.
- Now the API settings are complete.
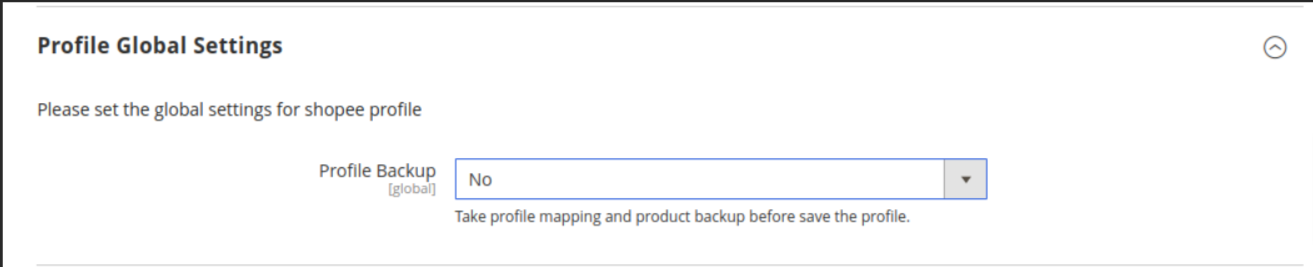
- Now move to Profile Global Settings ,
º On clicking the section is expanded as shown below:
- Again move to Shopee Product Global Settings,
- On clicking the section is expanded as shown below:

- Note: These settings make the admin independent of keeping the price of their products dynamic on Shopee without making any alteration to the product price in Magento.
- In the Shopee Product Price list, select one of the following options:
- Default Magento Price
- Increase by Fixed Price
- Increase by Fixed Percentage:
- Decrease by Fixed Price
- Decrease by Fixed Percentage
- Now let’s understand each in detail:
- Default Magento Price: As the name suggests, when selected makes no change in price.
- Increase by Fixed Price: If selected, then the Modify by Fix Price field appears.
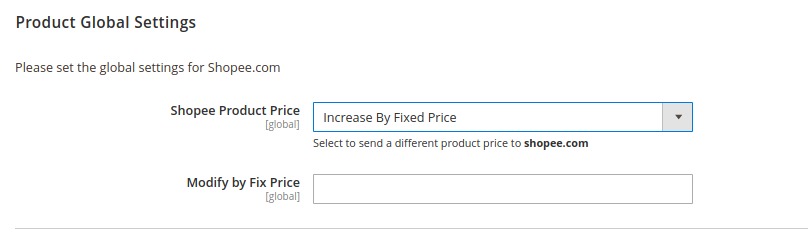 Enter the exact price and the change will get reflected on the Shopee product.
For Example,
Magento Price = 100
Select Increase By Fixed Price option
Enter Price = 20
100 + 20 = 120
Thus, Shopee Product Price = 120 - Increase by Fixed Percentage: If selected, then the Modify by Percentage Price field appears. Enter the numeric value to increase the price of the Shopee, product price by the entered value % of Magento price

For Example,
Magento price + 5% of Magento price.
Magento Price = 100
Select Increase By Fixed Percentage option
Enter Percentage = 5
100 + 5% of 100 = 100 + 5 = 105
Thus, Shopee Product Price = 105 - Decrease by Fixed Price: If selected, then the Modify by Fix Price field appears the same as in the increase section.
Enter the value and the change is done.
For Example,
Magento Price = 100
Select Decrease By Fixed Price option
Enter Price = 20
100 – 20 = 80
Thus, Shopee Product Price = 80 - Decrease by Fixed Percentage: If selected, then the Modify by Percentage Price field appears.
Enter the numeric value to decrease the price of the Shopee product price by the entered value % of Magento price.
For Example,
Magento price – 5% of Magento price.
Magento Price = 100
Select Decrease By Fixed Percentage option
Enter Percentage = 5
100 – 5% of 100 = 100 – 5 = 95
Thus, Shopee Product Price = 95
- On clicking the section is expanded as shown below:
- That’s all the required steps in the Shopee product global settings.
- Now Click the Order Settings tab
- The section will expand as:
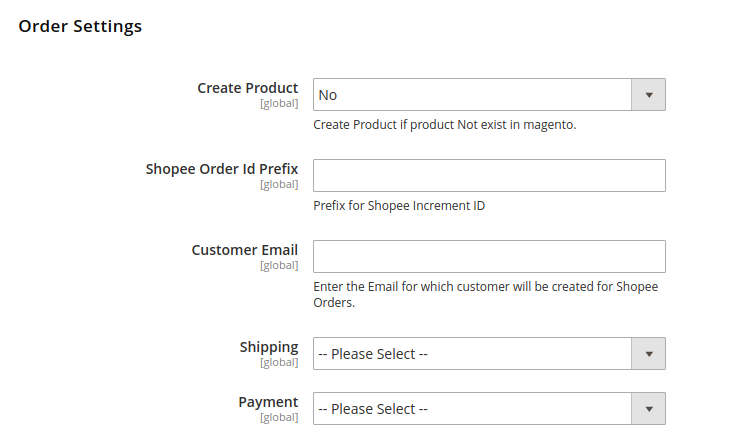
- In Create Product field, select Yes.
- Why is this option available – Suppose you have a product on Shopee that is not present on your Magento Panel. If you want to create the same product in your Magento store with the same details, by choosing YES it is done.

- In the Shopee Order Id Prefix box, enter the text as a prefix for Shopee Increment ID.
- Note: Shopee Order Id Prefix can be a combination of numbers, alphabets, or special characters. This is for your own recognition since the orders from the Shopee marketplace will have the same prefix & will be easy to analyze. So make sure to mark them as per your ease.
- For example:

- In the Customer Email field, enter the default email for the customer for which the order will be created.
- Note: This is in case the order received from the Shopee does not include an email id.
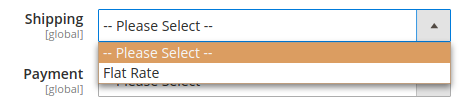
- In the Shipping field, select the shipping method from the options as shown below:

- In the Payment field, select the payment method from the options as shown below:
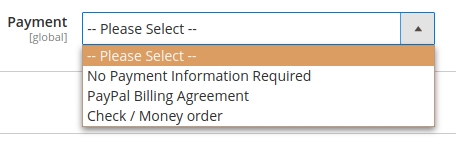
- Note: More fields can be added to the payment option after customizations.
- The section will expand as:
- Click the Shopee Inventory Rules tab and the tab expands as:

- In the Send Inventory on Basis of Threshold list, select Enable to send the inventory based on the threshold.
Note: Only when the admin selects Enable, the other fields appear. - The section appears as shown in the following figure:
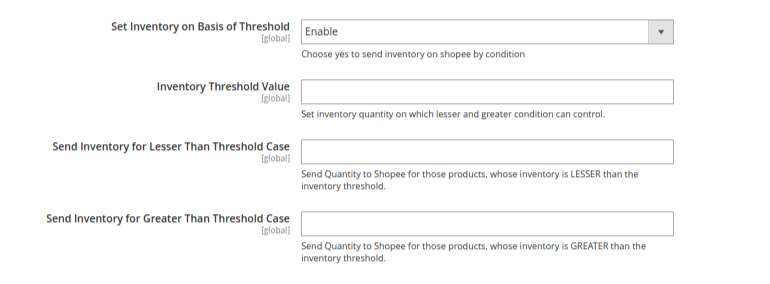
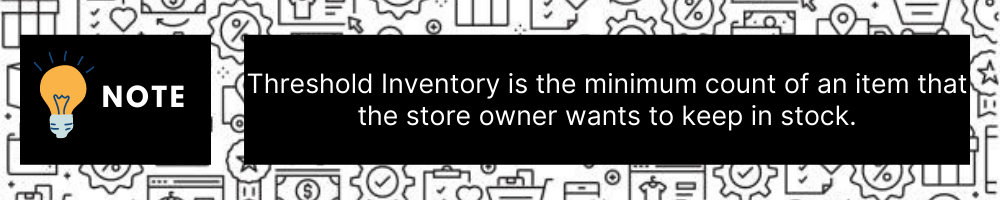
- In the Inventory Threshold Value box, enter the value which you consider to be the minimum for your inventory.
- In the Send Inventory for Lesser Than Threshold Case box, enter the value that needs to be visible on Shopee in case your inventory is lesser than the threshold value that you have set in the earlier parameter.
- In the Send Inventory for Greater Than Threshold Case box, enter the value that needs to be visible on Shopee in case your inventory is more than the threshold value that you have set.
- For Example:
Suppose you have set the threshold value of a product to be 500. You have set the greater than the threshold value to say 600 and the lesser than the threshold value to be 300.
Now you have 530 of that product in the inventory, then the number visible on Shopee would be 600. Suppose you sold 33 products and now the value is decreased to be 497 which is below the threshold. The value that will now appear on Shopee will be 300. - Click the Save Config button to save the entered values.
- In the Send Inventory on Basis of Threshold list, select Enable to send the inventory based on the threshold.
- Click on the Shopee Crons tab
- The tab will expand as:
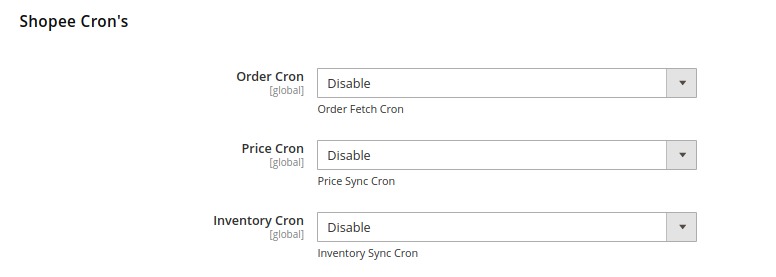

- In the Order Cron, select Enable if you want to fetch the orders. Order Crons are used to fetch waiting for shipment orders at approx 10 minutes.
- In Price Cron, select Enable to synchronize the Shopee Product Price between Magento and Shopee at regular intervals of time. This cron runs every 5 minutes to sync.
- In the Inventory Cron list, select Enable to enable the Inventory & Price Synchronisation automatically at regular intervals of time. This cron runs every 5 hours to sync.

- The tab will expand as:
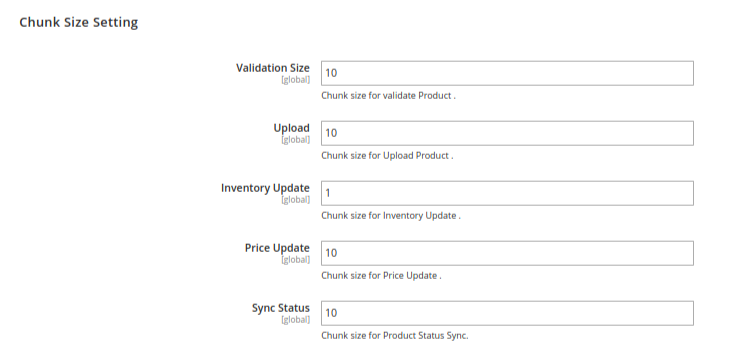
- Now click the Chunk Size Setting tab and it will expand as:
-
- Note: The reason why we perform these chunks settings is to easily manage Unlimited data by bifurcating it into limited parts.
- Under Chunk Size Settings, do the following steps:
- In the Validation Size field, enter the chunk size for the products. The products that will get validated before being uploaded on Shopee would be the same as the number you enter in this field.
- In the Upload field, enter the number of products that you want to upload in one go from Magento to Shopee.
- In the Inventory Update field, enter the chunk size of the products. The inventory will be updated in one batch for the number of products that you enter in this field.
- In the Price Update field, enter the chunk size for the number of products. The price will be updated in one batch for the number of products that you enter in this field.
- In the Sync Status field, enter the chunk size of the products. The number of products that you will be able to sync the status for would be the same as the number that you enter in this field.
- Click on Save Config Button and the configurations will get saved and the success message appears:

×


