
Reverb Configuration Settings
After obtaining the Access Token from the Reverb Seller account, the Magento 2 store owner may start the Configuration from the admin panel.
To Set up the Reverb Configuration settings in the Magento 2 Admin panel:
- Go to the Magento 2 Admin panel.
- On the left navigation bar, click the Reverb menu.
- On the right side, click on Configuration.

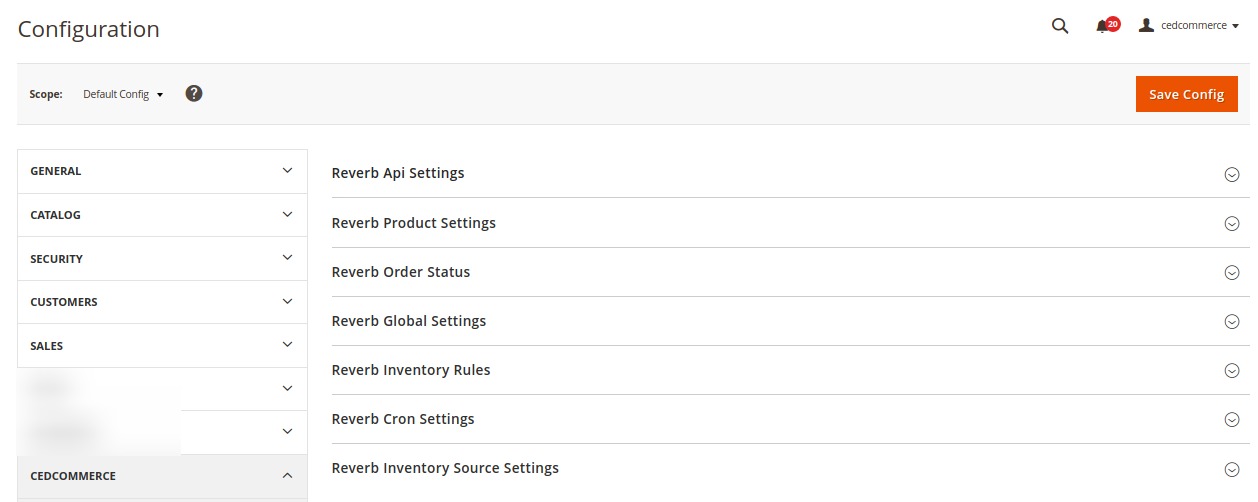
- The Reverb Magento 2 Configuration page appears as shown in the following figure:
Reverb API Settings-
- The first setting in the configuration section that you need to do is the Reverb API Setting
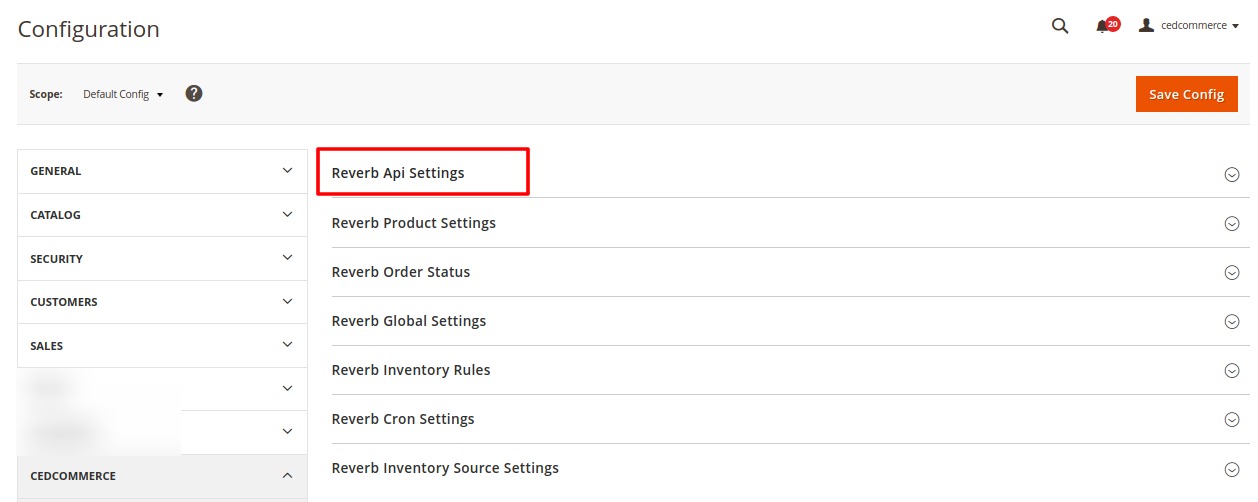
- Click and the section expands
- In Enable, select Yes in order to enable your extension.
- On selecting yes, the tab gets expanded as shown in the figure below:
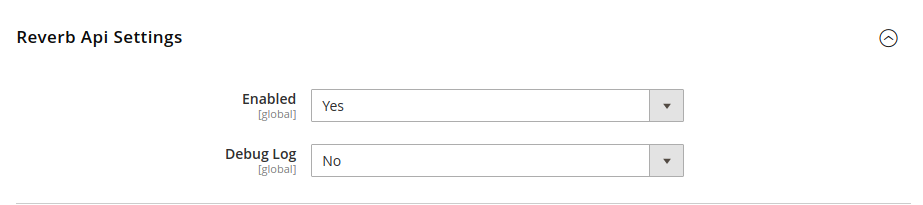
- Enter the Access Token that you had got from the Reverb Seller Panel, in the Access Token bar.
- In the Debug log, select Yes, if you want the debug log to be created.
Reverb Product Settings:
- Now click on the Reverb Product Settings

- On clicking, the section expands as:
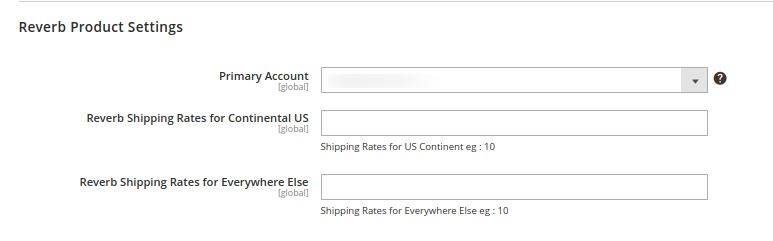
- In the Primary Account Section, choose the account from the drop-down menu for which you wish to perform the settings.
- In Reverb Shipping Rates for Continental US enter the shipping charges you want in the US on the product.
- In Reverb Shipping Rates for Everywhere Else enter the shipping rate for other places.
Reverb Order Status-
- Now click on the Reverb Order Status
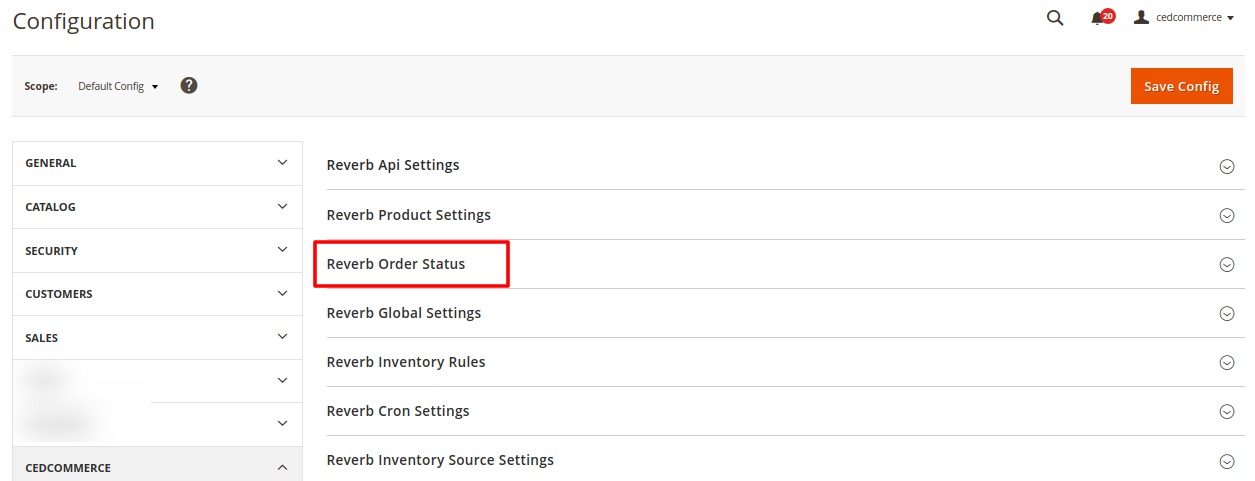
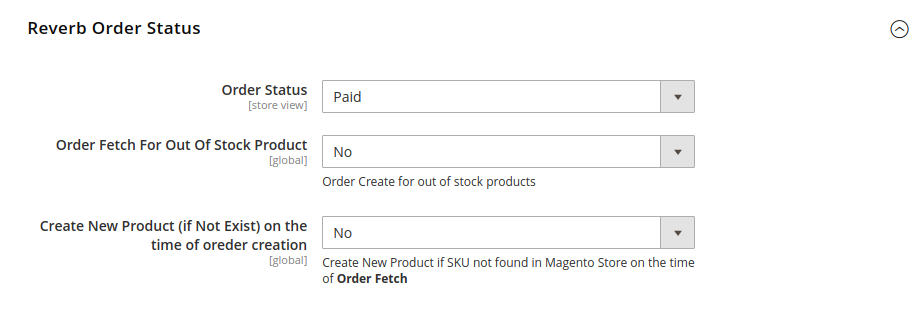
- On clicking, the section expands:
- In Order Status, as you have the following options to choose from, as shown in the image below:
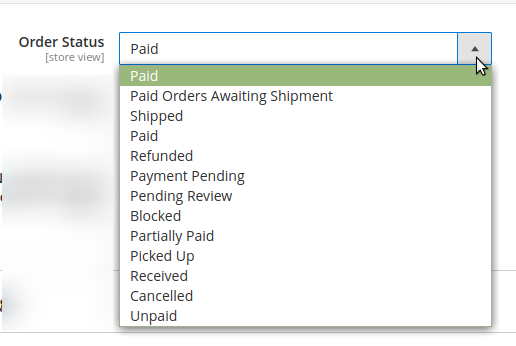
- If you select Paid, all orders(Paid as well as Unpaid) from Reverb will be fetched to your Magento 2 Admin Panel.
- If you select any of the orders from the list, those types of orders would be fetched to the Magento 2 Admin Panel.
- Now in Order Fetch for Out of Stock Product, you can select the option Yes if you want to fetch orders for out of stock products or else No.
- In Create New Product(if Not Exist) on the time of Order Creation, select Yes if you want to create a new order if it does not exist when the order is created.
Reverb Global Settings-
- Now move to the next section ie. Reverb Product Price

- Here you have options as shown in the image below, to send a price to Reverb in accordance with your business needs.
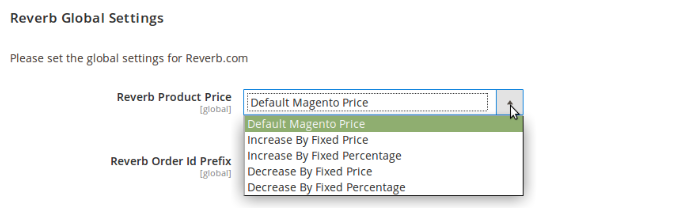
- Increase by Fixed Price- If you select this option, a new bar Modify by Fixed Price appears below this one as shown in the figure below:
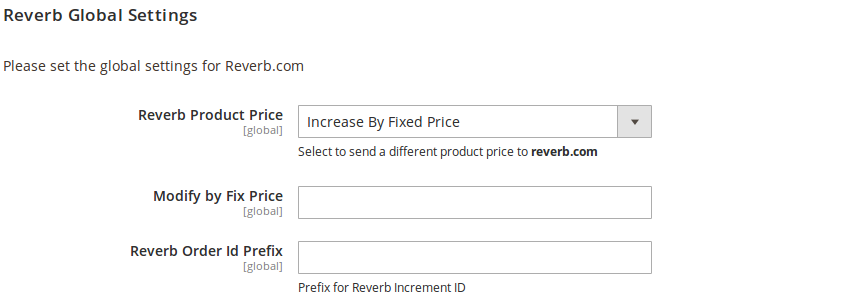
Now let’s see how it works. Suppose you enter 10 in the Modify by Fixed Price, then if your product is for US$100 on your Magento store, it will be available at the marketplace for US$110, increasing the price by US$10 on the Reverb marketplace, whereas the price at your Magento store remains the same.
- Increase by Fixed Percentage- If you select this option, a bar appears as shown in the image below:
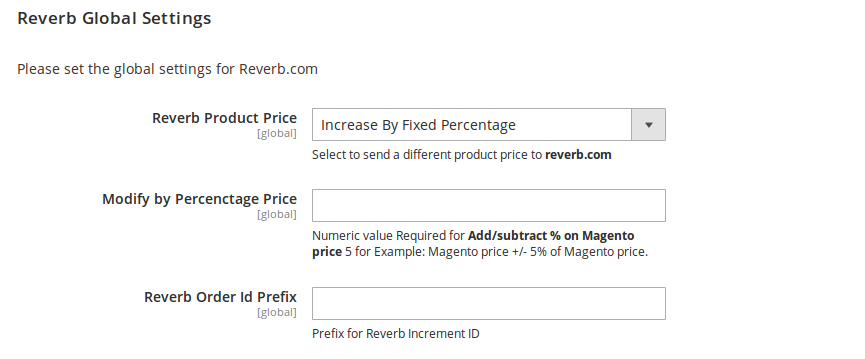
Now suppose your product on Reverb is available for US$100. If you enter 50 in the Modify by Percentage Price, then 50% of the price i.e. 50 will be added to the price and will be reflected on the Reverb Marketplace. So now the price that will be reflected on the Reverb marketplace will be US$150 for the product.
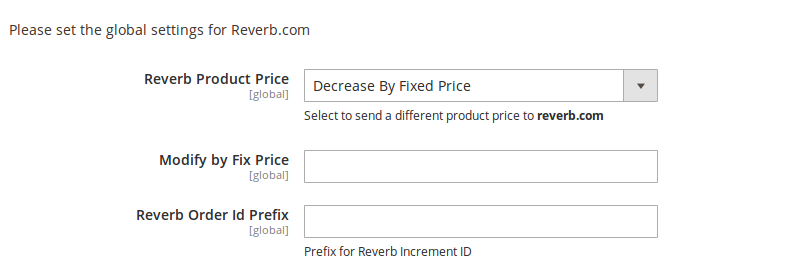
- Decrease by Fixed Price- When you select this option, you may see a bar and you may decrease the product price on Reverb the same way you can increase it. If your product is available for US$100 on Magento and you enter 50 in the bar that you see as shown in the image below, your product price will be decreased by US$50 on the Reverb marketplace. So if your product is for US$100 on Magento, it will be available for US$50 on the Reverb marketplace.
- Decrease by Fixed Percentage- If you select this option, you have the liberty to decrease the price of your product on Reverb by a particular percentage.
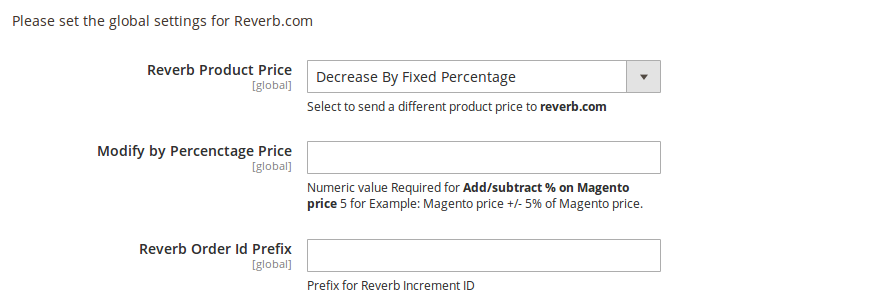
Suppose if your product is for US$100 on Magento and you enter 50 in the Modify by Percentage Price, your product price will be decreased by 50%, which means it will be available on Reverb for US$50 only.
In Reverb Order Id Prefix, you need to enter the Prefix which will be shown in the Order Id for the orders placed on Reverb for your products. It helps sellers in demarcating the orders of Reverb marketplace from the orders of any other marketplace where they sell their products if that is the case.

Reverb Inventory Rules-
- The Reverb Inventory Rules section appears as shown in the image below:
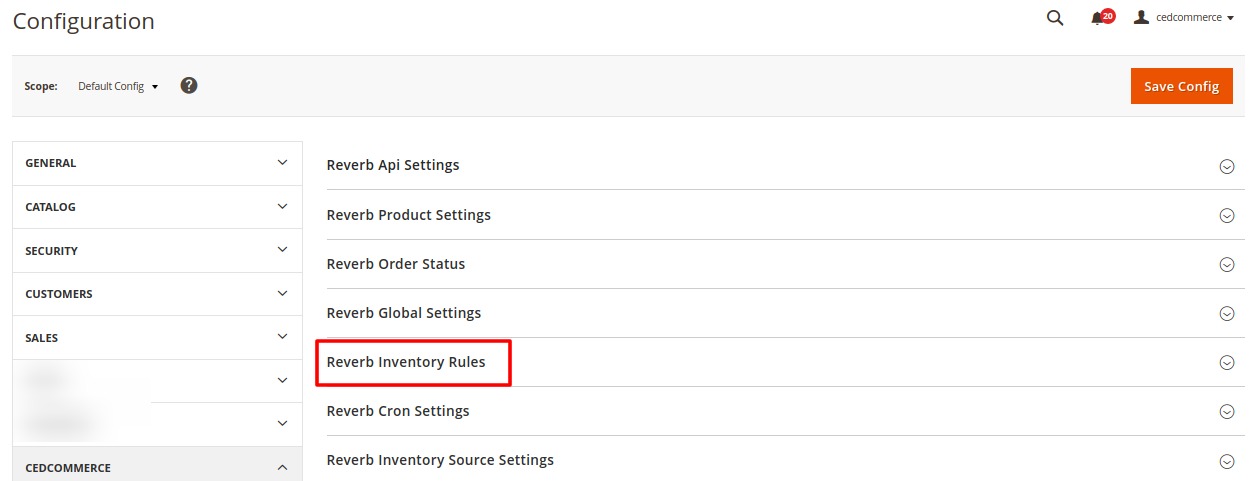
- Click and the section expands as:

If you wish to enable it, select Enable in the bar for Set Inventory on Basis of Threshold and the tab gets expanded as shown in the image below:
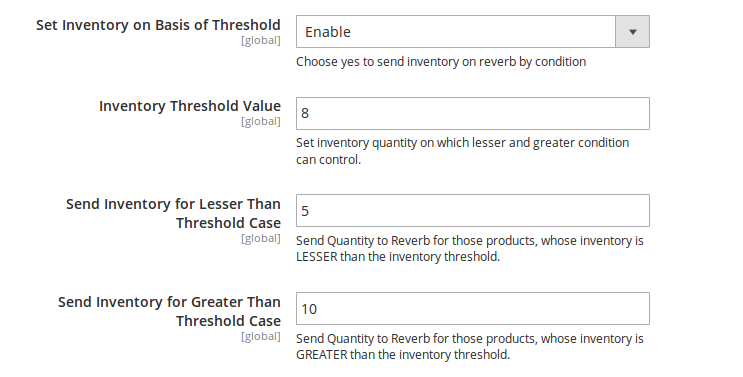
- In Inventory Threshold Value, set the inventory quantity on the basis of which the product stock can be controlled.
Let us see how it works.
- Suppose if in the Inventory Threshold Value we have entered 8.
- In Send Inventory for Lesser than Threshold Case, if we enter 5.
- In Send Inventory for Greater Than Threshold Case, if we enter 10.
Now, if the product inventory that we are sending to Reverb is lesser than the threshold case – let’s say 6 – then the inventory sent to Reverb would be 5 and not 6 as that is the inventory we’ve entered. Similarly, if we’re sending a product inventory of 9 to Reverb, the inventory that would be sent would be 10 because that’s what we’ve entered in the corresponding field.
Reverb Cron Settings-
- The Reverb Cron Settings tab appears as shown in the image below:
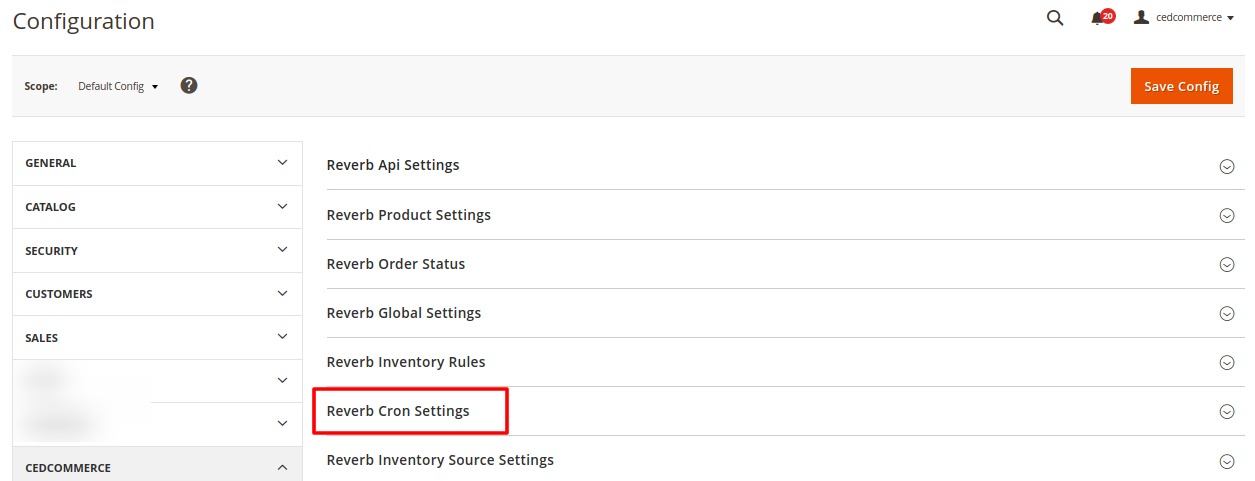
- Click on Reverb Cron Settings, it expands as:
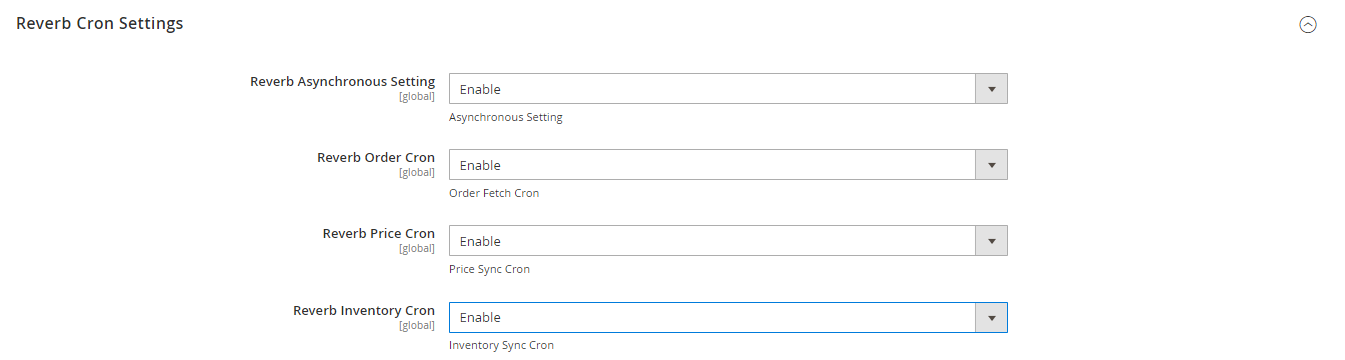
- In Reverb Asynchronous Setting, select Enable if you want this setting to run through cron automatically.
- In Reverb Order Cron, if you select Enable, then the Cron will start running and a specific interval of time, Reverb orders for your products will be fetched and get updated in your Magento 2 admin panel automatically.
- If you select Enable in the Reverb Price Cron, the product price will be synced and updated automatically between the Magento 2 store and Reverb marketplace after a specific interval of time.
- The Inventory can be synced and updated between Magento 2 store and the Reverb marketplace if you select Enable in the Reverb Inventory Cron.
Now, let’s move to the last settings of the configuration section.
Reverb Inventory Source Settings
- Click on the Reverb Inventory Source Settings
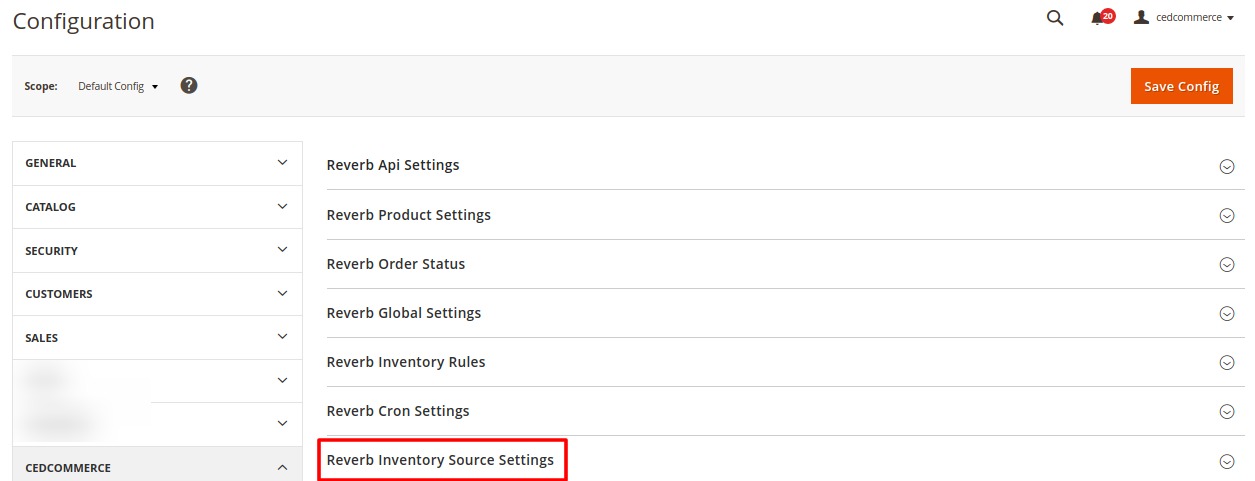
- The section expands as:

- Now select Enable under the Reverb Inventory Source Settings
- Additional options open up”
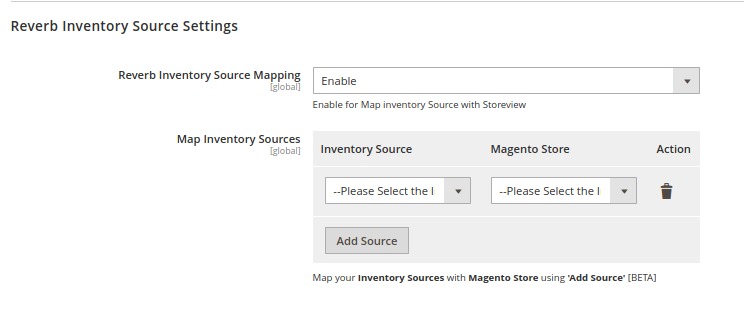
- Here you can Map Inventory Sources with Magento.
- Click on the Add Source button and you can add multiple sources.
Once all these actions have been taken on this Configuration page, the seller may save every action and complete the configuration process by clicking on the Save Config button on the top right part of the page, which has been shown in the image below:


