
General Configuration
To configure your Point of Sale Extension, login into the Magento Administrative panel, and select Stores > Configuration > POS, and then you will land to the General Information configuration and Receipt Information configuration page for POS setting.
The Detail General Information Section is as follow :
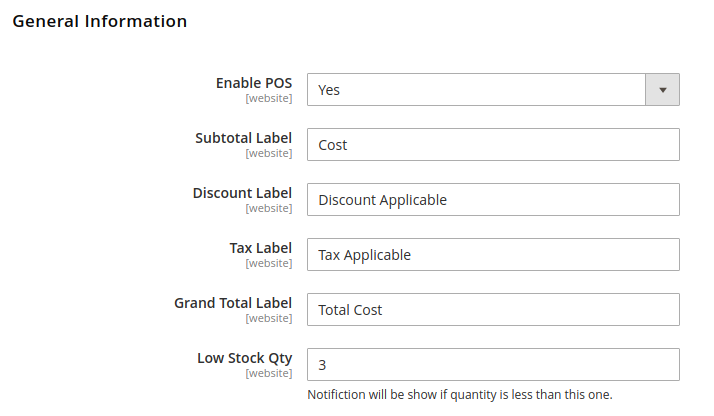
- Enable POS: Select Yes or No based on the requirement whether admin wants to use POS Solution or not.
- Sub Total Label This is the Text label that is used in the cart that will be listed in that POS cart layout as shown below:
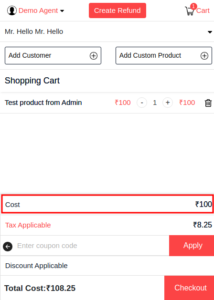
- Discount Lable: This is the Discount label that appears at the POS cart that will be listed in that POS cart layout as shown above
- Tax Lable: This is the Tax label that appears at the POS cart that will be listed in that POS cart layout as shown above
- Grand Total Label: This is the Grand Total label that appears at the POS cart that will be listed in that POS cart layout as shown above
- Low Stock Qty: This is the Stock Quantity that an admin enters as a Threshold value, after which the POS sales agent starts getting notified about the product running out of stock, as you can see in the below image.

The Detail Receipt Information Section is as follow :
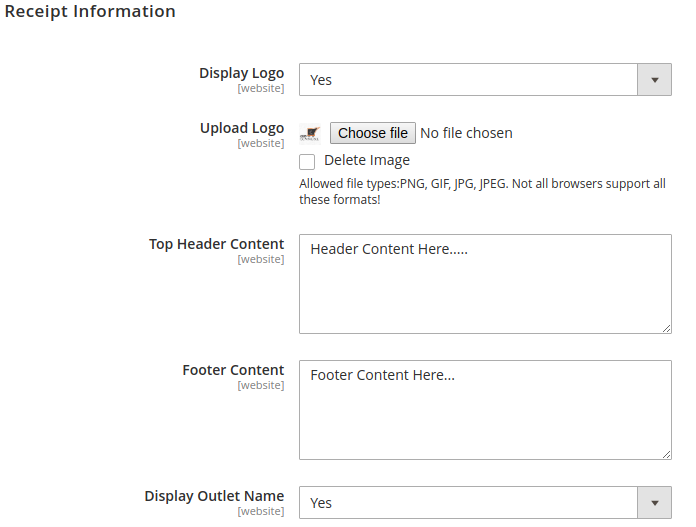
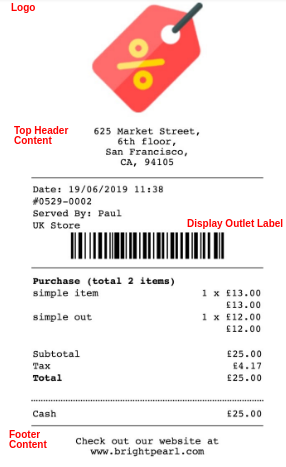
This is the invoice design that an admin does which is printed out from the POS order generation:
- Display Logo: Select Yes or No if the admin needs to get the logo displayed on the invoice printed from the POS order creation.
- Upload Logo: Here the admin can upload the logo file that is required by the admin to get printed on the invoice.
- Top Header Content: This is the Content added by admin that gets printed on the invoice, below Logo
- Footer Content: This is the Content added by admin that gets printed on the invoice, at the bottom-most of the receipt
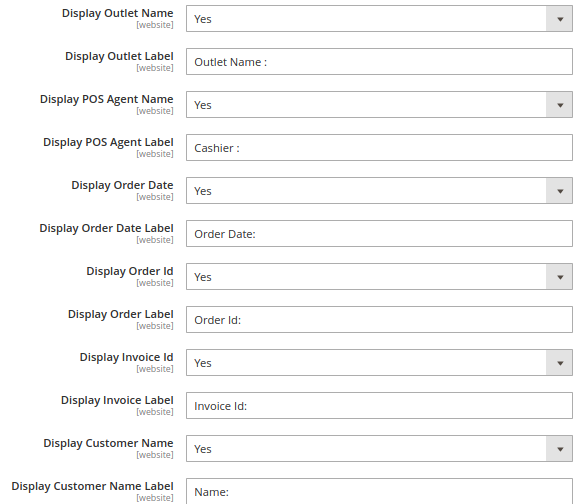
- Display Outlet Name: Here admin can decide Yes or No weather to add outlet name on the billing invoice or not.
- Display Outlet Label: This is a text field that stores the Store / Outlet name.
- Display POS Agent Name: Here admin can decide Yes or No weather to add outlet agent name on the billing invoice.
- Display POS Agent Label: This is the Agent Label heading to the Agent Name that gets displayed in Invoice.
- Display Order Date: Admin needs to select Yes or No if he needs to get the order generation date displayed on the invoice.
- Display Order Date Label: This is the Order Date Label heading on the invoice.
- Display Order Id: Admin needs to select Yes or No if he needs to get the order Id displayed on the invoice.
- Display Order Label: This is an Order Label text to the order id.
- Display Invoice Id: Admin needs to select Yes or No if he needs to get the order Id displayed on the invoice.
- Display Invoice Label: This is an Invoice Label text for the Invoice id.
- Display Customer Name: Admin needs to select Yes or No if the admin needs to get the customer name displayed on the invoice.
- Display Customer Name Label: This is the customer name label that is appeared on the Invoice before the customer name.
×


