
How To Perform Configuration Settings
Read along these steps to perform the configuration settings in the Magento 2 Admin panel
- Go to the Magento 2 Admin panel.
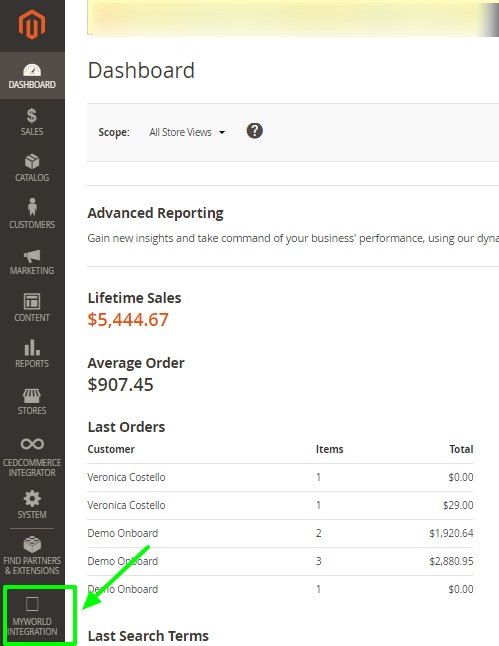
- On the left navigation bar, click the MYWORLD INTEGRATION menu.
The menu appears as shown in the following figure:
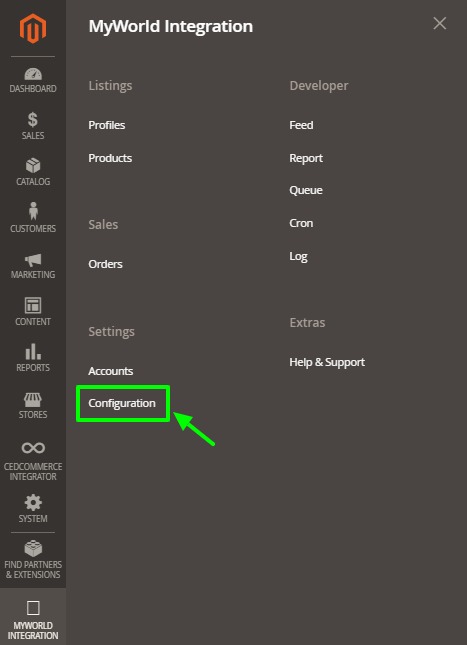
- Click Configuration.
The Configuration page appears as shown in the following figure:
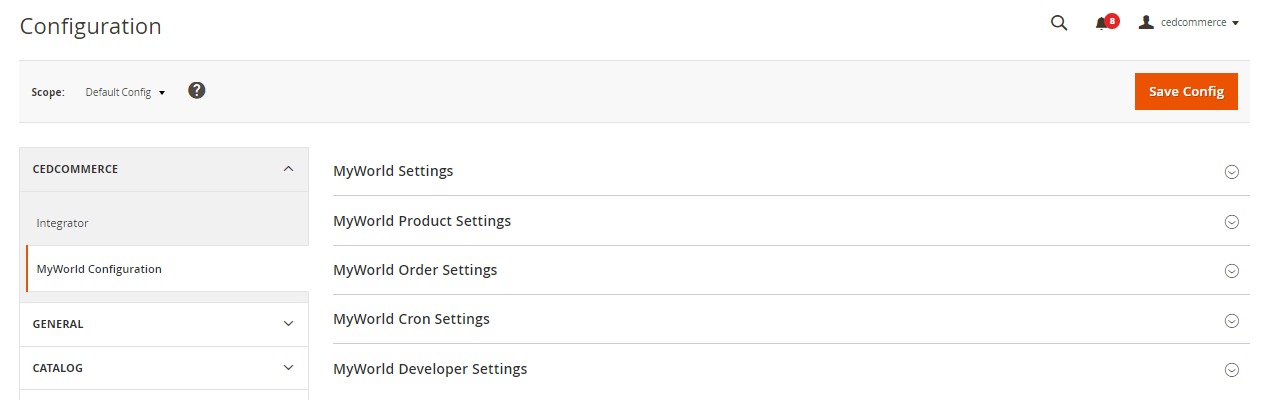
- In the right panel, click the MyWorld Settings tab.
The MyWorld Settings tab is expanded and the relevant fields appear as shown in the following figure:

- Under MyWorld Settings, do the following:
- In the Enabled list, select the Yes option.
- This will activate the extension and hence enable you to use its full features.Note: Make Sure to Clear the Flush every time you make any changes in the configuration settings section to ensure smooth flow of the integration.
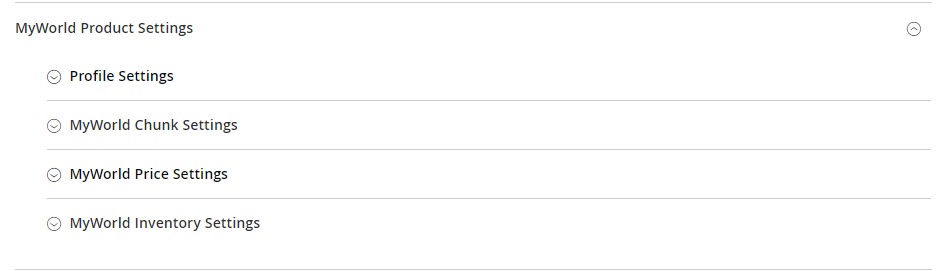
- Scroll down to the MyWorld Product Settings tab, and then click the tab.
The MyWorld Product Settings tab is expanded and the expanded section appears as shown in the following figure:
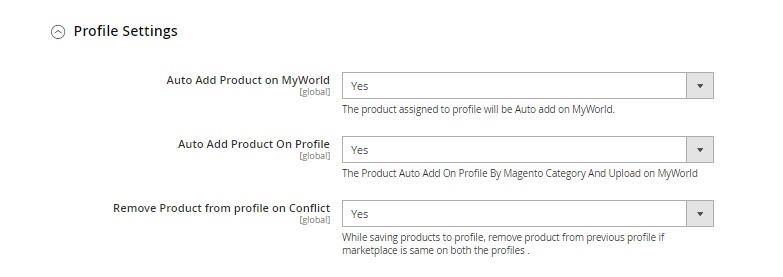
- Click on Profile Settings, the section will expand as:
 NOTE: A profile is a collection of similar type of products which allows you to perform actions in bulk, hence saving time and effort.
 - Under this Profile Settings, do the following steps:
- In Auto Upload Product on MyWorld, select Yes if you wish to automatically add the product on MyWorld, as soon as the product is added in the profile.
- In Auto Add Product On Profile, select Yes if you want to automatically add products to profile and then upload the same products on MyWorld.
- In Remove Product from Profile on Conflict, select Yes if you want to remove the products from the profile if the marketplace is the same on both the profile while saving the products.
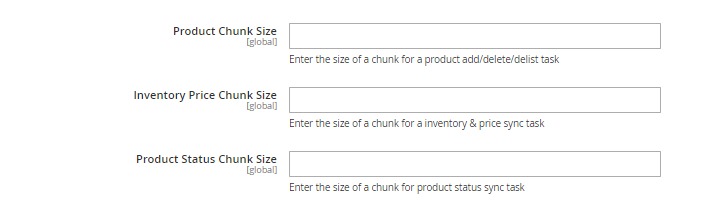
- Click MyWorld Chunk Settings, the section will expand as:
-
- In the Product Chunk Size box, enter the size number of a chunk for adding, deleting, or delisting products.
- In the Inventory Price Chunk Size box, enter the size number of a chunk for the synchronization of inventory and price.
- In the Product Status Chunk Size, enter the size of the chunk for the synchronization of product status.
-
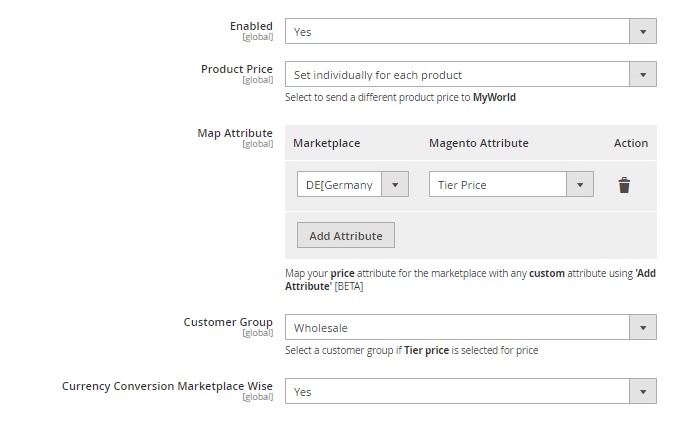
- Click MyWorld Price Settings, the tab gets expanded as:
-
- Choose YES in the Enable column to to enable the Price Sync from Magento 2 to MyWorld.
- In the Product Price list, select one of the following options:
- You can select the default Magento price by selecting Default Magento Price. This will make the product price on MyWorld the same as your Magento store panel.
- Increase by Fixed Price: If selected, then the Modify by Fix Price field appears.
- Increase by Fixed Percentage: If selected, then the Modify by Percentage Price field appears.
Enter the numeric value to increase the price of the MyWorld, product price by the entered value % of the Magento 2 store price.
For Example,
Magento 2 price + 5% of Magento 2 price.
Magento 2 Price = 100 - Select Increase By Fixed Percentage option
Modify by Percentage Price = 5
100 + 5% of 100 = 100 + 5 = 105
Thus, MyWorld Product Price = 105 - Decrease by Fixed Price: If selected, then the Modify by Fix Price field appears.
- Decrease by Fixed Percentage: If selected, then the Modify by Percentage Price field appears.
Enter the numeric value to decrease the price of the MyWorld product price by the entered value % of Magento 2 price
For Example,
Magento 2 price – 5% of Magento 2 price.
Magento 2 Price = 100 - Select Decrease By Fixed Percentage option
Modify by Fix Price = 5
100 – 5% of 100 = 100 – 5 = 95
Thus, MyWorld Product Price = 95
- In Map Attributes section, you can Map your price attribute for the marketplace with any custom attribute (such as barcode, sku, price, etc) of your Magento store. You can choose multiple attributes by clicking on Add attributes.
- In Customer Group, choose the targeted customer group if you have selected ‘Tier Price’ attribute or price syncing.
- In Currency Conversion Marketplace wise, select Yes if you want to send price after converting it to marketplace currency.
-
- Now click on MyWorld Inventory Settings, the section is expanded as:
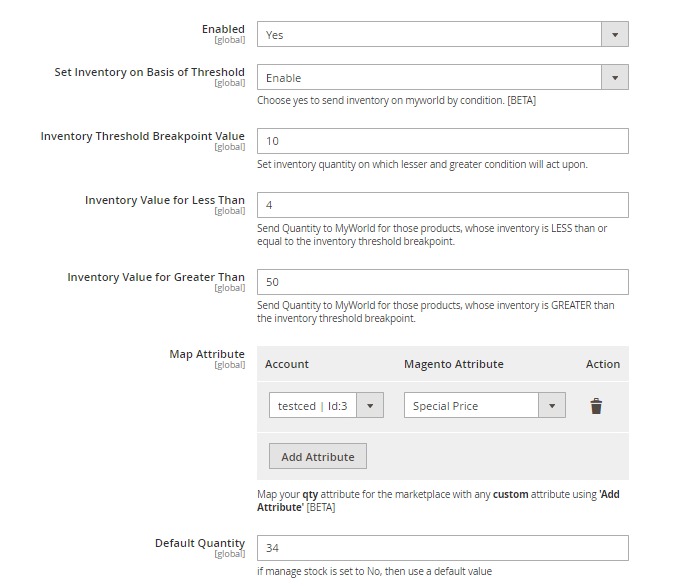 Under MyWorld Inventory Settings, do the following steps:
- Choose Yes in the Enable section to enable the inventory sync from Magento 2 to MyWorld.
- In Set Inventory on Basis of Threshold, select Enable it if you want to send inventory on MyWorld by condition of Threshold value for your inventory.
- In Inventory Threshold Breakpoint Value, enter the threshold quantity on which lesser and greater condition will act upon.
- In Inventory Value for Less Than, enter the value that will be sent to your MyWorld seller panel for those products, whose inventory is LESS than or equal to the inventory threshold breakpoint.
- In Inventory Value for Greater Than, enter the value that will be sent to your MyWorld seller panel for those products, whose inventory is MORE than the inventory threshold breakpoint.
- In Map Attribute, map MyWorld qty attribute with the Magento Attribute
- You can Map your more qty attribute for the marketplace with any custom attribute by Clicking on Add Attributes button.
- In Default Quantity, choose a default value of the stocks to be displayed on the MyWorld panel if manage stock is set to No.
- Scroll down to the MyWorld Order Settings tab, and then click the tab.
The tab is expanded and the section appears as shown in the following figure:
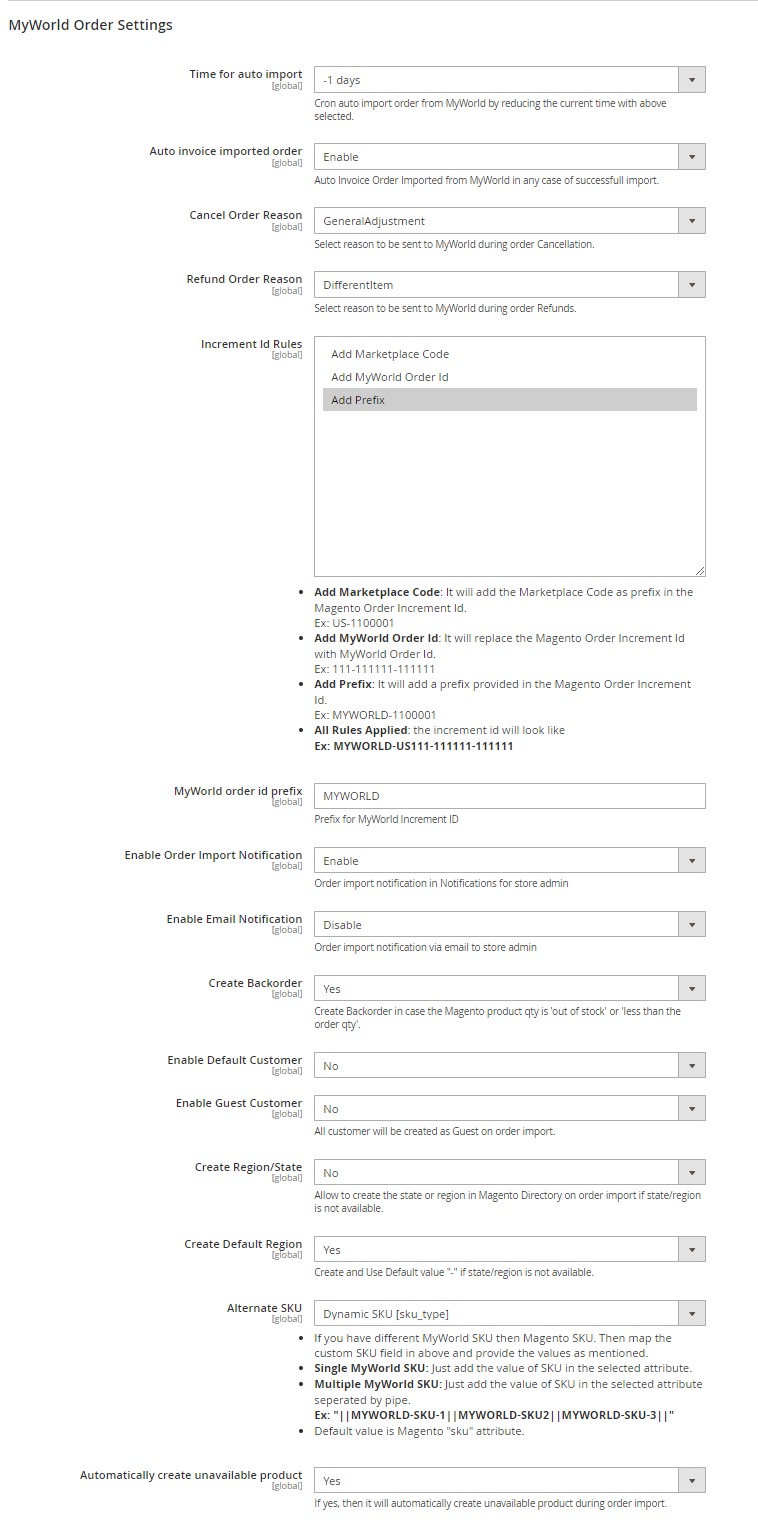
- In Time for Auto Import, select the time for which cron will automatically import the order.
- In Auto Invoice Imported Order, select Enable to create an invoice in Magento for imported order in any case of any successful import.
- In Cancel Orders Reason, select a reason to be sent to MyWorld in case of an order Cancellation.
- In Refund Orders Reason, select a reason to be sent to MyWorld in case of an order Refund.
- In Increment Id Rules, you have the rules to Add Marketplace Code, Add MyWorld Order Id, Add Prefix.
- In the MyWorld Order Id Prefix box, enter the required order Id prefix.
- In the Create Backorder, select Yes if you want to create an order if the product is out of stock.
- In Enable Default Customer, select Yes if you want to create an order with default customer, no new customer will be created during order import.

- Once you select Yes, a field appears of Default Customer, enter the email of the customer.
- In Use Default Customer’s Billing Address, select Yes if you want to use the billing address of the customer.
- In Enable Guest Customer, select Yes if you want to create guest customers on order import.
- In Create Region/State, select Yes if you want to create the region or state in the Magento directory if it is not present at the time of order import.
- In Create Default Region, select Yes if you want to create the region for the order by default.
- If Magento SKU does not match with MyWorld SKU, then select alternate Magento attribute which consist of MyWorld SKU.
- In Automatically create unavailable product, select Yes to create the product automatically if it is not available.
- Click MyWorld Cron Settings and the section will expand as:
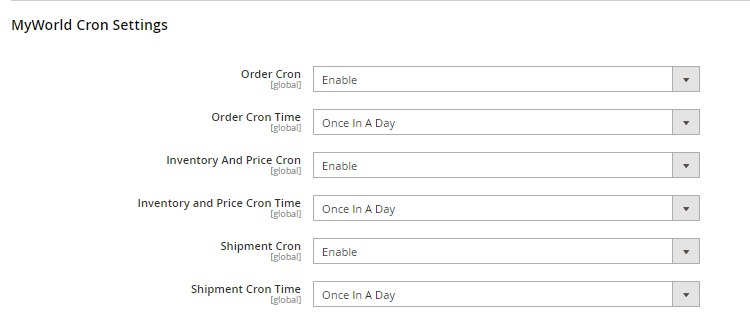
- In the Order Cron list, select the Enable option to enable the fetch order cron.
- Once you Enable this, you need to set the time frame for the order cron to run. In the Order Cron Time, set the time frame for which you wish to automatically set the cron.
- In the Inventory And Price Cron list, select the Enable option to enable the inventory and price sync cron.
- Similarly select the time frame by clicking on Inventory And Price Cron Time.
- In the Shipment Cron list, select the Enable option to enable the shipment cron and to generate shipments automatically.
- Similarly select the time frame by clicking on Shipment Cron Time.
- Scroll down to the MyWorld Developer Settings tab, and then click the tab.
The tab is expanded and the section appears as shown in the following figure:
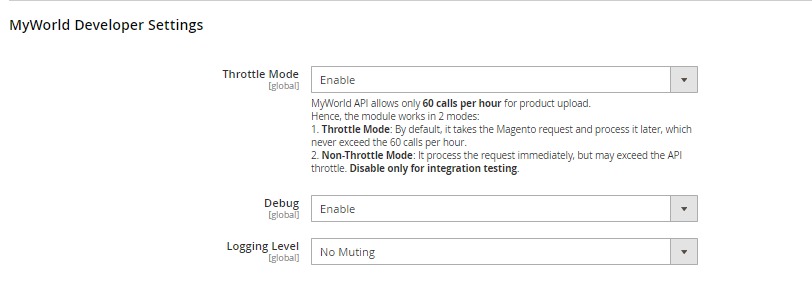
- In the Throttle Mode list, select the Enable option to process the upload and sync task through the queue. Disable only for integration testing.
- In Debug, select Enable for the logs to be created.
- In Logging Level, select the level of the logs created, select No Muting for all the levels.
- Click the Save Config button to save the entered values and information. The configuration will be saved.
Note: Make Sure to Clear the Cache every time you make any changes in the configuration settings section to ensure smooth flow of the integration
×


