
MercadoLibre Integration Configuration Settings
Once the extension is successfully installed in the Magento 2 store, the MLIBRE INTEGRATION menu appears on the left navigation bar of the Magento 2 store Admin panel. The merchant has to first create a seller account in the Mlibre seller panel. Once the seller account is created and is approved by Mercado Libre, the Magento 2 store owners have to obtain the AWS API Key values from the Mercado Libre Seller account, and then the Magento® 2 store owners have to paste it in the respective fields displayed on the Mlibre Configuration page of the admin panel.
To set up the configuration settings in the Magento 2 Admin panel
- Go to the Magento 2 Admin panel.
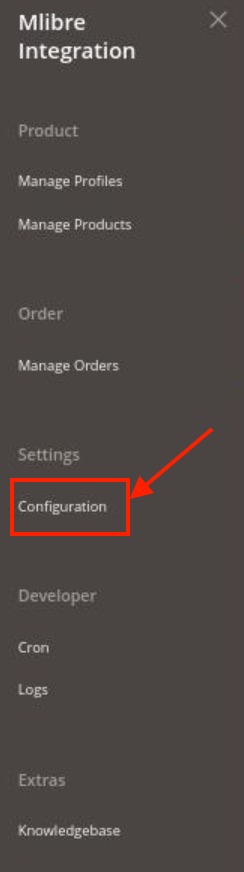
- On the left navigation bar, click the MLIBRE INTEGRATION menu.
The menu appears as shown in the following figure:
- Click Configuration.
The Configuration page appears as shown in the following figure: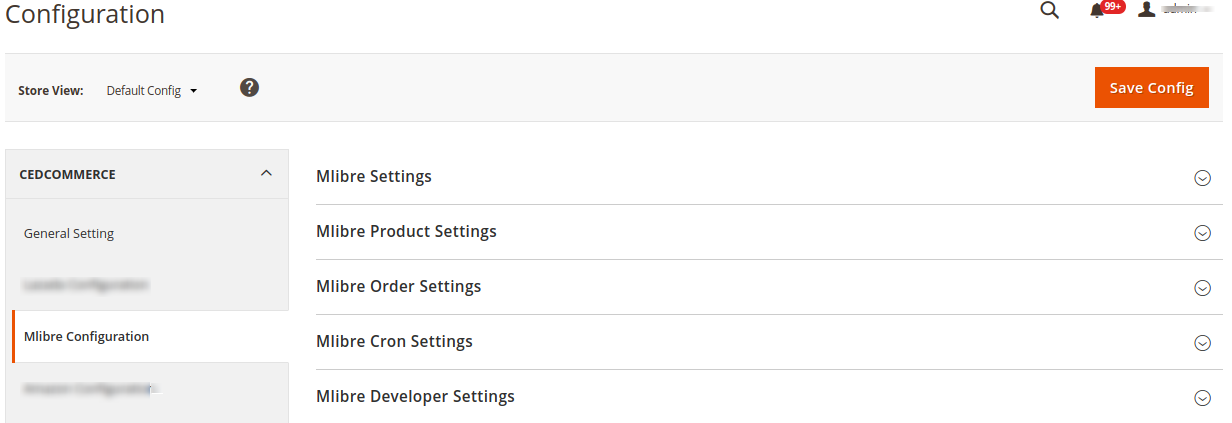
- In the right panel, click the Mlibre Settings tab.
The Mlibre Settings tab is expanded and the relevant fields appear as shown in the following figure: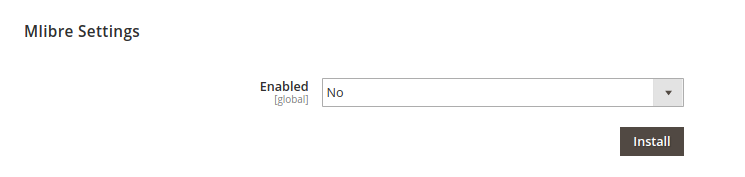
- Under Mlibre Settings, do the following:
- In the Enabled list, select the Yes option.
- Additional options opens up:

- In the side, column choose your desired country.
- Choose the default currency of your store.
- Copy the redirect Uri and paste it into your MercaroLibre Seller Panel.
- Now choose the country from the Mlibre Seller Panel.
- Login to your account.

- Goto Test and click on Create New Application.


- Paste the Uri generated above in the respective fields as shown in the image below.
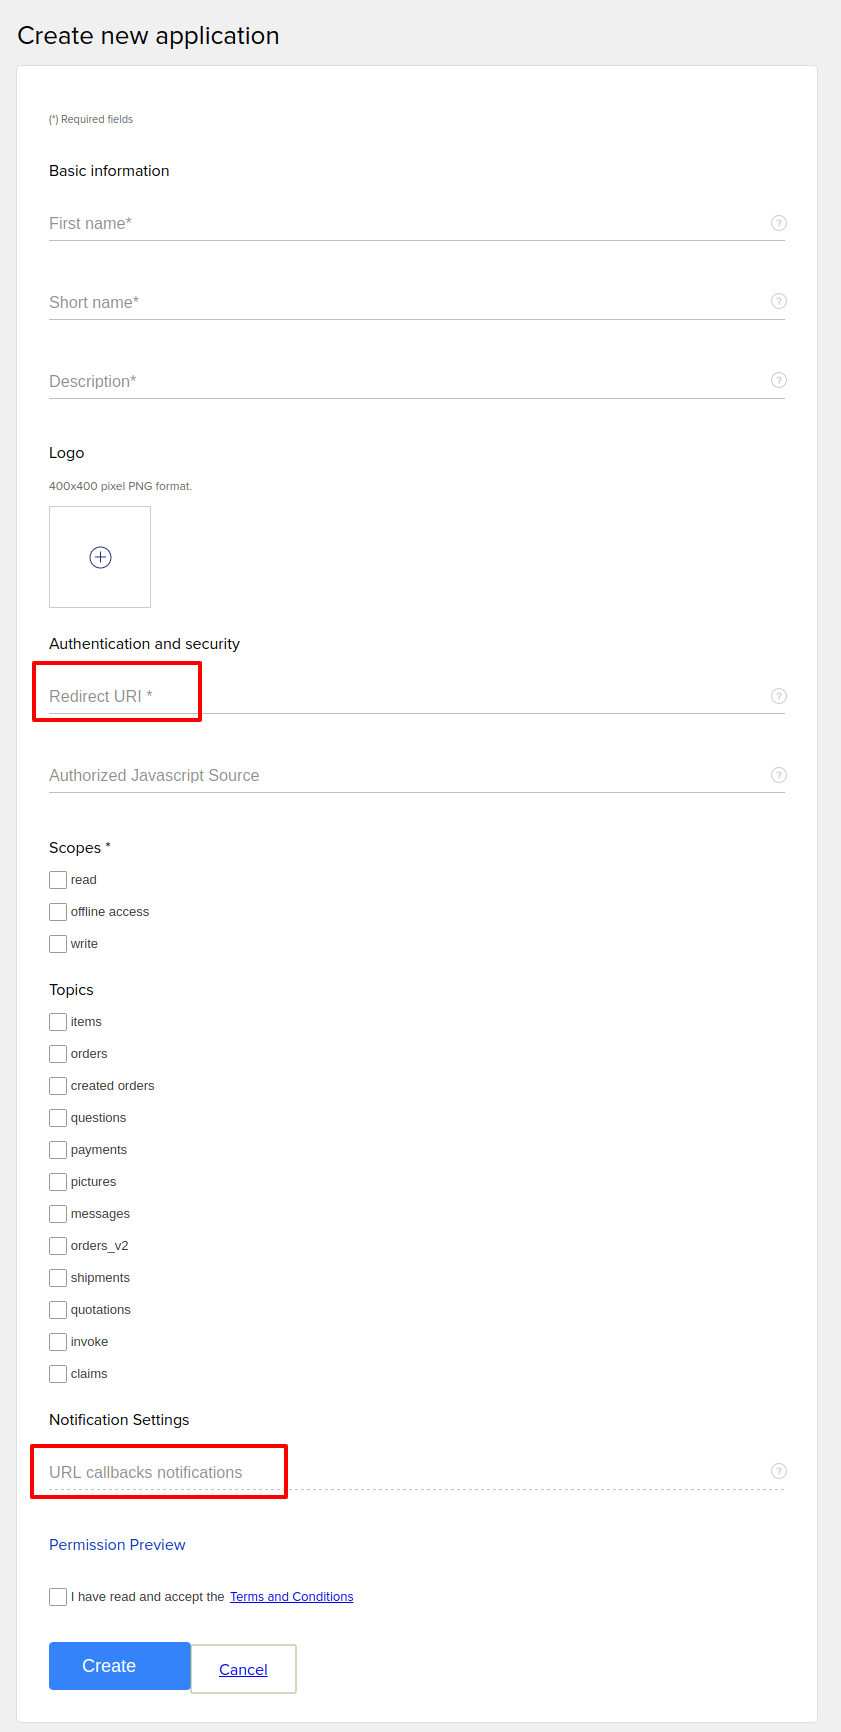
- After clicking on Create App ID and Secret Key will be generated. Copy them and paste them into the Magento Panel.
- Scroll down to the Mlibre Product Settings tab, and then click the tab.
The Mlibre Product Settings tab is expanded and the expanded section appears as shown in the following figure: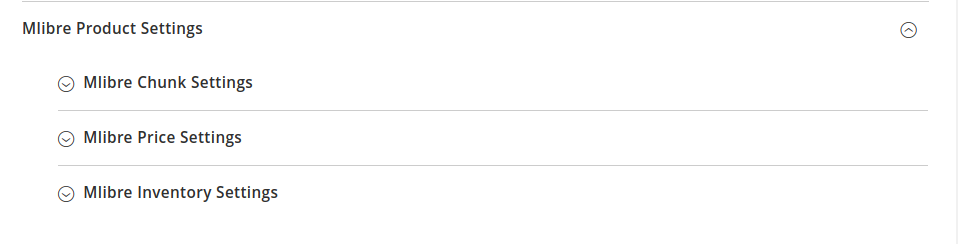
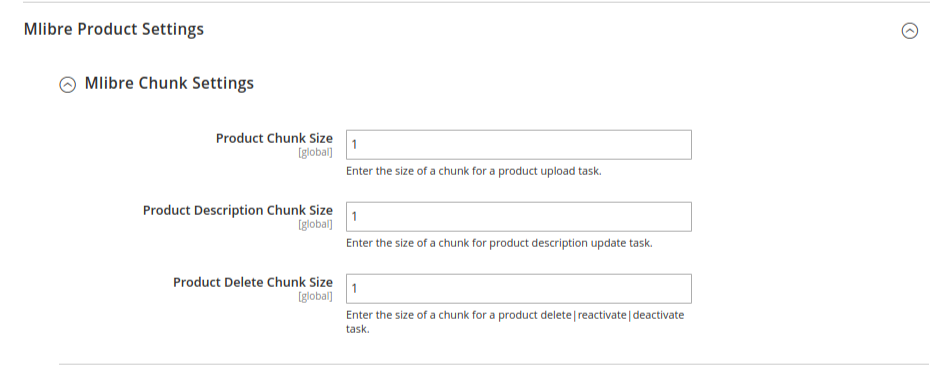
- Click Mlibre Chunk Settings, the section will expand as
-
- In the Product Chunk Size box, enter the size number of a chunk for a product upload queued task.
- In the Product Description Chunk Size box, enter the size number of a chunk for a product upload feed.
- In the Price Delete Chunk Size box, enter the size number of a chunk for a price to be deleted.
-
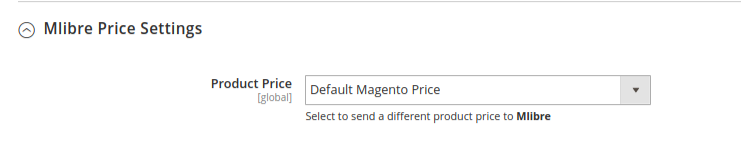
- Click Mlibre Price Settings, the tab gets expanded as
-
- In the Product Price list, select one of the following options:
- Increase by Fixed Price: If selected, then the Modify by Fix Price field appears.
- Increase by Fixed Percentage: If selected, then the Modify by Percentage Price field appears.
Enter the numeric value to increase the price of the Mlibre, product price by the entered value % of the Magento 2 store price.
For Example,
Magento 2 price + 5% of Magento 2 price.
Magento 2 Price = 100
Select Increase By Fixed Percentage option
Modify by Percentage Price = 5
100 + 5% of 100 = 100 + 5 = 105
Thus, Mlibre Product Price = 105 - Decrease by Fixed Price: If selected, then the Modify by Fix Price field appears.
- Decrease by Fixed Percentage: If selected, then the Modify by Percentage Price field appears.
Enter the numeric value to decrease the price of the Mlibre product price by the entered value % of Magento 2 price
For Example,
Magento 2 price – 5% of Magento 2 price.
Magento 2 Price = 100
Select Decrease By Fixed Percentage option
Modify by Fix Price = 5
100 – 5% of 100 = 100 – 5 = 95
Thus, Mlibre Product Price = 95
- In the Product Price list, select one of the following options:
-
- Click on Mlibre Inventory Settings, the tab gets expanded as:
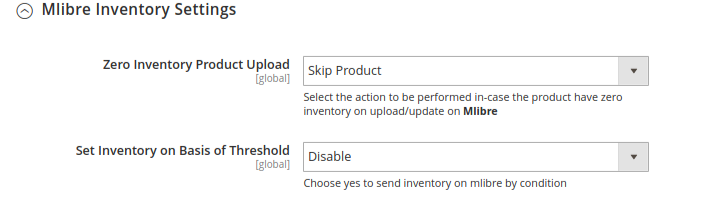
- In the Zero Inventory Product Upload box, enter the action to be performed in case the product count in inventory on Mlibre drops down to zero.
- In the Set Inventory on Basis of Threshold list, select the Enable option if required to set the inventory based on the threshold.
-
- Note: Only when the admin selects Enable, the other fields appear. Threshold Inventory is the minimum count of an item that the store owner wants to keep in stock.
-
- The section will expand as:
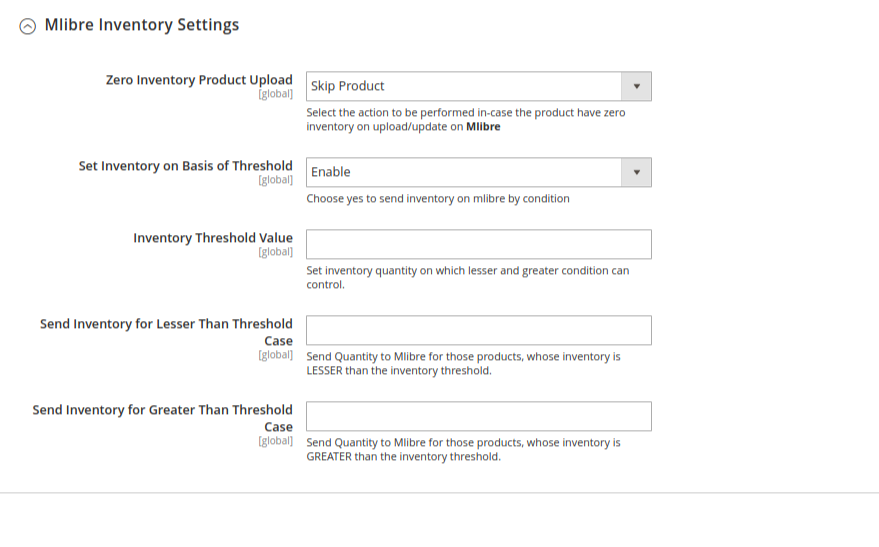
- In the Inventory Threshold Value box, enter the required value.
- In the Send Inventory for Lesser Than Threshold Case box, enter the required value.
- In the Send Inventory for Greater Than Threshold Case box, enter the required value.
- Scroll down to the Mlibre Order Settings tab, and then click the tab.
The tab is expanded and the section appears as shown in the following figure:
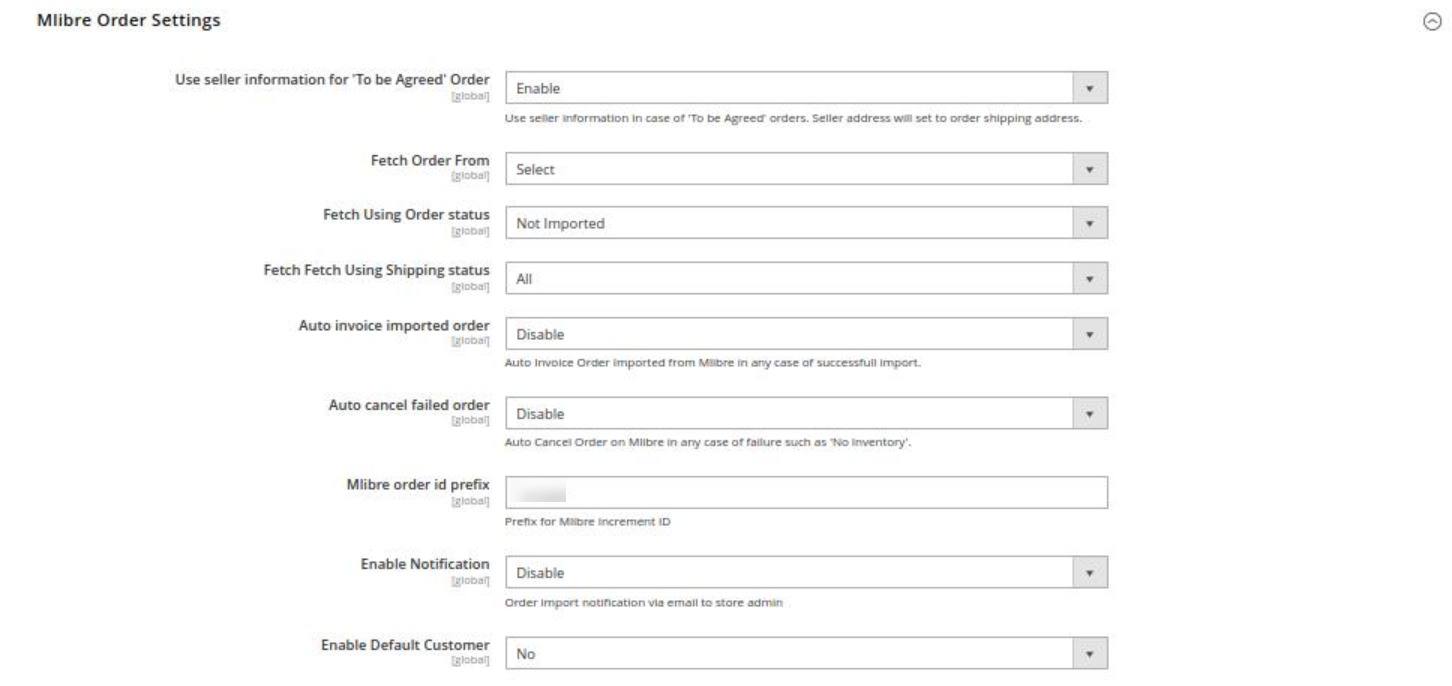
- Under Mlibre Order Settings, do the following steps:
- In Use Seller information “To Be Agreed” orders, select Enable if you want the orders to be acknowledged automatically in case of successful import.
- In Fetch Order From, select the duration from which you want to fetch the created orders.
- In Fetch Using Order Status, select the status from the drop-down menu according to which you want to fetch the created orders.
- In Fetch Using Shipping Status, select the shipping status from the drop-down list according to which you want to fetch the order.
- In Auto Invoice Imported Order, select Enable if you want to use seller information & seller address will set to order shipping address.
- In the Auto Cancel Failed Order box, select the Enable option to auto cancel the orders on Mlibre in any case of failure such as No Inventory.
- In the Mlibre Order Id Prefix box, enter the required order Id prefix.
- In the Enable Notification list, select the Enable option to get order import notification via email.
The field appears as shown in the following figure:
- In the Notification Email field, enter the email id on which you may get the notifications.
- In the Enable Default Customer field, select the Yes option to enable the default customer.
- The field appears as shown in the following figure:

- The field appears as shown in the following figure:
- In the Default Customer list, select the required customer name.
- Click Mlibre Cron Settings and the section will expand as:
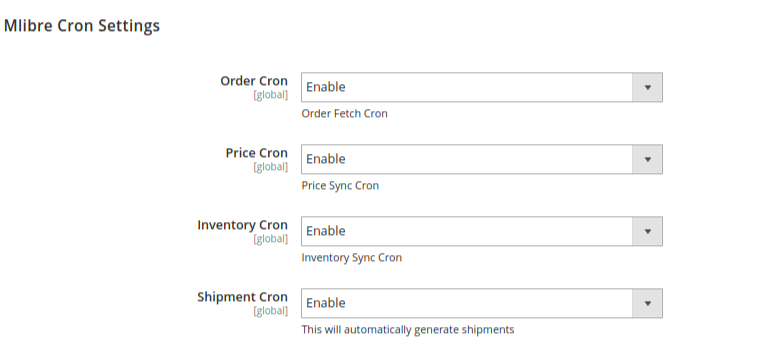
- In the Order Cron list, select the Enable option to enable the fetch order cron.
- In the Price Cron list, select the Enable option to enable the price sync cron.
- In the Inventory Cron list, select the Enable option to enable the inventory sync cron.
- In the Shipment Cron list, select the Enable option to enable the shipment cron and to generate shipments automatically.
- Scroll down to the Mlibre Developer Settings tab, and then click the tab.
The tab is expanded and the section appears as shown in the following figure: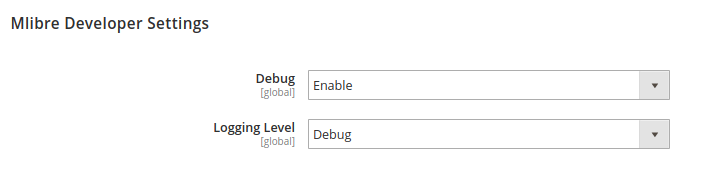
- In Debug, select Enable for the logs to be created.
- In case you want the errors to get Logged Choose the desired option from the Logging Level.
- Click the Save Config button to save the entered values and information. The configuration will be saved.
×


