
Vendor Configuration Settings
After installing the Vendor Order add-on, the admin has to set the vendor configuration settings to enable the features of the add-on. Also, the admin needs to install Vendor Multishipping extension and enable the features of the extension to use the Shipping features of the add-on.
To set up the required vendor configuration settings
- Go to Admin panel.
- On the left navigation bar, click the MARKETPLACE menu.
The menu appears as shown in the following figure:
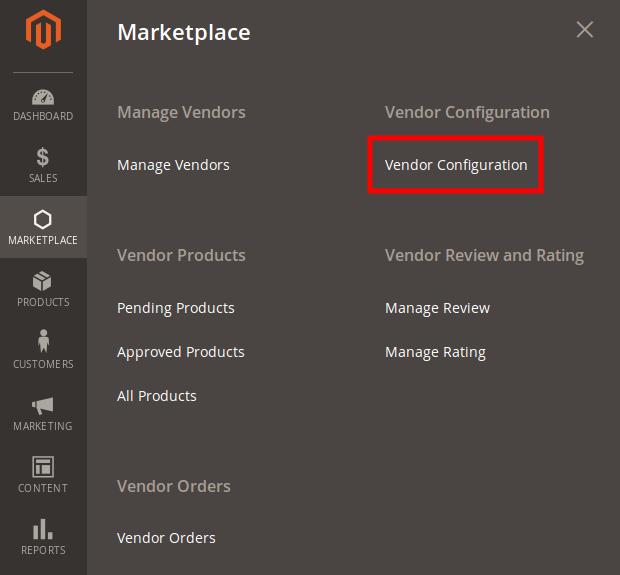
- Click Vendor Configuration.
The Configuration page appears. - In the right panel, move to the General section.
The section appears as shown in the following figure:
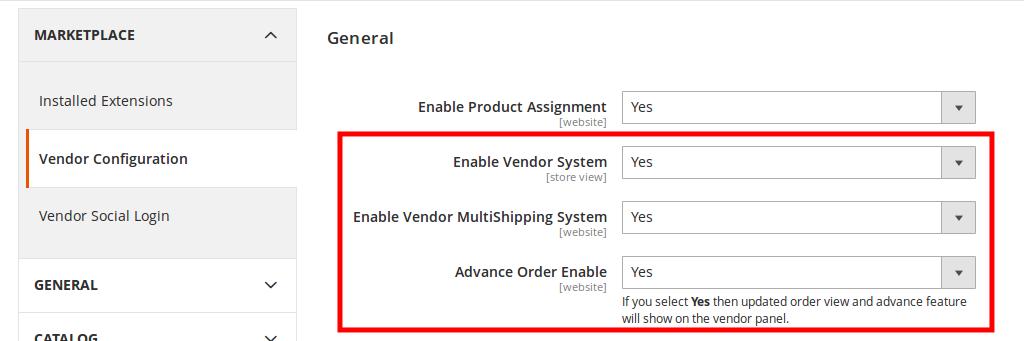
- To enable the Vendor Multishipping system and Advance Order, do the following steps:
- In the Enable Vendor System list, select Yes.
- In the Enable Vendor MultiShipping System list, select Yes.
- In the Advance Order Enable list, select Yes.
- Scroll down to the Vendor Orders section.
The section appears as shown in the following figure:
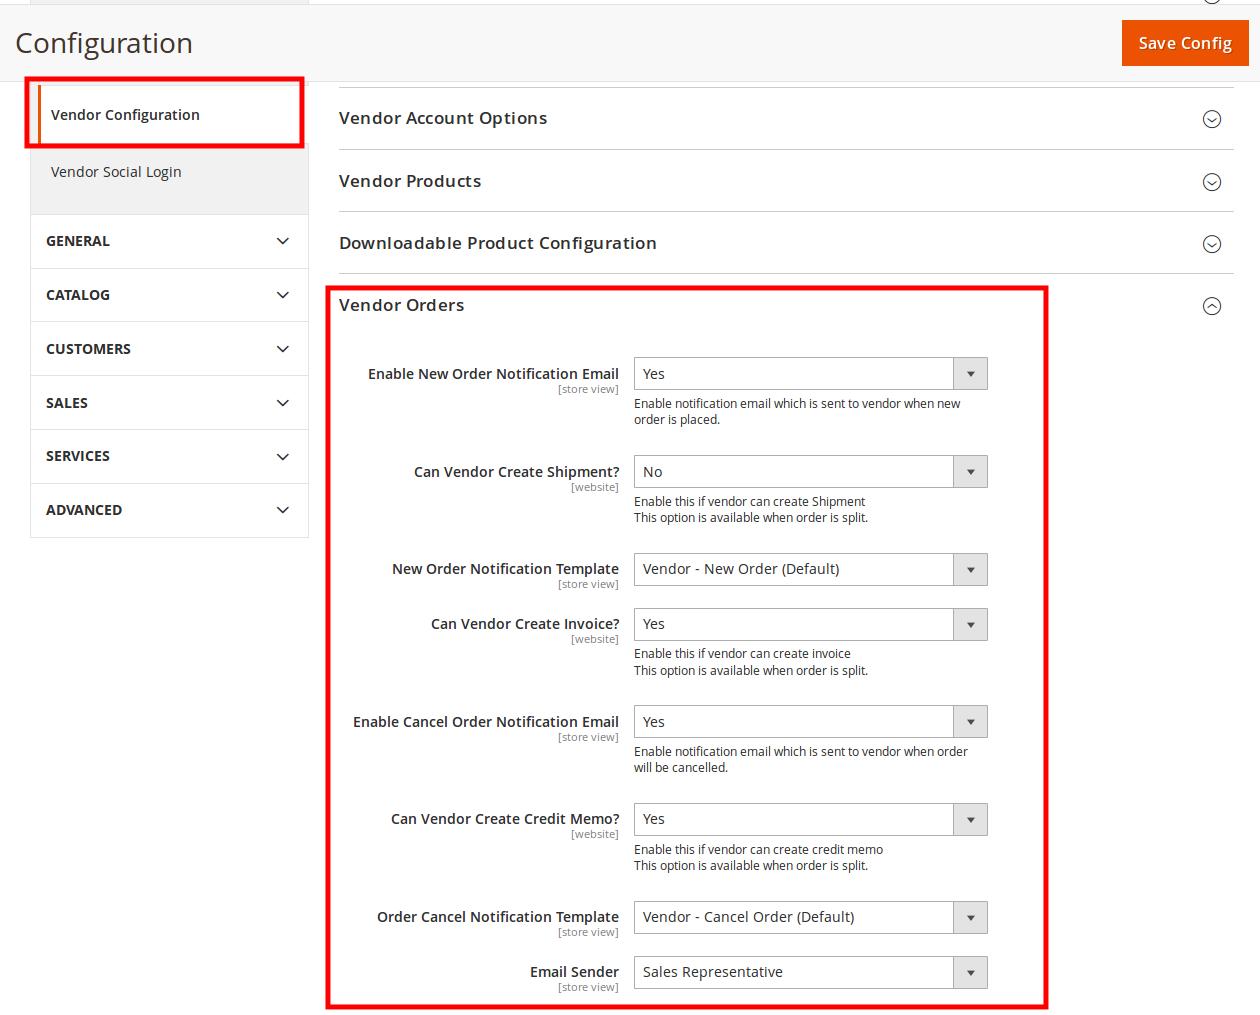
- To enable the Vendor Orders add-on features, move to the Vendor Orders section, and then do the following steps:
- In the Enable New Order Notification Email list, select Yes.
This enables the notification email, which is sent to the vendor when a new order is placed. - In the Can Vendor Create Shipment list, select Yes.
This enables the vendors to create a shipment. - In the New Order Notification Template list, select the required template.
- In the Can Vendor Create Invoice list, select Yes.
This enables the vendors to create an invoice.
- In the Enable Cancel Order Notification Email list, select Yes.
This enables the notification email, which is sent to the vendor when an order is canceled.
- In the Can Vendor Create Credit Memo list, select Yes.
This enables the vendors to create a credit memo.
- In the Order Cancel Notification Template list, select the required template.
- In the Email Sender list, select the required sender of the email.
- In the Enable New Order Notification Email list, select Yes.
- Scroll down to the Vendor Multi Shipping section.
The section appears as shown in the following figure:
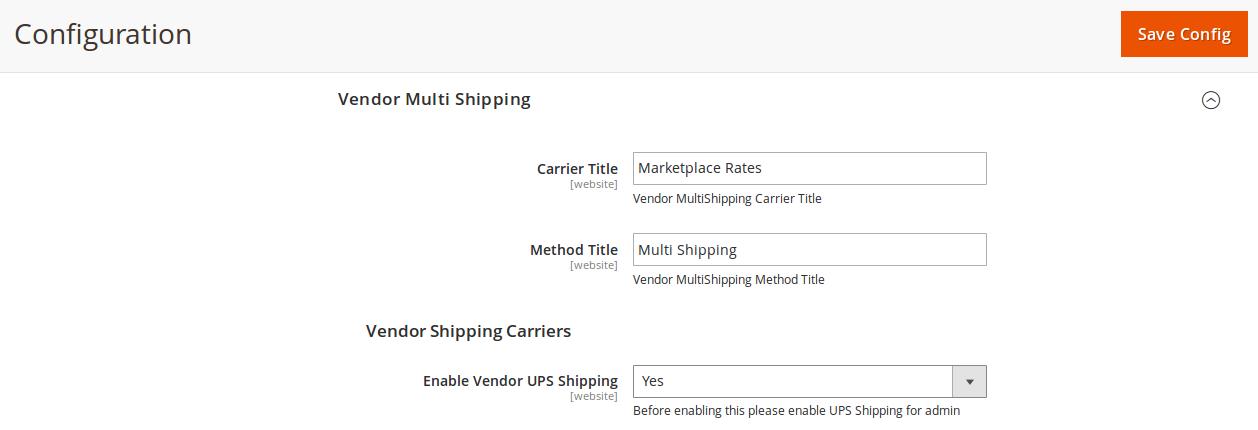
- Under Vendor Multi Shipping, do the following steps:
- In the Carrier Title box, enter the title for the vendor multi-shipping carrier.
- In the Method Title box, enter the title for the vendor multi-shipping method.
- Under Vendor Shipping Carriers, in the Enable Vendor UPS Shipping list, select Yes.
- Click the Save Config button.
The Configuration settings are saved and a success message appears on the page.
×


