
Manage Products
To manage products,
- Go to the Magento 2 Admin panel.
- On the left navigation bar, click on JD Integration.
A menu appears as shown below:
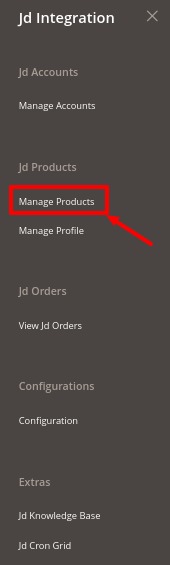
- Click on Manage Products.
The Product Management page appears as shown below:
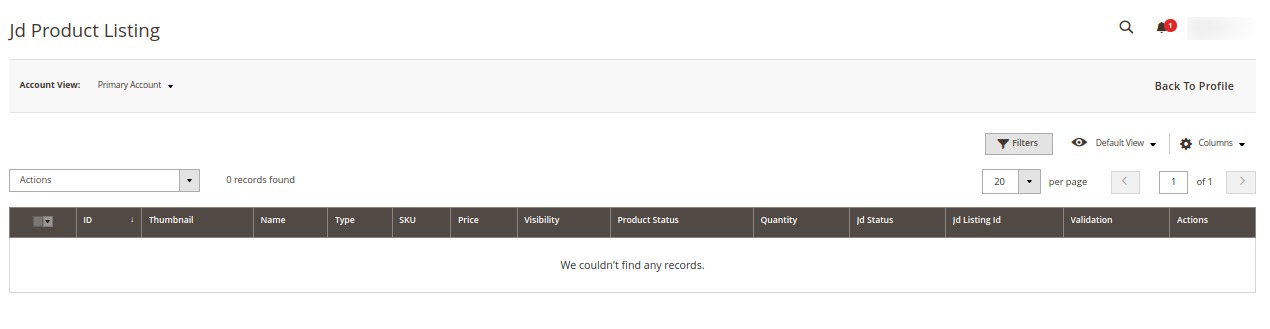
- All the products will be displayed here in the grid.
To perform bulk actions,
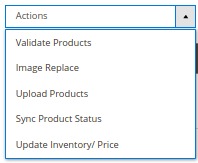
- On the Product Listing page, In the Actions list, click the Arrow button.
A list appears as shown in the figure:
- Select the checkboxes associated with the required products.
- To validate products, click on the Validate Products. Selected Products will be validated.
- To replace the product images, click on Image Replace. The image will be replaced for the selected products.
- To upload the products in bulk, click on Upload Products. The selected products will be uploaded.
- To synchronise products status, click on Sync Product Status. The selected products status will be synced.
- To update inventory and price, click on Update Inventory/Price. The inventory and price will be updated on the selected products.
×


