4.Configuration Settings ↑ Back to Top
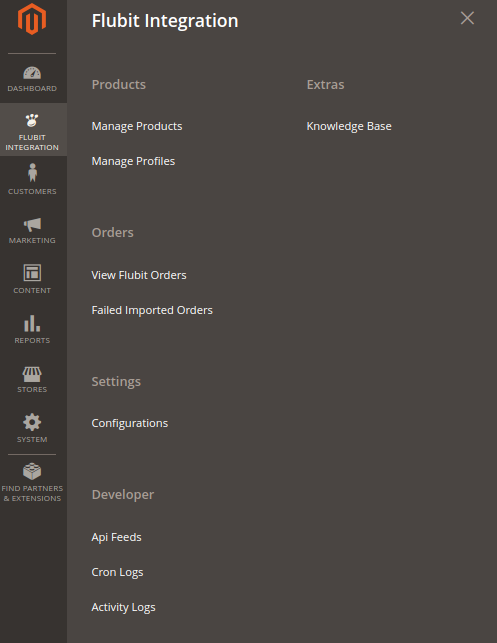
Once the extension is successfully installed on the Merchant’s store, the Flubit tab appears in the Magento Admin Panel.
The admin has to set up the configuration settings for establishing the connection between the Magento store and the Flubit marketplace.
To set up the configuration settings in the Magento Admin panel:
- Go to the Admin panel.
- On the left navigation bar, you will find the Flubit Integration option.

- Click Configuration.
The Flubit Configuration page appears as shown in the following figure:
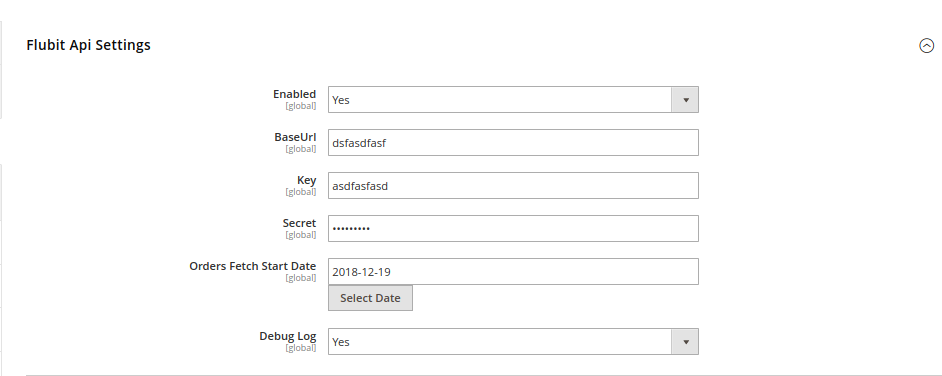
2. Click on Flubit API settings, you will find the following window:
- In the Enabled list, select Yes.
Note: The No option disables the Flubit Integration extension. - Enter the API of your seller panel in the Base URL section.
- Enter the Key provided by Flubit in this section.
- In the Secret Section, enter Your secret key.
- In the Orders Fetch Start Date box, click the Calendar icon to select the required date.
- In the Flubit Debug Log list, select Yes to enable Flubit Debug Mode for logging.
3. Click on Flubit Order settings, you will find the following window:
- In the Increment Id Prefix enter the Flubit Increment ID.
- In the Order Email box, enter the email id associated with your Flubit account.
- In the Force Product Create on Order section, you can enable/disable with the drop-down menu. In case any product profile is not created in Flubit and you are selling so, it by default creates it.
- In the Mock Order box also you can enable/disable the option. This is for you to ensure the working as it creates dummy orders.
5. Click on Flubit Cron Settings. You will find the window as shown below.
1. Flubit Order Cron: Enable/Disable the Order Fetch Cron.
2. Flubit Price/Full Item Cron: Enable/Disable the Price Sync Cron.
3. Flubit Inventory Cron: Enable/Disable the Inventory Sync Cron.
In these three you can control the working of the Crons that automatically fetches the data in a specified period of time.


