
Submit Bulk Action on the Selected Products
Admin can perform the following tasks through the Bulk Action feature:
- Validate Product: To validate the selected products before uploading to the Catch website. It displays the corresponding validation error if any. If there is no error, it confirms that the product is ready to upload.
- Upload Products: To validate and upload the selected products to the Catch website. It displays the corresponding validation error if any. If there is no error, then the selected products are validated and uploaded, and a success message appears.
- Update Inventory & Price: To update the inventory and price of the selected products on Catch. This action completes the entire job related to the product inventory and also it manages the quantity related issues. For example, if the user has changed the product price on the Magento 2 store and also wants to change the price on Catch then this action is applicable. The price is updated when the user submits this action for the selected product.
To submit the selected bulk action on the selected products
- Go to the Magento 2 Admin panel.
- On the left navigation bar, click the CATCH INTEGRATION menu.
The menu appears as shown in the following figure:
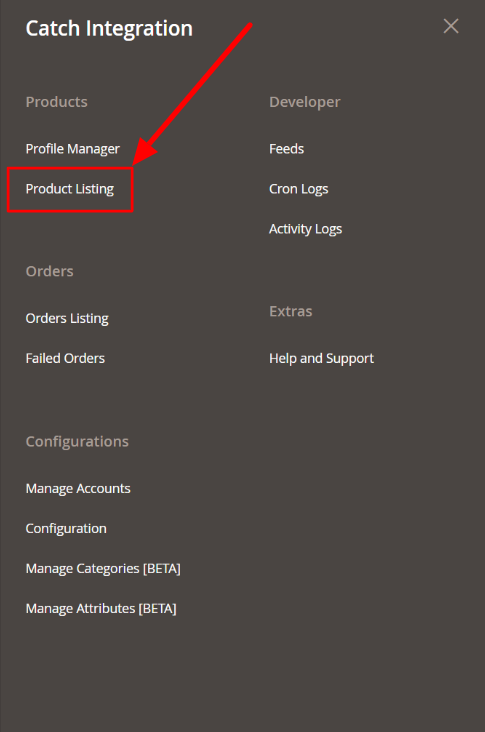
- Click Product Listing.
The Catch Product Listing page appears as shown in the following figure: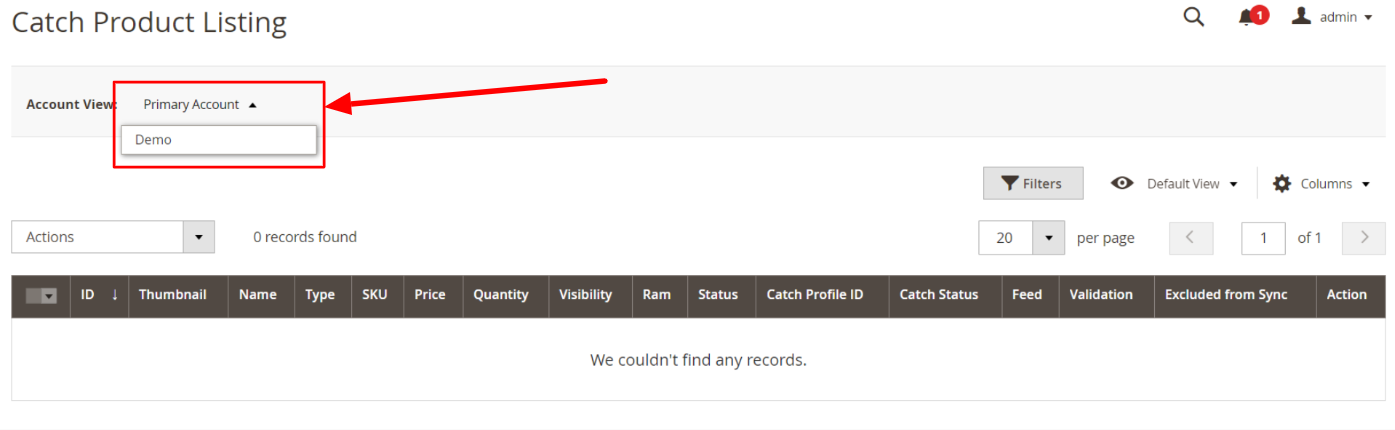
- On the top right corner, you will find Account View. Click on the drop-down button to choose your preferred Catch Seller account.
- To validate the selected products, do the following steps:
- Select the checkboxes associated with the required products.
- In the Actions list, click the arrow button.
A list appears as shown in the figure:
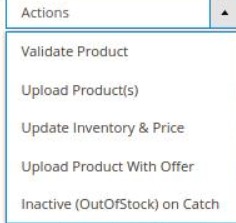
- Click Validate Product.
A confirmation dialog box appears. - Click the OK button.
The selected products validation process is executed and the page appears as shown in the following figure:
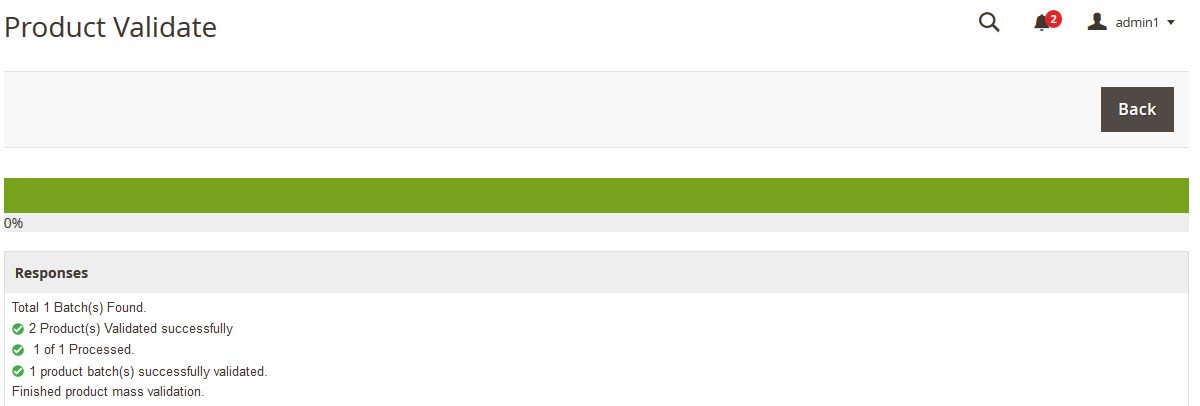
The selected products are validated. - Click the Back button to go back to the Catch Product Listing page.
If there is an error, then the INVALID buttons appear in the Validation column of the respective product rows.
Note: Click the INVALID buttons to view the error details.
- To upload the selected products, do the following steps:
- Select the check boxes associated with the required products.
- In the Actions list, click the arrow button.
A list appears as shown in the figure:
- Click Upload Product(s).
A confirmation dialog box appears. - Click the OK button.
The selected products uploading process is executed and the page appears as shown in the following figure:
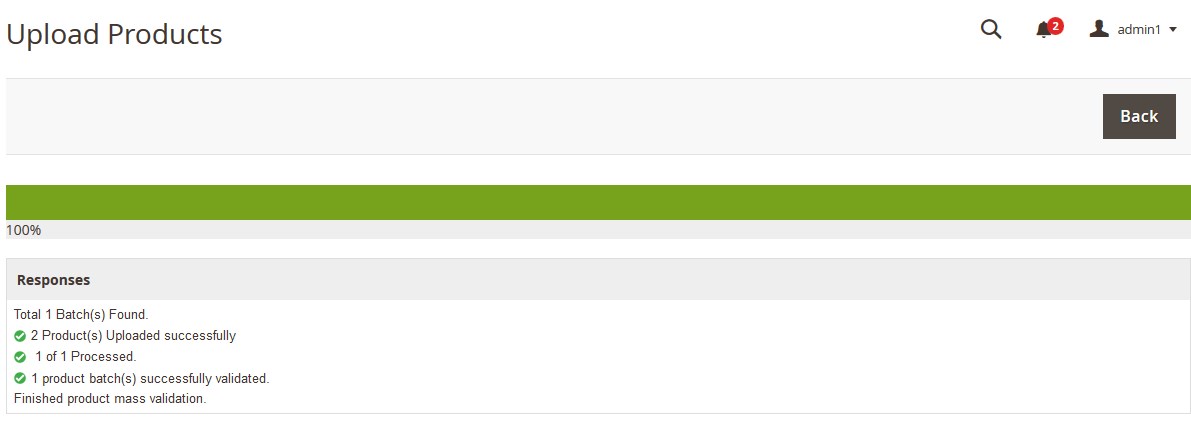
If the selected products are uploaded successfully, then a success message appears on the page.
If there is an error and the upload is failed, then the error is intimated on the page as shown in the figure.
- To update the inventory and price of the selected products, do the following steps:
- Select the check boxes associated with the required products.
- In the Actions list, click the arrow button.
A list appears as shown in the figure:
- Click Update Inventory & Price.
A confirmation dialog box appears. - Click the OK button.
The selected products inventories and prices updating process is executed and the page appears as shown in the following figure:
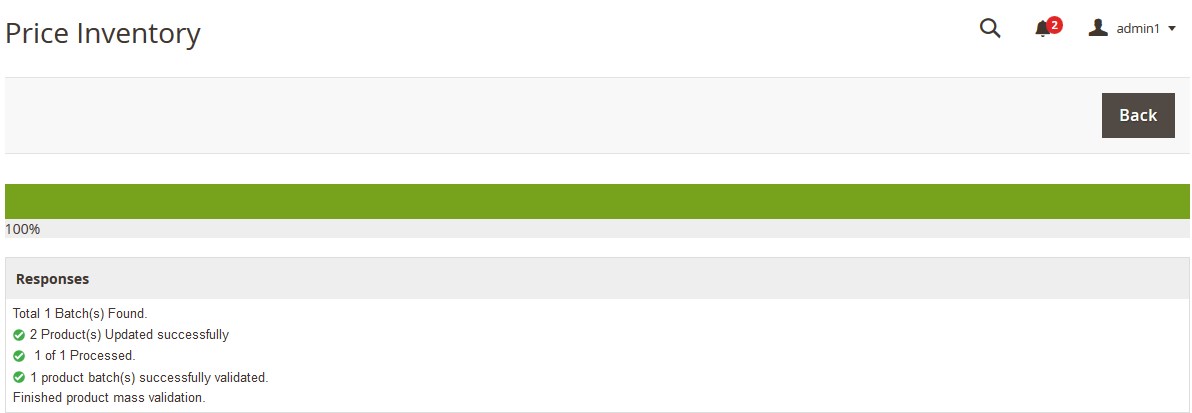
The prices and the inventories of the selected products are updated on the Catch website. - Click the Back button to go back to the Catch Product Listing page.
- To upload product with the offer of the selected products, do the following steps:
- Select the checkboxes associated with the required products.
- In the Actions list, click the arrow button.
A list appears as shown in the figure:
- Click Upload Product With Offer.
A confirmation dialog box appears. - Click the OK button.
- To inactive the out of stock selected products, do the following steps:
- Select the checkboxes associated with the required products.
- In the Actions list, click the arrow button.
A list appears as shown in the figure:
- Click on Inactive(OutOfStock) on Catch.
A confirmation dialog box appears. - Click the OK button.
×


