5.Manage Catch Accounts ↑ Back to Top
To Manage Catch Accounts,
- Go to the Magento Admin Panel.
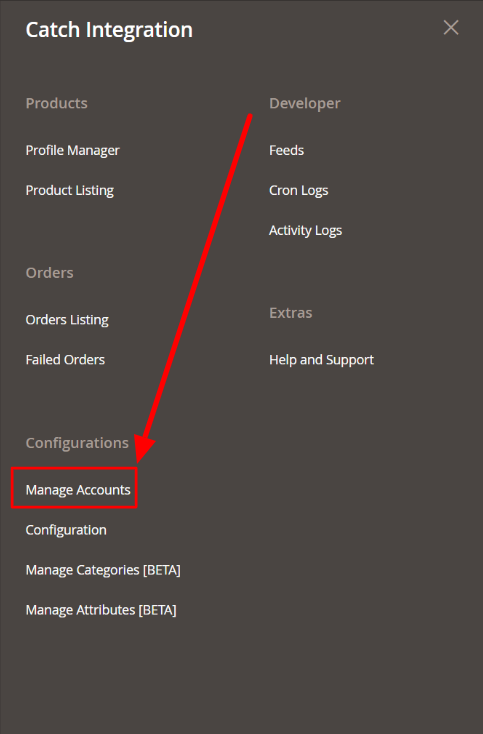
- On the left navigation bar, click on the Catch Integration menu.
The menu appears as shown below:

- Click on Manage Accounts.
The Manage Account page appears as shown below:

- To add a new account, click on Add Account button in the top right corner.
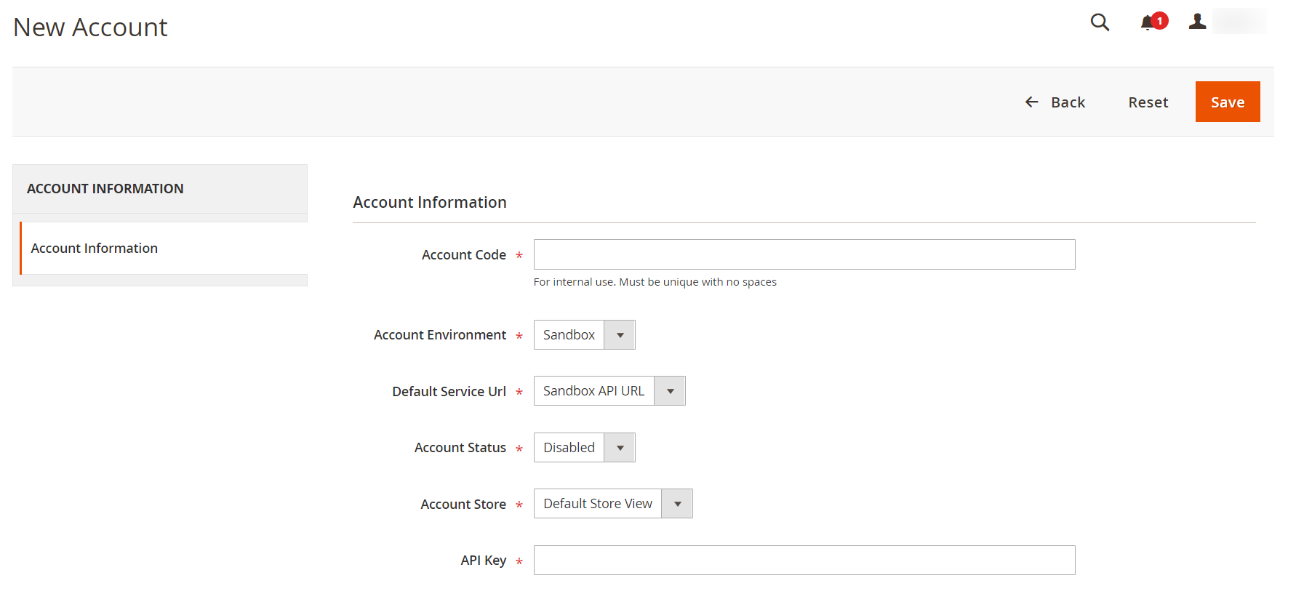
You’ll be redirected to a new page:

- Account Code is solely for your purpose. So, here you must enter a code that you will remember for your account and not get confused in different Catch accounts.
- In Account Environment, you can choose your preference of account from the drop-down menu. Sandbox is for testing purposes, and Live is for the live website.
- In Default Service URL, select the API URL for the preferred Account Environment you have selected in the above option.
- In Account Status, you can select Enabled or Disabled to connect or disconnect your account from the Magento store.
- In the Account Store section, choose the store view that you want to use for your Catch account.
- In the API Key field, enter the API Key of your Catch account.
- Once you have filled in details in all the required sections, click on the Save button on the top right of the page.
Now, your new Catch Account will be created and displayed on the Manage account page.
To Edit an Account,
- Go to the Manage Catch Account Page, and click on the Edit button under the Actions column.

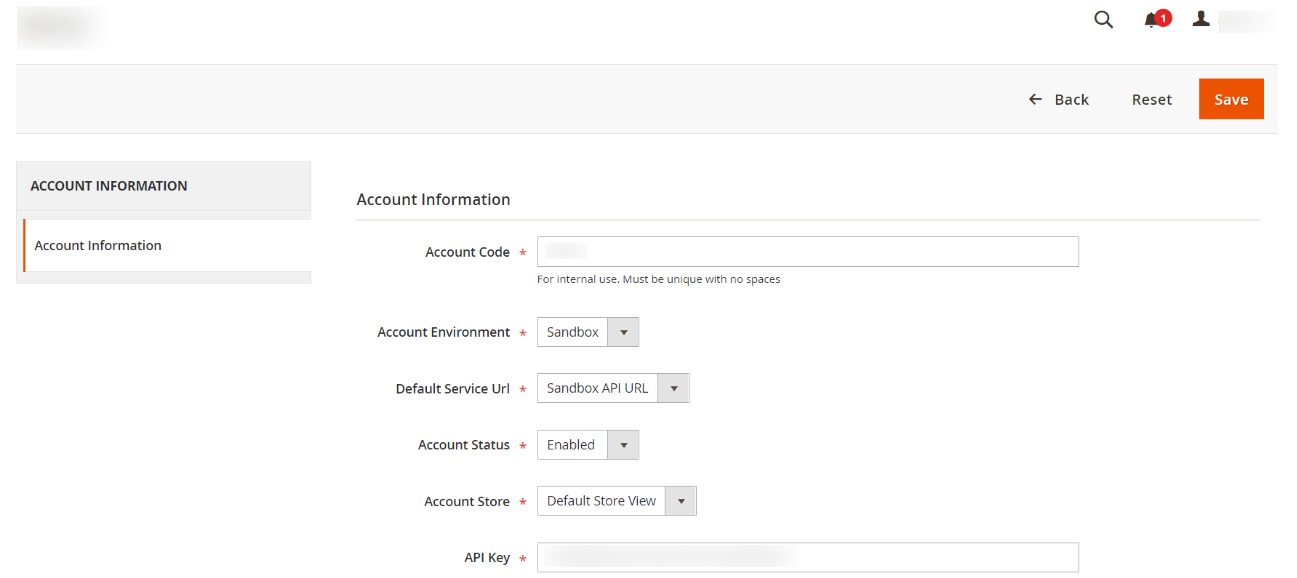
- On clicking edit button, you will be navigated to the new Edit Account Page. It will be visible as shown below:

- Here make the required changes and click on the Save button.
The edits will be saved.
To delete an Account,
- Go to the Manage Account Page. Then, click on the checkbox(s) to select the account(s) you want to delete.

- Click on the Actions list and then click on Delete.
 The selected accounts will be deleted.
×


