
Adding a New Profile
To add a new profile
- Go to the Magento 2 Store Admin
- On the left navigation bar, click the AMAZON INTEGRATION
A menu appears as shown in the following figure:

- Click Manage Profiles.
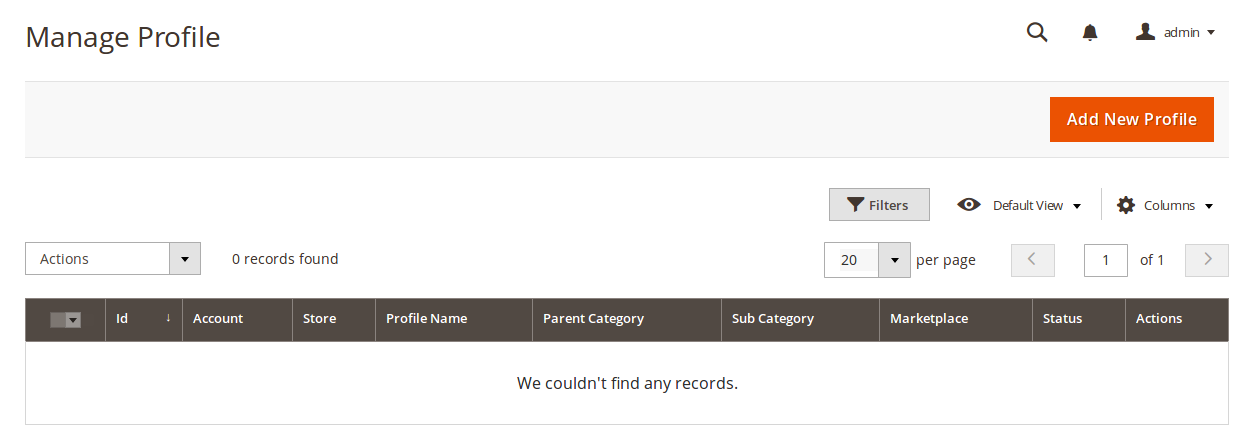
The Manage Profile page appears as shown in the following figure:
- Click the Add New Profile
The New Profile page appears as shown in the following figure:
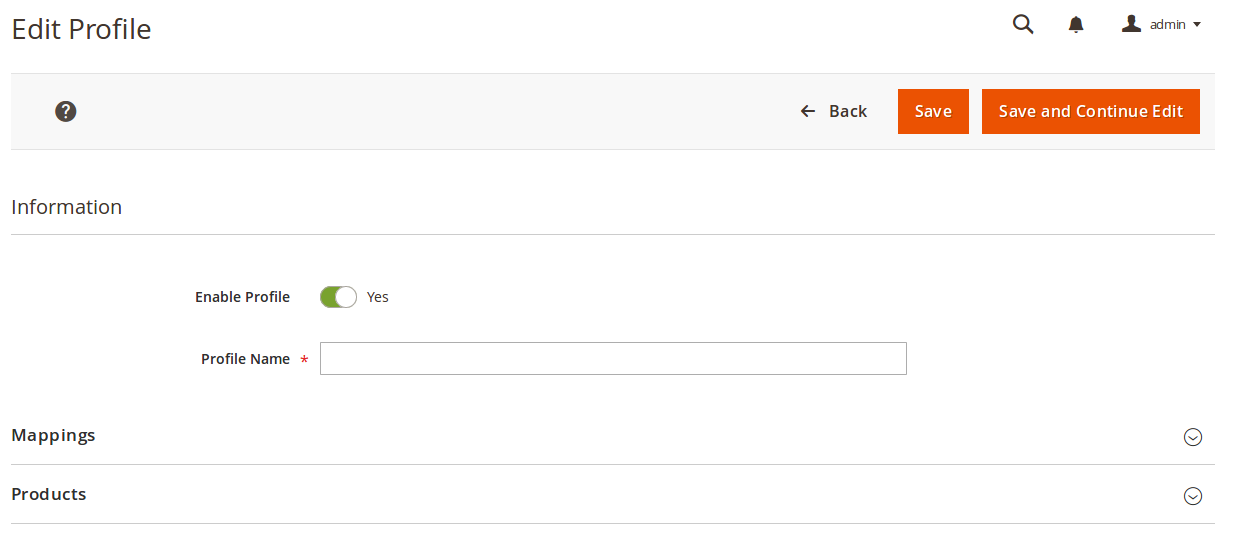
- In the right panel, under Information, do the following steps:
- In the Enable Profile, select Yes to enable the profile that you are creating.
- In Profile Name, enter the name for the profile.
- Scroll down and click the Mappings section. The section will expand as:
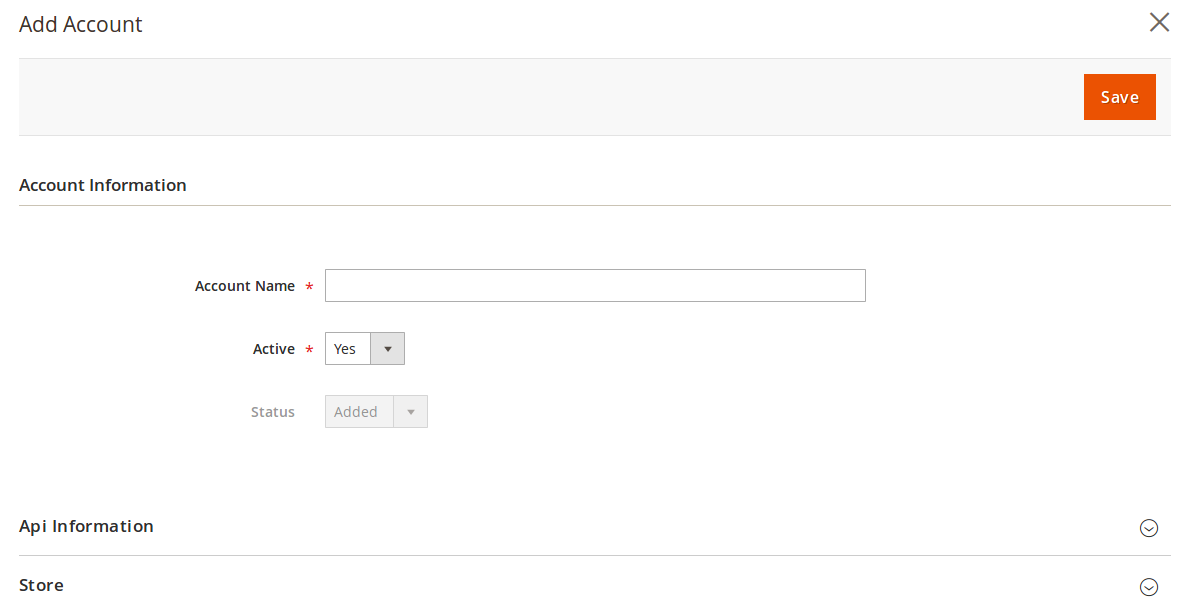
- Enter the Account Name in the corresponding field.
- In Active, select Yes.
- Now scroll down and click API Information. The section will expand as:
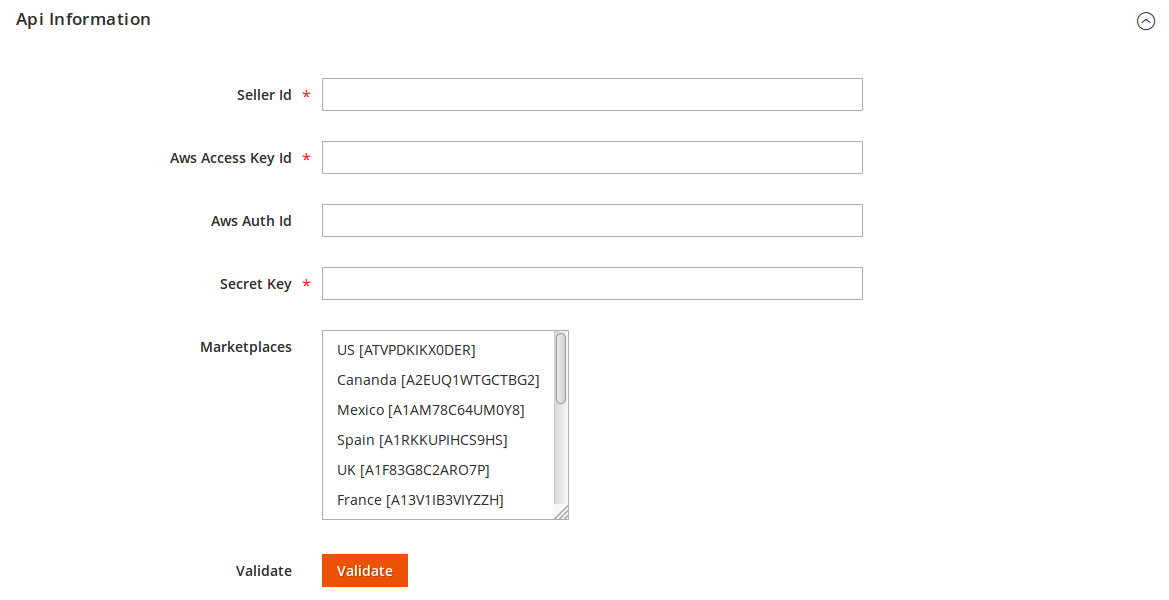
- To know the information that you need to fill in this section(Seller Id, Aws Access Key Id, Secret Key), you need to go to the Amazon seller account. For that,
- Log in to the Amazon seller account.
- On the top right side of the Amazon seller central, place cursor on Settings.
- When the menu appears, click User Permission.
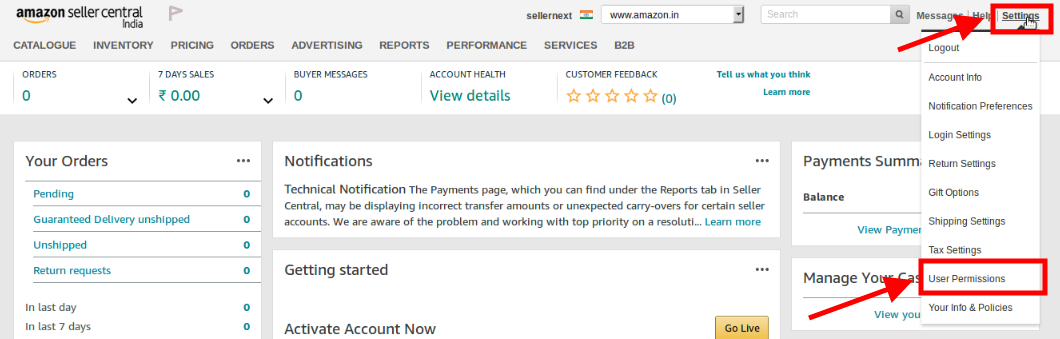
- You will be navigated to the page which will have the following section:
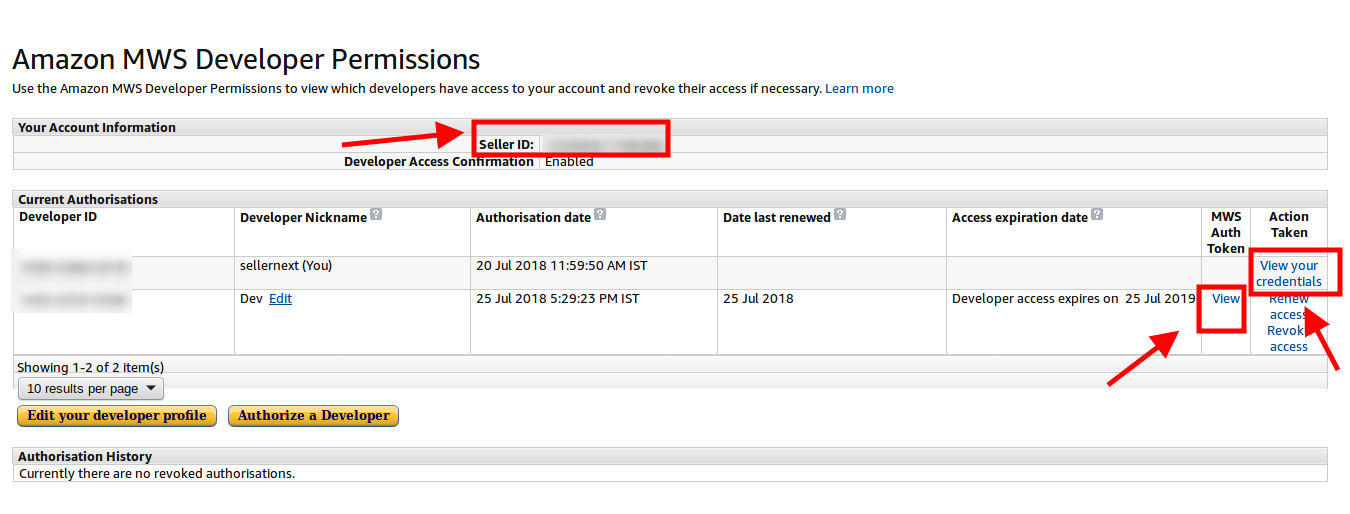
- Now on the top of the section, you may see the Seller ID which has been highlighted inside the red box.
- If you want to know the MWS Auth Token for the developer you’ve created in your account, click View under MWS Auth Token. It appears on the same place as:

- To know the Aws Acess Key Id and the Secret Key, click on the View your credentials under Action Taken column. A box will appear as:
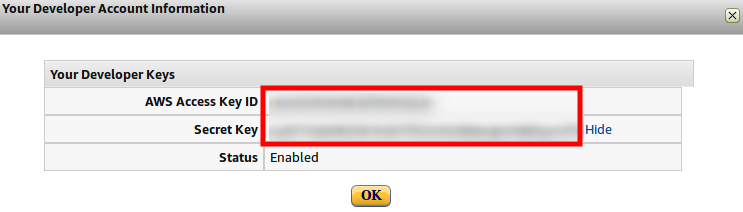
- You may get the Aws Acess Key Id and the Secret Key from here.
- Now that you have got the necessary details, fill them in the section as:
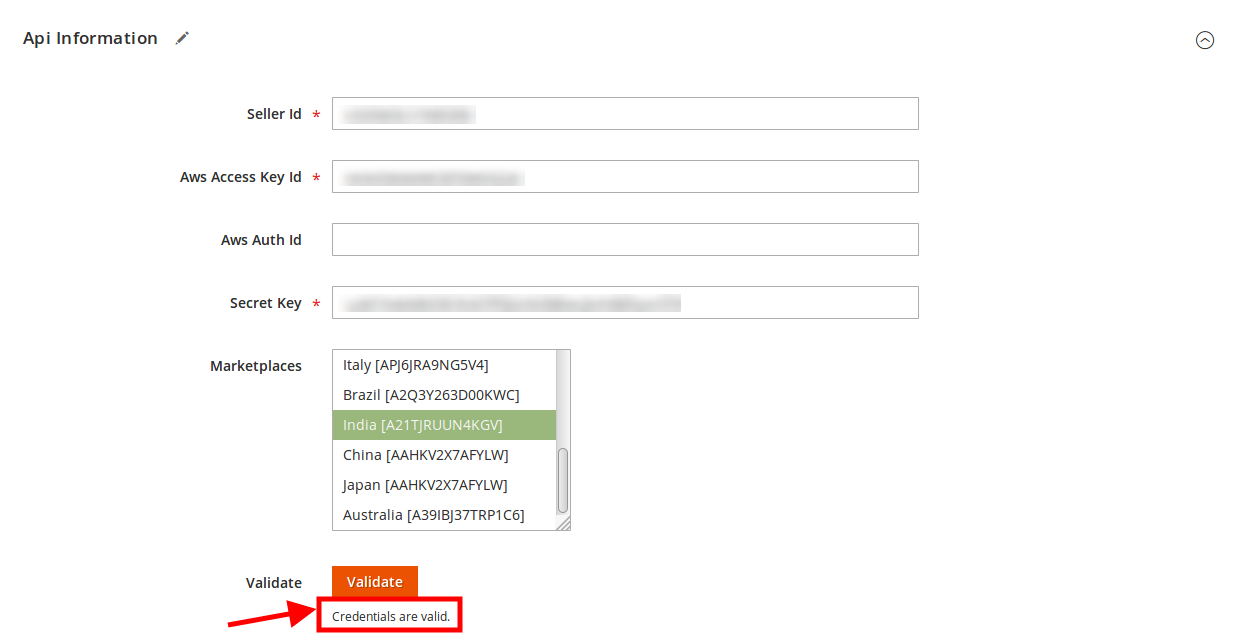
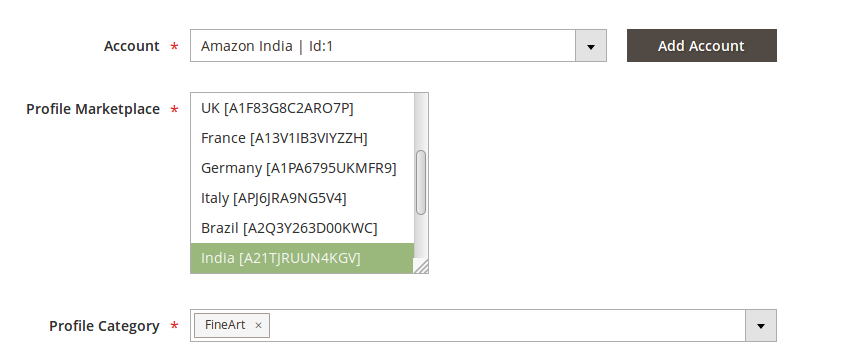
- Once the information has been filled, select Marketplaces in the corresponding field.
- Now click on the Validate button and the message of Credentials are valid will appear as it has been mentioned in the above image.
- Scroll down and click the Store section and it will expand as:

- Scroll down and click on Developer section and it will appear as:

- Select the Account Mode.
- Add notes if you want any.
- Click on Save on the top right side of the page.
- The account will be created.
- When done, you need to select the profile category in the corresponding field.
- On selecting the profile category, attribute section appears as:

- Now map the attributes. You may also add attributes by clicking on the Add Attribute button.
- Scroll down to Products and the section will appear as:

- In Default Store, select the default store.
- Click Save on the top right side of the page. Profile will be saved.
×


