
Configuration Settings
After the successful installation of the Stripe Payment extension on the Magento 2 store, the admin has to set up the configuration settings required to enable the features of the extension.
To configure the settings
- Go to the Admin panel.
- On the left navigation bar, click the STORES menu, and then click Configuration.
The Configuration page appears. - In the left navigation panel, click the SALES
- Scroll down to click Payment Methods.
In the right panel, all the payment methods are listed. - Scroll down to click the Ced Stripe Payment tab.
The corresponding fields appears as shown in the following figure:
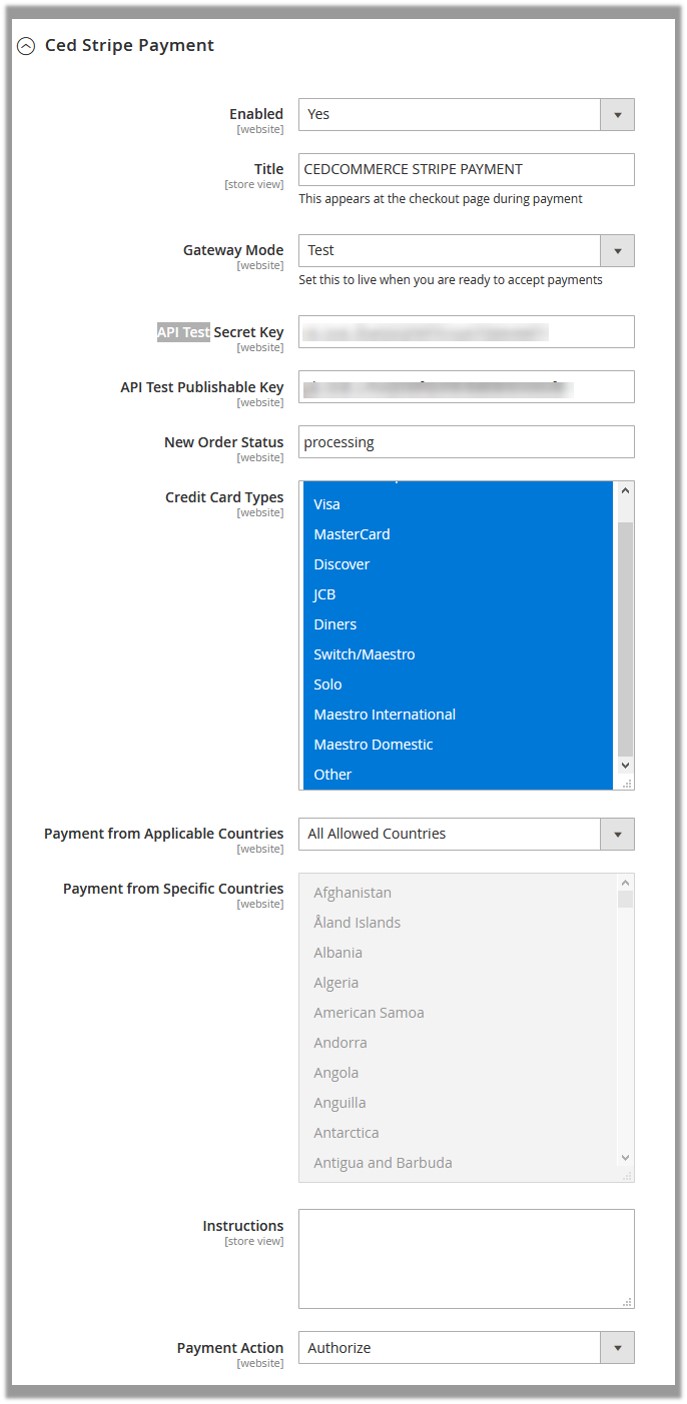
- In the Enabled list, select Yes.
- In the Title box, enter the title of the payment method.
- In the Gateway Mode list, select Test.
Note: Test is used for the testing purpose. - In the API Test Secret Key box, enter the provided key.
- In the API Test Publishable Key box, enter the provided key.
Note: Before making it live, the admin needs to test the Stripe Payment extension. For testing purpose, the admin has to enter the API Test Secret and Publishable keys that the admin had received from the Stripe website to integrate Stripe Online Payments with the Magento 2. - In Payment from Applicable Countries list, select one of the following options:
- All Allowed Countries: All the available countries are allowed.
- Specific Countries: On selecting this option, the next field Payment from Specific Countries is activated, from where admin can select the each required country from the list.
- In the Payment Action list, select one of the following options:
- Authorize: Admin can create invoice later on. Admin can also process the online refund through Stripe payment gateway.
- Authorize and Capture: Automatic invoice is generated.
- Click the Save Config button.
The configuration is saved.
×


