Connecting Jumia Seller Account With WooCommerce
To connect the Jumia seller account, click on the Jumia option as shown in the image below:
A section will appear, as shown in the image below:
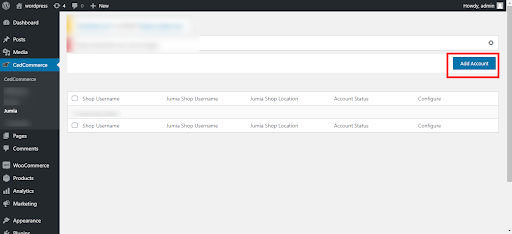
Click on Add Account to add your Jumia account.
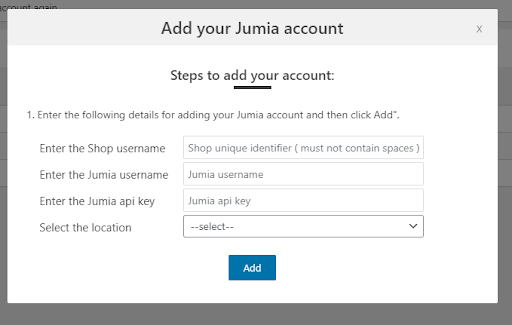
A window will appear, which will require the following details:
- Enter the shop username.
- Enter the Jumia username.
- Enter the Jumia API key.
- Select Location.
Click on the ADD button at the bottom to Add your Jumia account.
Refer to the image below:
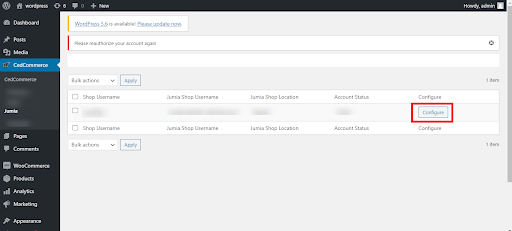
After filling in all the credentials, the Jumia account will be added, and you will be redirected to your account listing section.
Click on the ‘Configure’ to manage your account, as shown in the image below:
ACCOUNT DETAILS
Once you click on the configuration button a new window appears with all the details for the seller’s account.
Seller will be able to select the account status as shown in the image below:
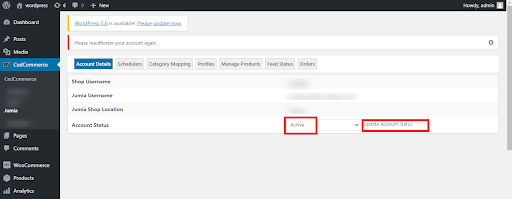
Select the Account status as active and click on update status.
Note: You can also deactivate the account by selecting “Inactive” from the account status option.
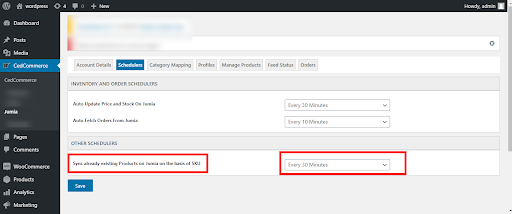
SCHEDULERS:
The scheduler tab is located second from the left end
on the upper panel. Scheduler has the following option for the sellers: (refer to the image)
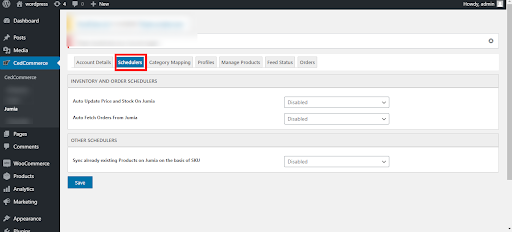
(i) Inventory and Order Schedulers: The inventory and order Schedulers allow you to Auto-update the price along with the available stock on the Jumia store. You can also enable or disable the auto fetch option for Orders from Jumia to the store.
-
- Auto Update price and Stock On Jumia:
The inventory and order Schedulers allow you to Auto-update the price along with the available stock on the Jumia store. You can also enable or disable the auto fetch option for Orders from Jumia to the store.
-
-
- Auto Update price and Stock On Jumia:
-
Under the Scheduler Tab, click on the ‘Auto Update Price and Stock on Jumia; drop-down menu:
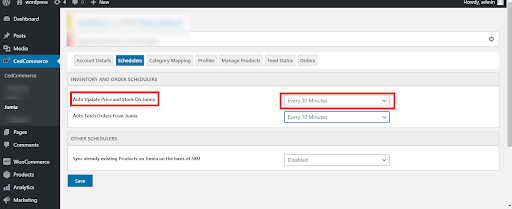
Choose the desired time at which you want the auto-update for price and stock to take place.
-
-
- Auto Fetch orders from Jumia:
-
The Auto Fetch Order from Jumia option fetches the orders from Jumia automatically within the selected time frame.
Under the Scheduler Tab, Click on the Auto Fetch order from Jumia drop-down menu as shown in the image below:
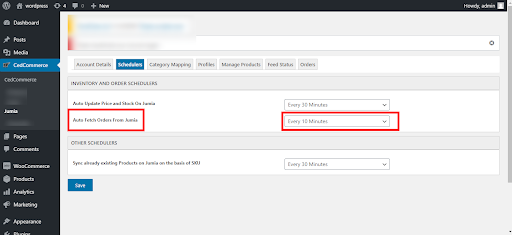
Set the desired time interval for automated fetching of Jumia orders.
-
-
- Other schedulers:
-
The Other scheduler option lets you sync the already existing products on Jumia based on SKU.
Under the Scheduler Tab, follow the other scheduler option, as shown in the image given below:
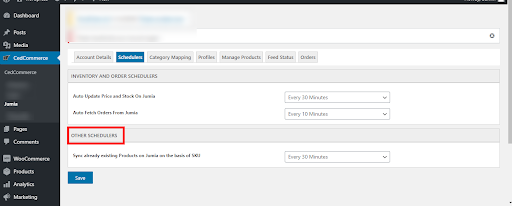
Select the duration in which you want the sync to take place.
Click on the Save button at the right bottom to save the changes
The given action can be performed as shown in the image below,