
Jet Configuration Settings
Once the Jet Shopify Integration app is successfully installed in the Shopify store and the API credentials are received from the Jet partner panel, the admin has to follow the Registration process and set up the configuration settings to establish the connection between the Shopify store and Jet.com.
To follow the registration process and set up the configuration settings
- Go to the Shopify store admin panel.
- In the left navigation panel, click the Apps link.
The page appears as shown in the following figure:
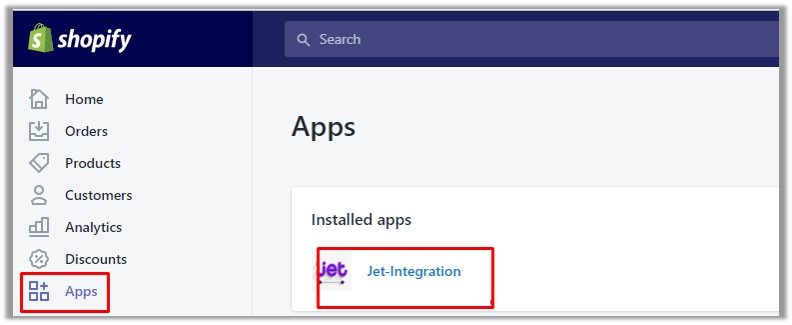
- In the right panel, click the Jet-Integration link.
The Step 1: Registration page appears as shown in the following figure:
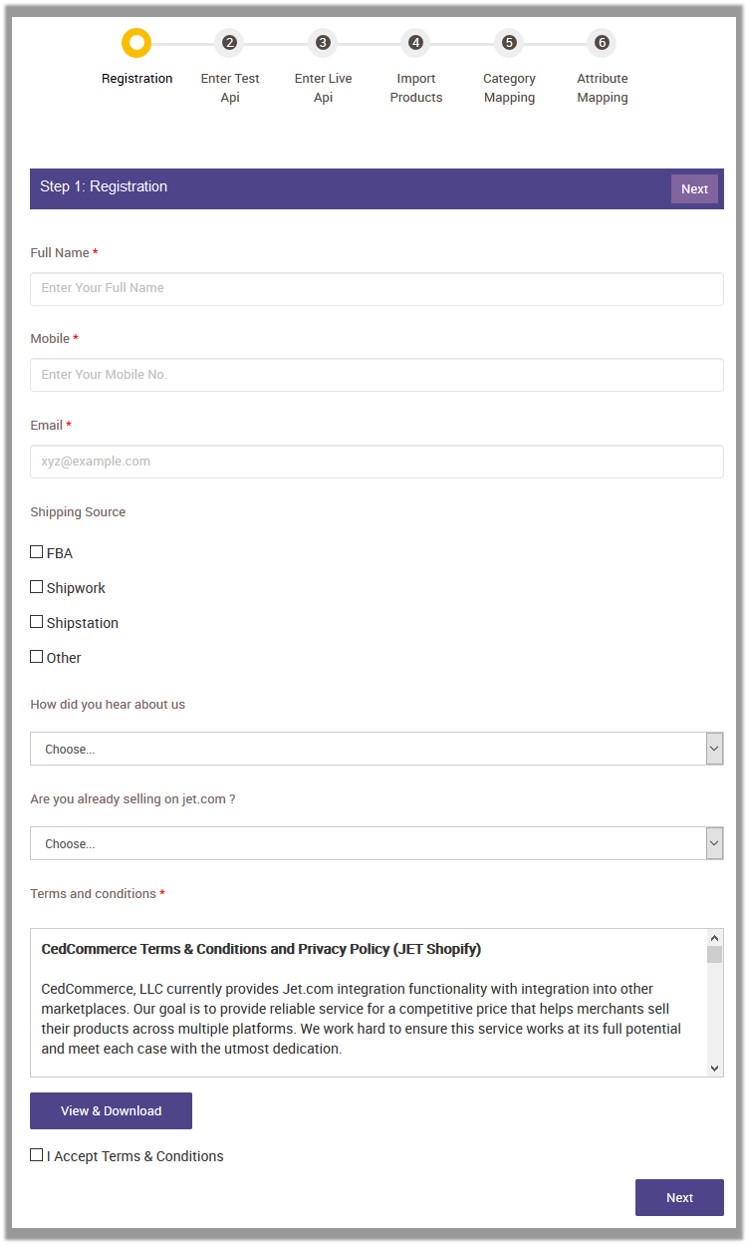
- In the Full name box, enter the name.
- In the Mobile box, enter the required mobile number.
- In the Email box, enter the required email-id.
- Under Shipping Source, select the check boxes associated with the required shipping services provider.
- In the How did you hear about us list, select the appropriate option.
- In the Are you already selling on jet.com? list, select the appropriate option.
- Under Terms and conditions, read the content and then select the checkbox associated with the I Accept Terms & Conditions text.
- Click the Next button.
Step 2: Enter Test Api
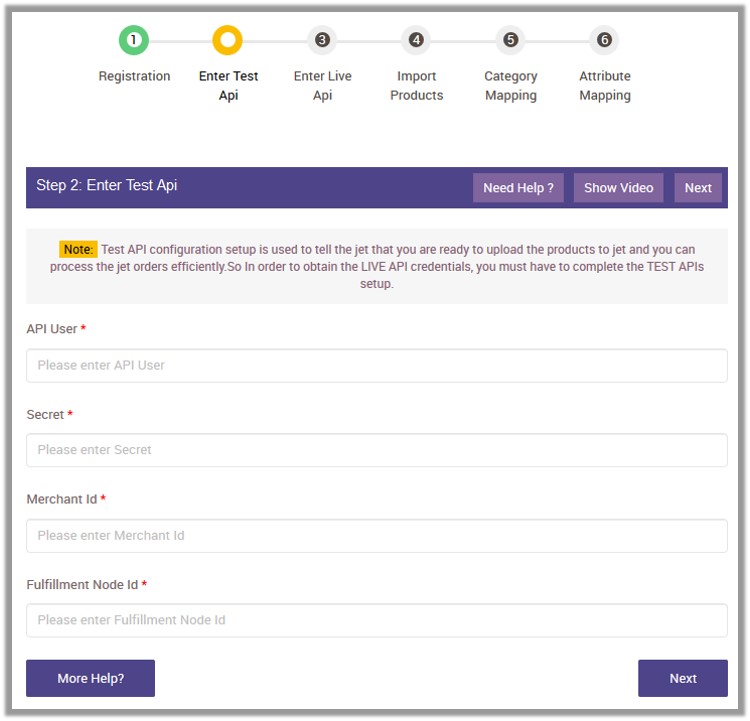
- In the API User box, paste the corresponding API User value copied from the Sandbox API Keys dialog box displayed in the Jet Partner panel.
- In the Secret box, paste the corresponding Secret value copied from the Sandbox API Keys dialog box displayed in the Jet Partner panel.
- In the Merchant Id box, paste the corresponding Merchant Id value copied from the Sandbox API Keys dialog box displayed in the Jet Partner panel.
- In the Fulfillment Node Id box, paste the corresponding Fulfillment Node Id value copied from the Jet Partner panel.
Notes:- Click the Need Help? button to get the help from the online help provided that covers the Installation process and the configuration set up the process.
- Click the Click the More Help? button to contact the CedCommerce Support team to get the queries resolved and further assistance if required.
A dialog box appears as shown in the following figure:
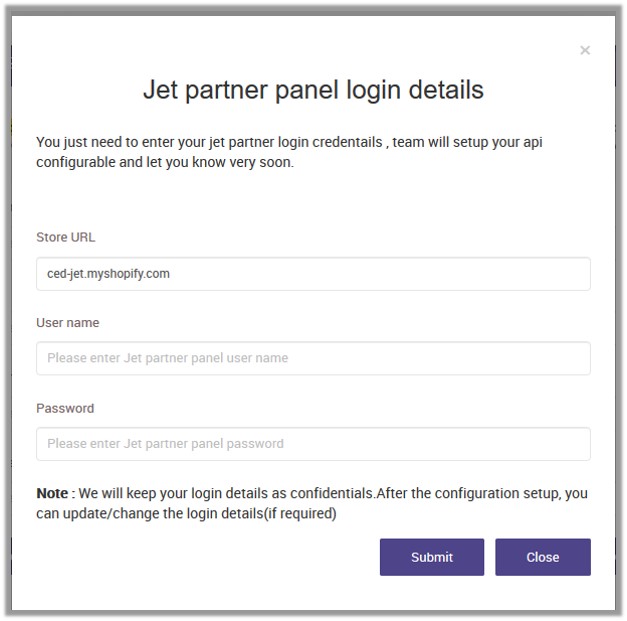
Do the following steps:- Enter the Jet Partner Login Credentials.
- Click the Submit button.
- On Step 2: Enter Test API page, click the Next button.
Step 3: Enter Live API
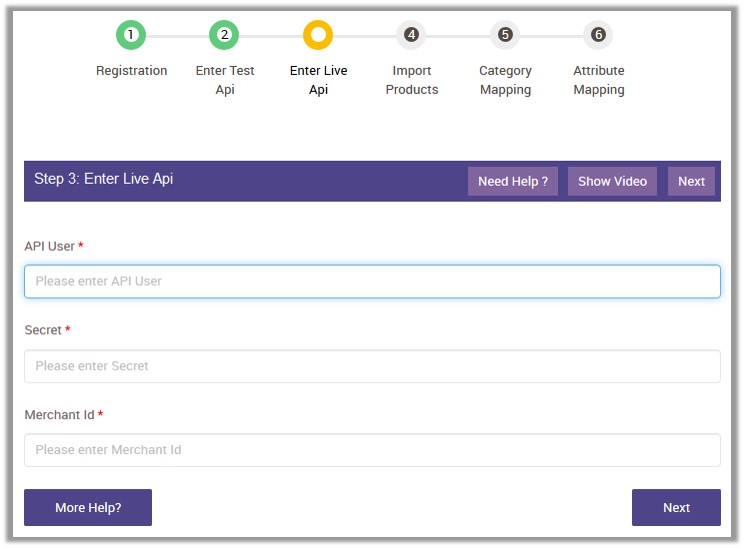
- In the API User box, paste the corresponding API User value copied from the API Keys dialog box displayed in the Jet Partner panel.
- In the Secret box, paste the corresponding Secret value copied from the API Keys dialog box displayed in the Jet Partner panel.
- In the Merchant Id box, paste the corresponding Merchant Id value copied from the API Keys dialog box displayed in the Jet Partner panel.
- Click the Next button.
The Step 4: Import Products page appears as shown in the following figure:
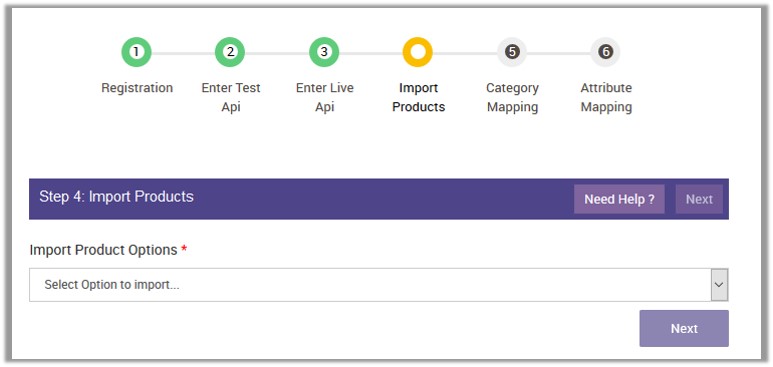
- In the Import Product Options list, select one of the following options:
- All products: It enables the store owners to import all the Shopify store products in the app.
- Published Products: It enables the store owners to import only those products which are available at the Shopify store front-end.
- Custom Products Selection: It enables the store owners to import only those products which they want to upload from their Shopify store to the app.
- If selected the All Products or the Published Products option, then the page appears as shown in the following figure:

Do one of the following steps:- Click to select the Import All Product option to import all the products.
The Custom SKU create checkbox appears.- Select the checkbox to create the custom SKU.
OR
- Select the checkbox to create the custom SKU.
- Click to select the Import Only ready To import option to import only the products those are ready to import.
- Click to select the Import All Product option to import all the products.
- Click the Start Import button.
- If selected the Custom Products Selection option, then the page appears as shown in the following figure:
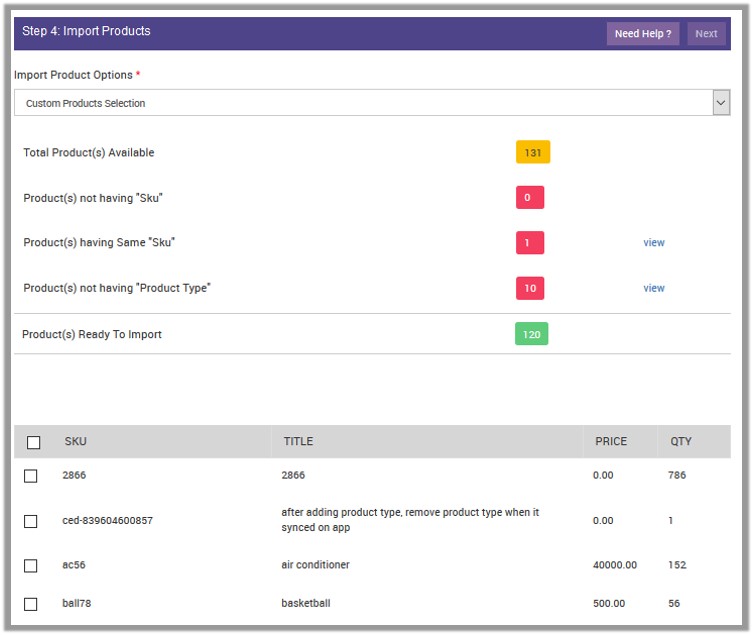
Do one of the following steps:- Select the check boxes associated with the required product SKU.
Or - Select the check box associated with the SKU label to select all the products listed on the page.
- Select the check boxes associated with the required product SKU.
- Scroll down to the Start Import button and then click the button.
The Product Import Status appears as shown in the following figure:
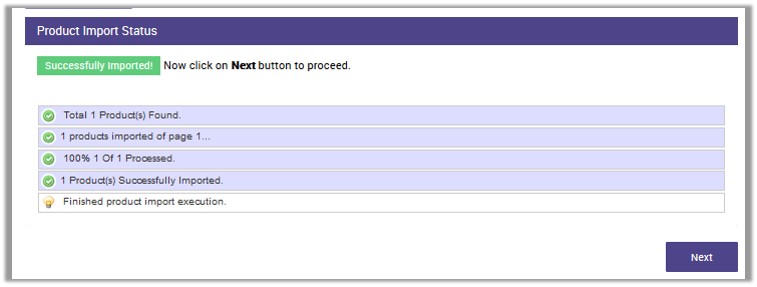
- Click the Next button.
The Step 5: Category Mapping page appears as shown in the following figure:
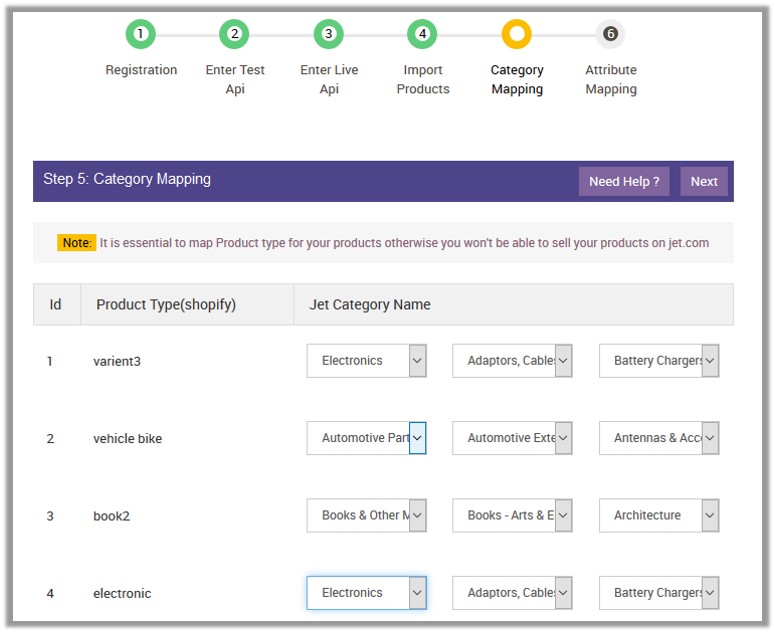
Correct category mapping is very important to find the relevant product in the respective category. Jet maps the product type to the category and then subcategory.
It means Category > Sub-Category > Sub-Category of the Sub-Category
The chances of getting order increases if the store owner has mapped the product types to the correct category. - In the Jet Category Name column, select the required categories and the sub-categories from the respective lists.
- Click the Next button.
The Step 6: Attribute Mapping page appears as shown in the following figure:
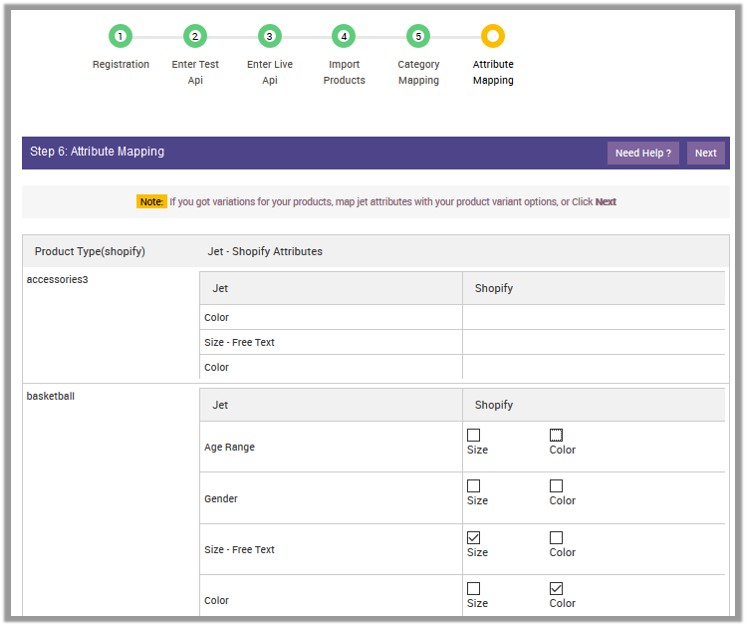
- Choose Jet attributes to map with the product variant options.
If the store owners have the variant products in their store then they need to map the attributes. Variant Products mean, the products having various attributes such as color, size, metal, and so on.
For instance, Engagement Ring as the Shopify product type.
To transfer correct information of the products on jet, admin needs to map the Jet attributes with the product variant options (attributes) such as map the Size-Free Text attribute of Jet to Size variant option of the Engagement Ring (product type) and the Color attribute of Jet to the Color variant option of the Engagement Ring (product type). - Click the Save button.
×


