
2.Configuration Settings ↑ Back to Top
Once the module has been installed, the first necessary step needs to be taken by the admin is to complete the Configuration.
To do the Configuration Settings:
- Go to your OpenCart admin panel.
- Place the cursor on CL Lazada Integration which is on the left navigation bar, as shown in the figure below:
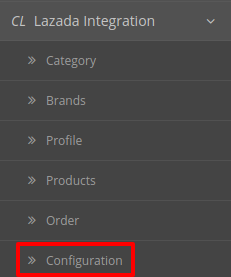
- From the menu that appears as shown in the image below, click on Configuration.
- On clicking Configuration, you will be navigated to the Configuration page as shown below:

- In Status, select Enabled to enable the module.
- In Debug Mode
- Select Enable, to activate the debug mode.
- Select Disable, to deactivate the debug mode.
In Lazada Product Settings.
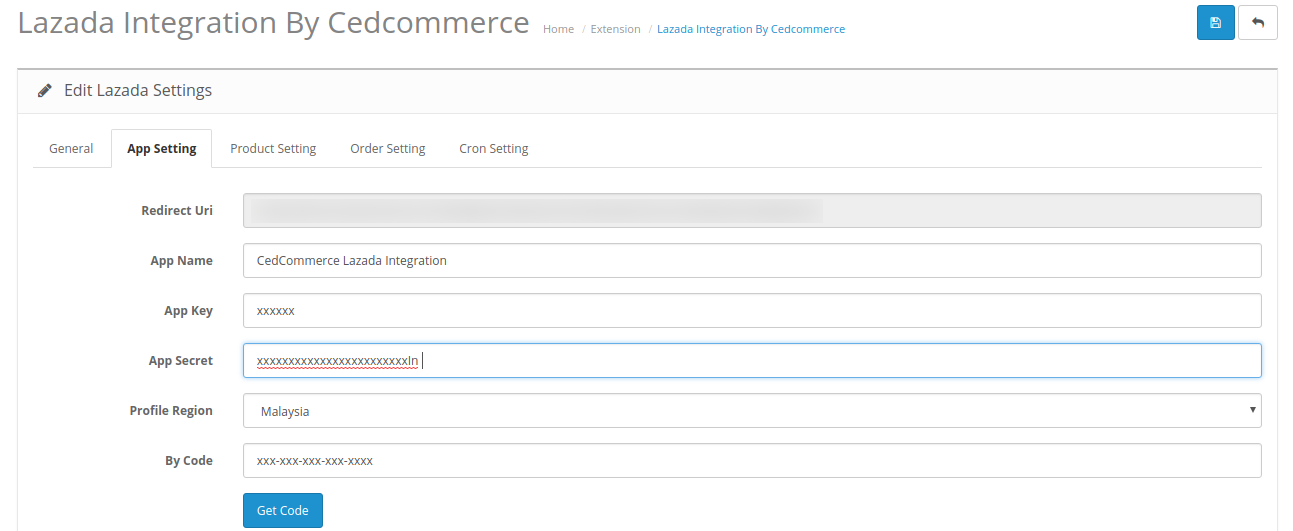
- The Redirected URL Box gets automatically filled once the account is verified.
- In the App Name bar, enter the app name provided on the Lazada App Console
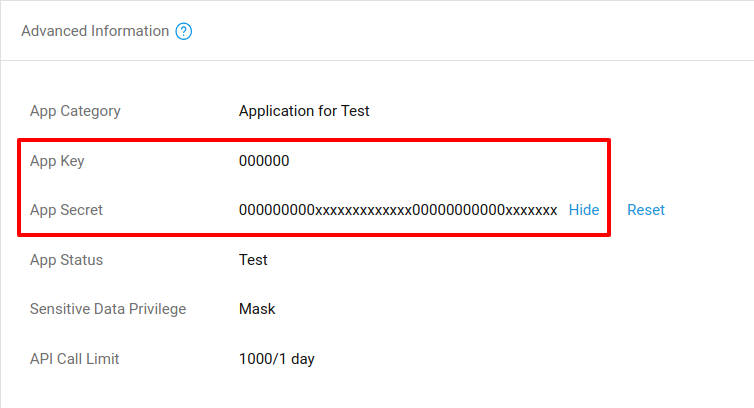
- In the App Key bar, Enter the six-digit app key.
- In the App Secret key bar, enter the ID that you had retrieved from the Lazada App Console.
- In the Profile Region, select the region, where your store is located.
- If you want to do it by Code, then click on the Get Code Button & you will be redirected to you lazada seller panel.
- To retrieve the details from your lazada seller panel, Visit this link
- You will be redirected to the login of your lazada seller panel:
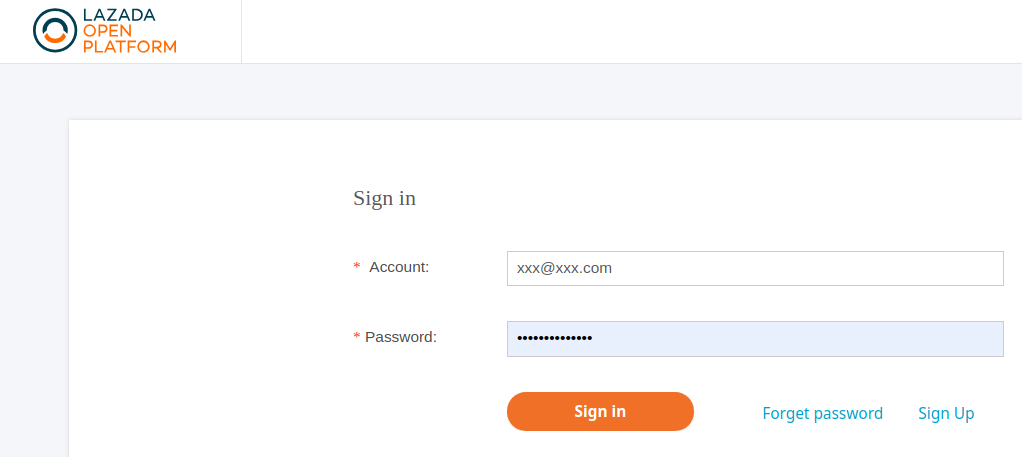
- Enter the details and click on Sign In.
- The App Console Of Lazada opens up as shown below:

- Click on Create.
- A Create App Section Opens Up:
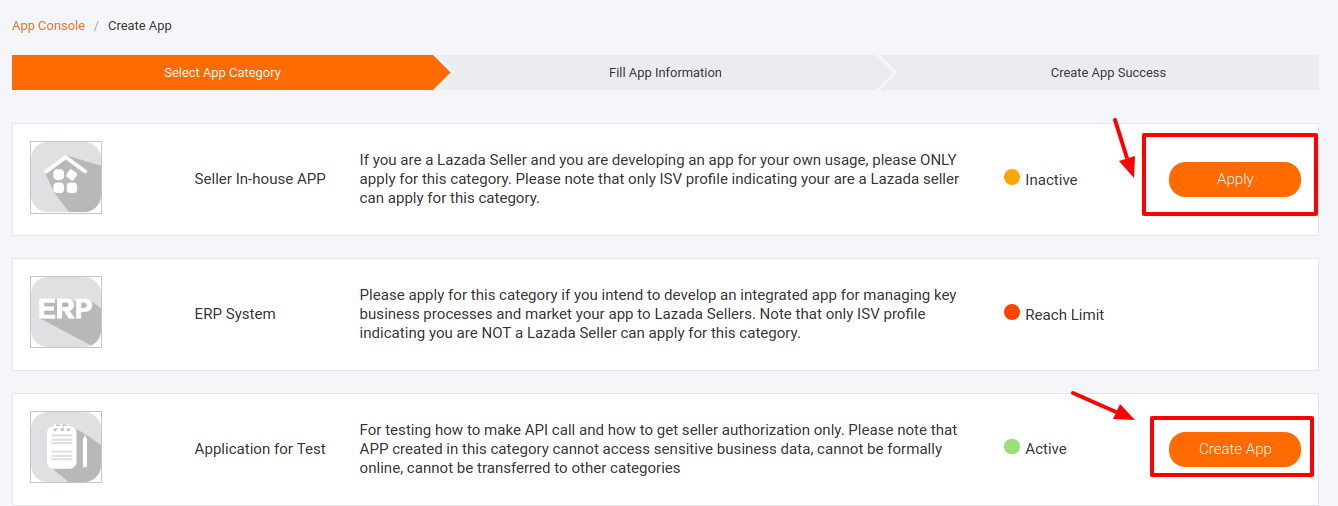
- First Click on Create App under the Application For Test.
- Then Apply under Seller In-house APP.
- After Verification your app will be displayed as shown:

- Click on Manage:
- Here all the details are mentioned under Advanced Information:
- Now move back to your Opencart Seller Panel.
In Lazada Product Settings.

- In Default Store, select the store in which you want your entire system to be processed.
- In Product Price, you may select the price that you want for your products on Lazada marketplace. The options for sending different prices are shown in the image below:

- Default Price: Choose this if you don’t want any change in price between OpenCart store and Lazada.
- Increase Fixed Amount: You may select this option if you want your product price to be increased on Lazada as compared to your OpenCart store. If you select this option, a box appears as shown below:
- By choosing this option, you may enter in the Price Variant Amount box the amount by which you want your product price to be Increased on Lazada as compared to your OpenCart store. Suppose if you enter 50 in this field and your product is for 100 on your OpenCart store, then the amount that your product will be available for on Lazada would be 150 (as the amount entered is 50 for Increase by fixed price, so the price entered would be added to the price for which product is available on OpenCart).
- Decrease Fixed Amount- You may use this option if you want the price of your OpenCart product to be decreased on Lazada.
- By choosing this option, you may enter in the Price Variant Amount box the amount by which you want your product price to be decreased on Lazada as compared to your OpenCart store. Suppose if you enter 50 in this field and your product is for 100 on your OpenCart store, then the amount that your product will be available for on Lazada would be 50 (as the amount entered is 50 for Decrease by fixed price, so the price entered would be subtracted from the price for which product is available on OpenCart).
- Increase Fix Percentage- You may use this option if you want the price of your OpenCart product to be increased on Fruugo by a certain percent.
In Lazada Order Settings.
The Lazada Order Settings section expands as:

- In Lazada Order ID Prefix, Enter the prefix code to recognize the Lazada order.
- In Order Notification Email, enter the email Id on which you want the notification during the creation of new order.
- In Enable Default Customer,
- Select Yes to enable it.
- Select No to disable it.
In Lazada Cron Settings.
The Lazada Cron Section appears as:

- All the running crons are mentioned here including the Order Cron, Price/Inventory Cron, and New Product Cron.
- Once all the necessary details have been filled or selected, click on the Save button on the top right side of the page, as shown below:

- The configuration will be saved and a success message will appear as:

×


