
Tophatter Configuration Settings
After obtaining the Access Token values from the Tophatter Seller account, the Magento store owner has to paste them on the Tophatter Configuration page of the admin panel.
To set up the configuration settings in the Magento Admin panel
- Go to the Magento Admin panel.
- On the top navigation bar, point to the Tophatter menu.
The menu appears as shown in the following figure:
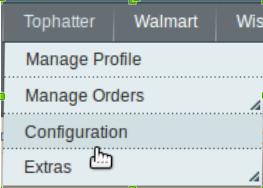
- Click Configuration.
The Tophatter Configuration page appears as shown in the following figure:
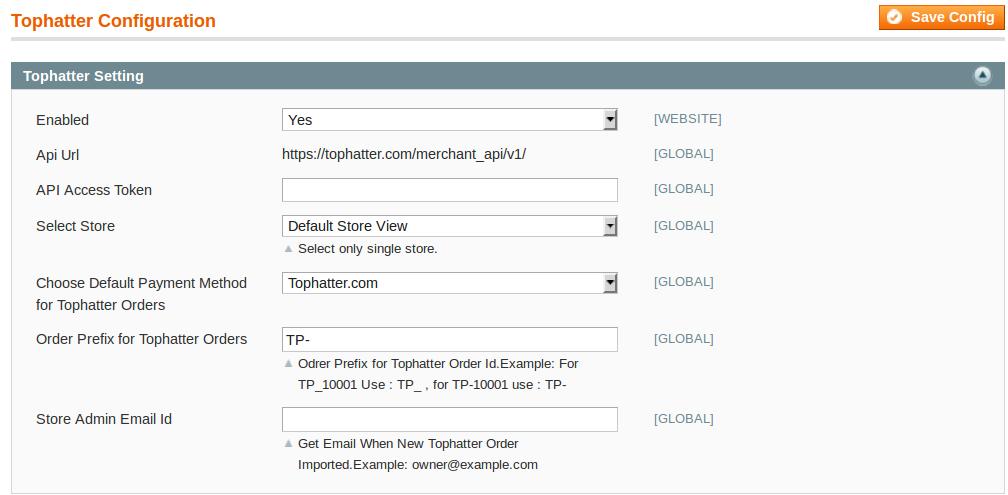
- In the right panel, under the Tophatter Setting section, do the following steps:
- In the Enabled list, select Yes to enable the Tophatter Integration extension.
Note: Api Url link is displayed by default. - In the API Access Token box, paste the Access Token value copied from the Tophatter seller panel.
- In the Select Store list, select the required store view.
- In the Choose Default Payment Method for Tophatter Orders list, select Tophatter.com.
- In the Order Prefix for Tophatter Orders box, enter the required prefix value.
For instance, enter TP- for TP-10001. - In the Store Admin Email Id box, enter the required email Id.
- In the Enabled list, select Yes to enable the Tophatter Integration extension.
- Click the Save Config button to save the entered values.
- Scroll down to the Tophatter Cron Management tab, and then click the tab.
The tab is expanded and the corresponding field under the section appears as shown in the following figure:

- Under Tophatter Cron Management, do the following step:
- In the Cron Chunk Size list, select the required chunk size for the cron jobs to synchronize product on tophatter.com.
- Scroll down to the Product Edit Settings tab, and then click the tab.
The tab is expanded and the corresponding fields under the section appear as shown in the following figure: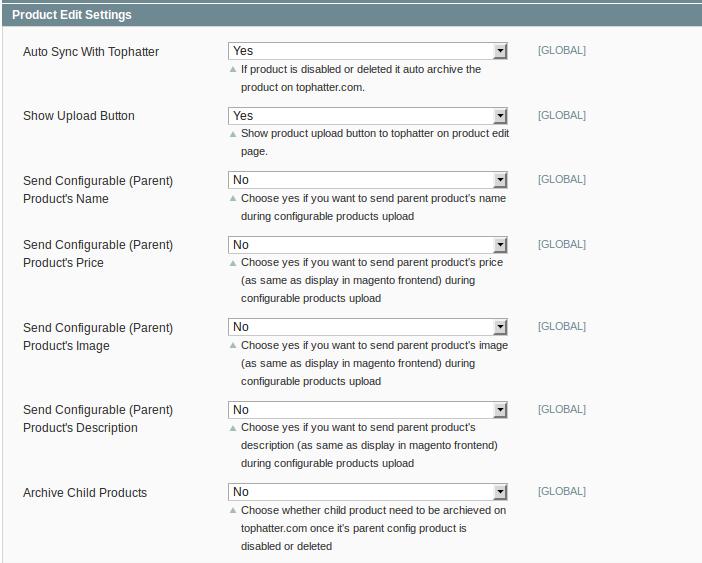
- Under Product Edit Settings, enable or disable the following fields based on the business requirement:
- Auto Sync With Tophatter: If selected Yes, then it auto disables the product on tophatter.com if the product is disabled or deleted.
- Show Upload Button: If selected Yes, then it displays the product upload button on the product edit page.
- Send Configurable (Parent) Product’s Name: Select Yes to send parent product name during configurable products upload if required.
- Send Configurable (Parent) Product’s Price: Select Yes to send parent product price (similar to the price displayed on the Magento frontend view) during configurable products upload if required.
- Send Configurable (Parent) Product’s Image: Select Yes to send parent product image (similar to the image displayed on the Magento frontend view) during configurable products upload if required.
- Send Configurable (Parent) Product’s Description: Select Yes to send parent product description (similar to the product description displayed on the Magento frontend view) during configurable products upload if required.
- Archive Child Products: If required, select Yes to archive the child product on tophatter.com once its parent config product is disabled or deleted.
- Scroll down to the Minimum Tophatter Attribute Mapping to List Mapping on Tophatter.com tab, and then click the tab.
The tab is expanded and the corresponding fields under the section appear as shown in the following figure:
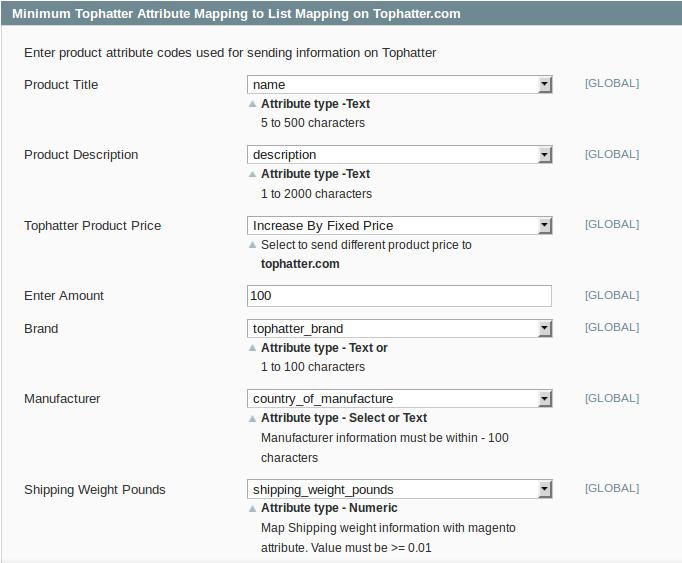
- Under the Minimum Tophatter Attribute Mapping to List Mapping on Tophatter.com section, enter the product attribute codes used for sending information on Tophatter in the following fields:
- Product Title: Select attribute code for the title of the product. Attribute type used is Text – 5 to 500 characters.
- Product Description: Select attribute code for the description of the product. Attribute type used is Text – 1 to 2000 characters.
- Tophatter Product Price: This is to set a different price for all the products.
The user can set the price on the following basis: –- Increase by Fixed Price: If selected, then the Enter Amount field appears.
- Increase by Fixed Percentage: If selected, then the Enter Percentage field appears.
Enter the numeric value to increase the price of the Tophatter product price by the entered value % of Magento price
For Example, Magento price + 5% of Magento price.
Magento Price = 100
Select Increase By Fixed Percentage option
Enter Percentage = 5
100 + 5% of 100 = 100 + 5 = 105
Thus, Tophatter Product Price = 105 - Decrease by Fixed Price: If selected, then the Enter Amount field appears.
- Decrease by Fixed Percentage: If selected, then the Enter Percentage field appears.
Enter the numeric value to decrease the price of the Tophatter product price by the entered value % of Magento price
For Example, Magento price – 5% of Magento price.
Magento Price = 100
Select Decrease By Fixed Percentage option
Enter Percentage = 5
100 – 5% of 100 = 100 – 5 = 95
Thus, Tophatter Product Price = 95
- Brand: Select attribute code for Brand of the product. Attribute type used is Text – 1 to 100 characters.
- Manufacturer: Select attribute code for Manufacturer of the product. Attribute type used is Text – 1 to 100 characters.
- Shipping Weight Pounds: Select the required attribute code for Shipping Weight Pounds. Attribute type used is Numeric. Map Shipping weight information with Magento attribute. Value must be >= 0.01
- Click the Save Config button.
×


