
Spartoo Configuration Settings
Once the extension is successfully installed on the Merchant’s store, Spartoo tab appears in the Magento Admin Panel. The merchant has to fill in the API credentials on the Spartoo Configuration page of the admin panel.
The user has to log in the Spartoo Seller account to obtain the following API credentials:
- Spartoo Consumer Id
After obtaining Consumer Id, the merchant has to copy it from the Spartoo Seller account and paste it to the Configuration page of the admin panel of the seller.
To Copy the Configuration Settings from the Spartoo Seller account
- Open the Spartoo Seller account.
- Go to the Information option from the left side of the screen.
The screen appears as shown in the following figure:
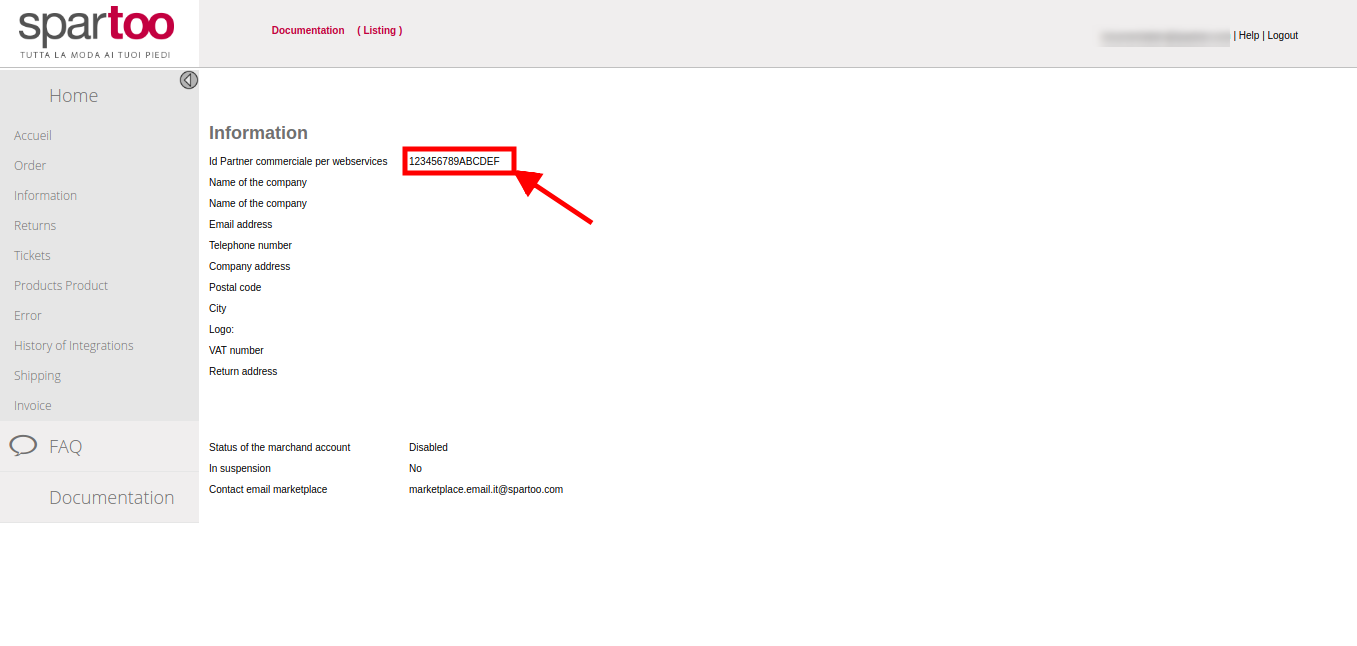 Copy the Consumer Id, as shown in the Rectangular Box
To update the Spartoo Configuration Setting of the extension
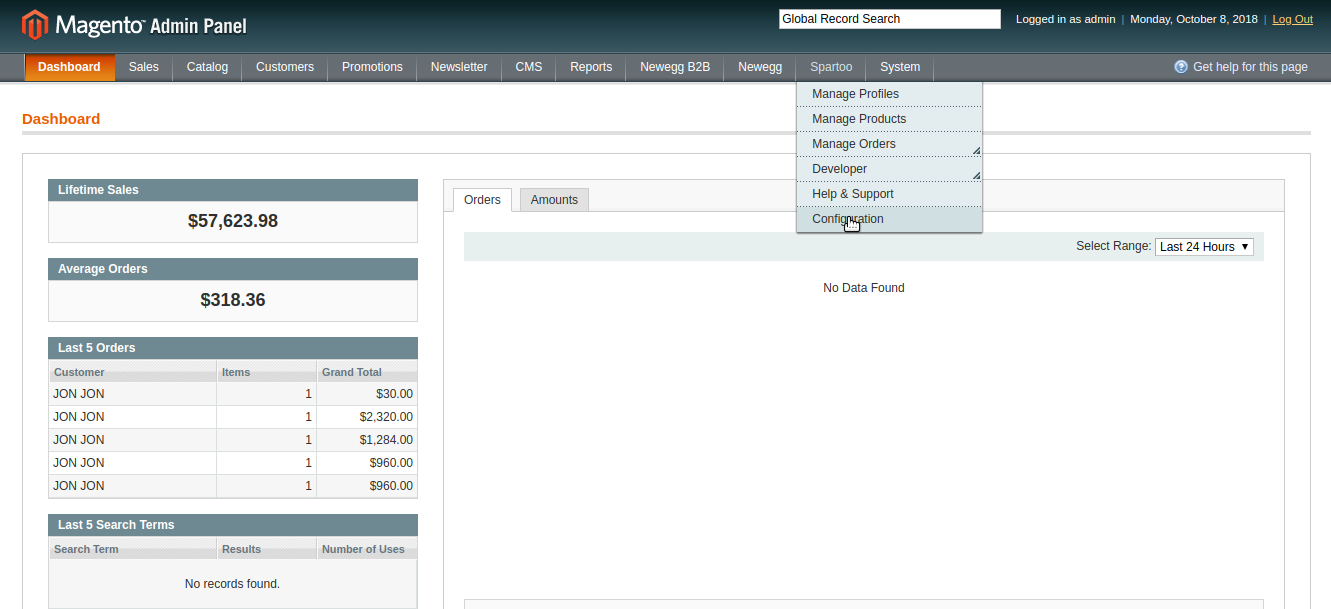
- Go to the Magento Admin panel.
- On the top navigation bar, click the Spartoo menu, and then click Configuration.
Refer to the following figure:
The Spartoo Configuration page appears as shown in the following figure:
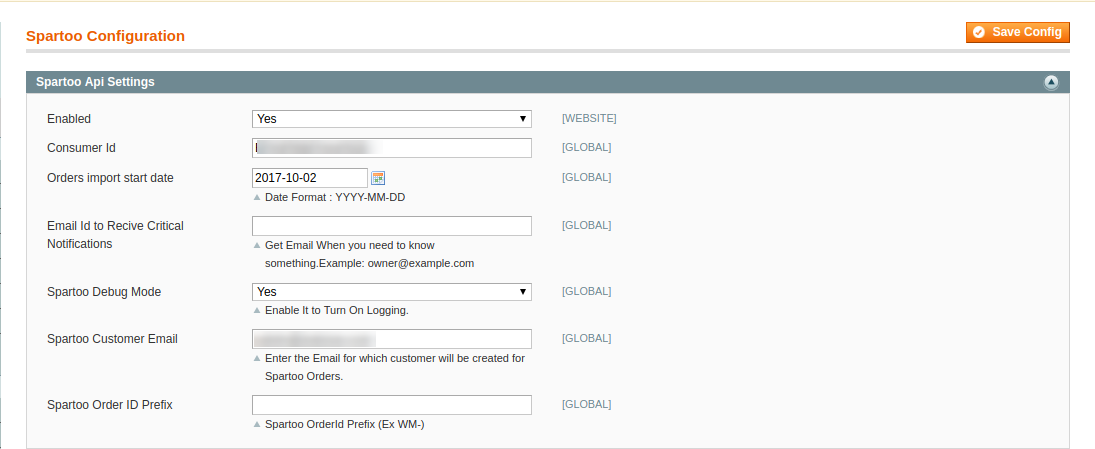
- Under Spartoo API Settings, do the following steps:
- In the Enabled list, select Yes.
Note : Selecting the No option hides all other fields of Spartoo API Settings. Thus, the user cannot set-up the API settings in the Magento store.
 - In the Consumer Id, Enter the details copied from the seller panel.
- In the Order import Start Date box, enter the date.
The date from which the user has started to fetch the order. - In the Email Id to Receive Critical Notifications enter your email Id to get the critical notifications from Marketplace on your e-mail.
- In the Spartoo Debug Mode
- Select Yes to recognize the error
- Select No to disable the Debug Mode
- In the Spartoo Customer Email, enter the default email Id to create a default customer if the customer details are not available
- In the Spartoo Order Id Prefix, Enter the prefix code the recognize the order of Spartoo. For Eg: SP
- In the Enabled list, select Yes.
Click the Spartoo Product Global Settings tab.
The Spartoo Product Sync Settings tab is expanded as shown in the following figure:
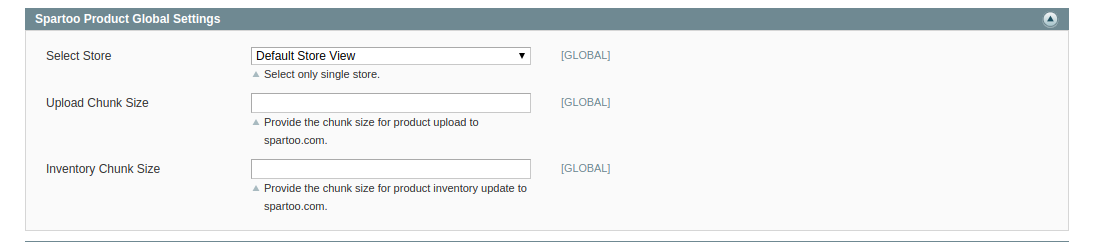
- In the Select Store, select your preferred store view where you want to display products.
- In the Upload Chunk Size, Enter the size of uploading products during the bulk uploading
- In the Inventory Chunk Size, Enter the size of the chunk, while updating the inventory with crons.
Spartoo Order Configuration.
The Spartoo Order Configuration is expanded as shown in the following figure:

- In the Create Order for Out of Stock Products.
- Select Yes, to create order if the product is out of stock in your Magento.
- Select No, to create a failed order, if the product is Out of Stock in your Magento.
- In the Create Order for Disabled Products.
- Select Yes, to create order if the product is Disabled in your Magento.
- Select No, to create a failed order, if the product is Disabled in your Magento.
The Spartoo Cron Settings is expanded as shown in the following figure:
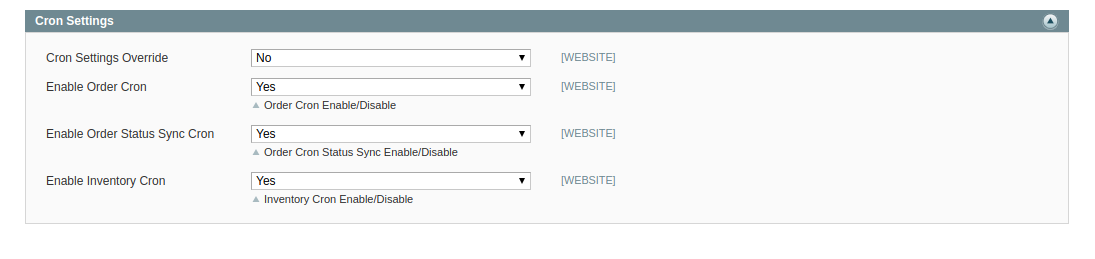
- In Cron Setting Override
- Select No, to use predefined time set for the cron.
- Select Yes, to set the custom time for the cron.
On selecting Yes, you will get the blank text box for each crons as shown in the figure. 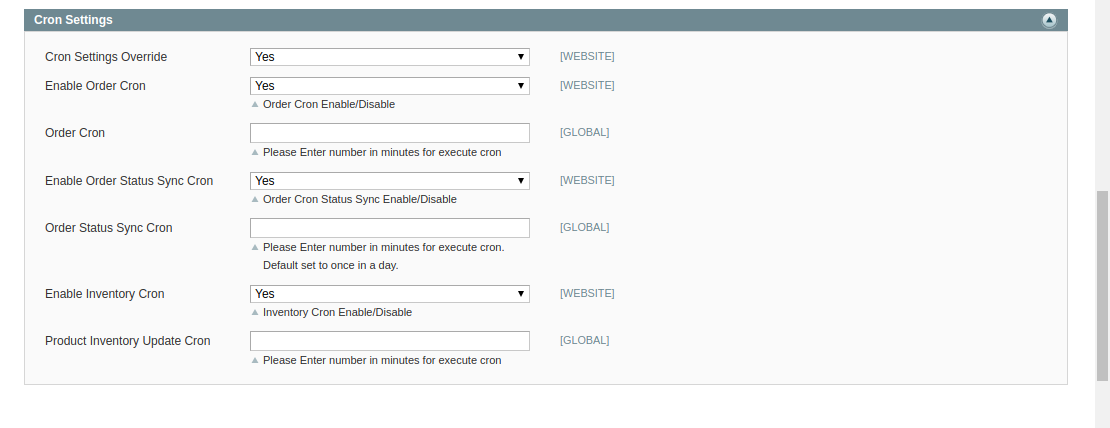
Fill the custom values in the particular text boxes to set the manual time for the crons.
- In the Enable Order Cron,
- Select Yes, to enable the cron
- Select No, to disable the cron.
- In the Order Status Sync Cron
- Select Yes, to sync the order status through cron
- Select No, to disable the order sync cron.
- In the Enable Inventory Cron,
- Select Yes, to enable the Inventory Cron
- Select No, to disable the Inventory Cron
Now click on the Save Config button to save the Configuration process.


