
Configuration Settings
Once the Extension of Shopify Integration for Magento is installed, the configuration needs to be done in order to proceed further.
To do the Configuration,
- Go to your Magento admin panel.
- On the top navigation bar, you can see Shopify which appears after the extension’s installation.
- Place the cursor on it and the menu appears as:

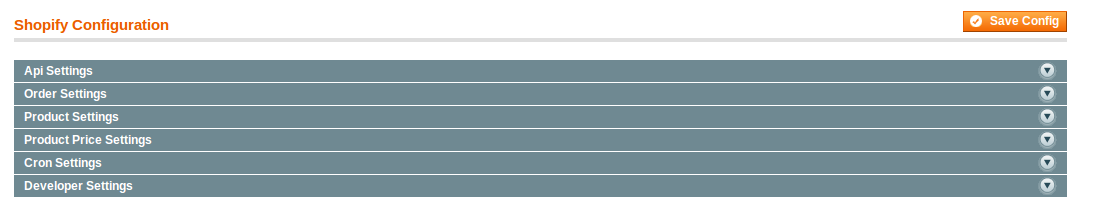
- Click Configuration from the menu and you will be navigated to the configuration page as shown below:
API Settings
- Click on API Settings and the section will expand as shown below:

- In Enabled, select Yes to enable the extension. On enabling it, the section further expands and appears as:
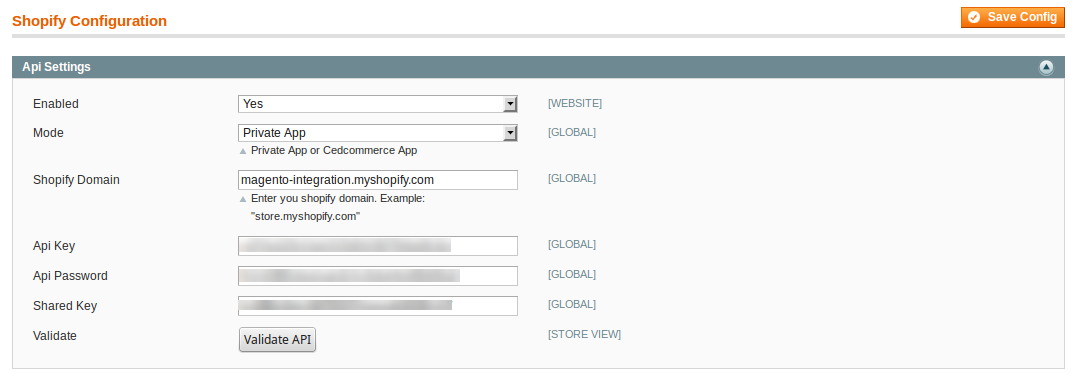
- In Mode, select between Private App or CedCommerce.
- In Shopify Domain, enter your Shopify Domain as has been shown in the example in image above.
- In the API Key, enter the API Key which you may get from your Shopify admin panel.
- In the API Password, enter the API Password which you may get from your Shopify admin panel.
- In the Shared Key, enter the Shared Key which you may get from your Shopify admin panel.
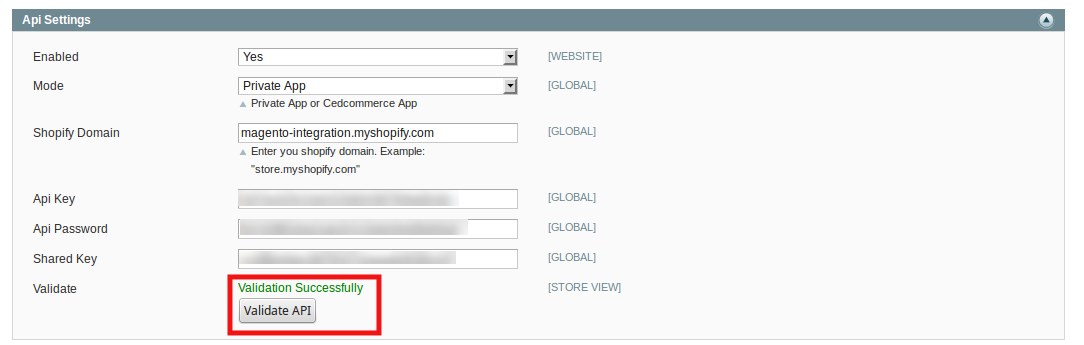
- Now click Validate API button for API Validation. A message would appear as shown below:
Order Settings
- Click on Order Settings and the section will expand as shown below:

- In Enable Import, select Enable and the section will get expanded as:
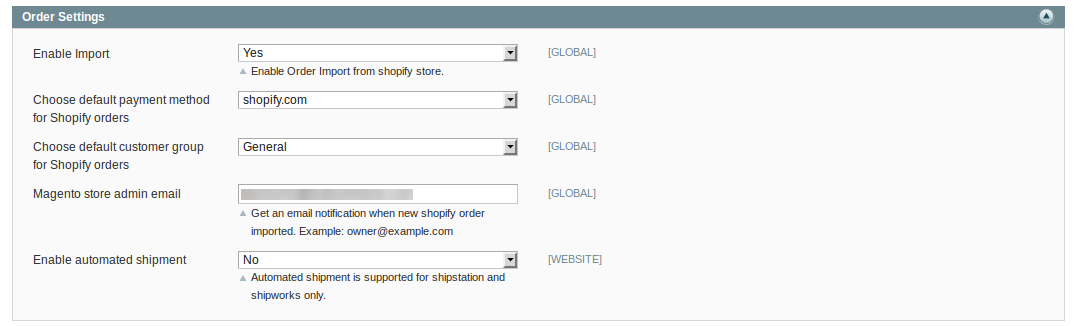
- In Choose default payment method for Shopify order, select the payment method for the orders placed for your products on Shopify.
- In Magento store admin email, enter the email id on which you want notifications to be sent when a new Shopify order is imported.
- In Enable automated shipment, select Yes if you want automated shipment to be processed which is supported for ShipStation and ShipWorks. If you don’t want automated shipment to be enabled, select No.
Product Settings
- Click Product Settings and the section expands as:

- In Select Store, select the store from which you want data to be sent to Shopify.
- In Profiling, select Yes if you want Profile-based product upload to be enabled. If you do not want it, select No.
Product Price Settings
- Click Product Price Settings and the section will be expanded as:

- In Shopify Product Price, you have the following options for price that you want to be sent to Shopify for your products.
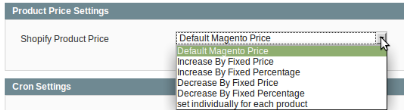
- Select Default Magento Price if you don’t want any difference in the price of your Magento products on Shopify.
- Increase By Fixed Price: By selecting it, you may increase the price of your Magento products on Shopify. On selecting it, a box appears as:

- Suppose in the box, you enter 50. Now if your product is for $100 on Magento, it will be available on Shopify for $150 as you have increased the product price by 50, by entering 50 in the corresponding box.
- Increase By Fixed Percentage: By selecting it, you may increase your Magento product’s price on Shopify by a certain percentage. On selecting it, a box appears as:

- Suppose in the box, you enter 50. Now if your product is for $100 on Magento, it will be available on Shopify for $150 as you have increased the product price by 50%, by entering 50 in the corresponding box. Since50% of 100 is 50, 50 will be added to 100.
- Decrease By Fixed Price: By selecting it, you may increase your Magento product’s price on Shopify by a certain percentage. On selecting it, a box appears as:

- Suppose in the box, you enter 50. Now if your product is for $100 on Magento, it will be available on Shopify for $50 as you have decreased the product price by 50, by entering 50 in the corresponding box.
- Decrease By Fixed Percentage: By selecting it, you may decrease your Magento product’s price on Shopify by a certain percentage.
- Suppose in the box, you enter 50. Now if your product is for $100 on Magento, it will be available on Shopify for $50 as you have decreased the product price by 50%, by entering 50 in the corresponding box. Since 50% of 100 is 50, 50 will be deducted from 100.
- Select individually for each product: You may set the price for products individually as well by selecting this option. On selecting it, the box appears as:

- In Map Attribute, select the attribute code from which the price would be fetched to be sent to Shopify from Magento.
Cron Settings
- Click on Cron Settings and the section will appear as:

- In Cron Settings Override, select Yes if you want to set cron setting according to your needs, and the section will expand further as:
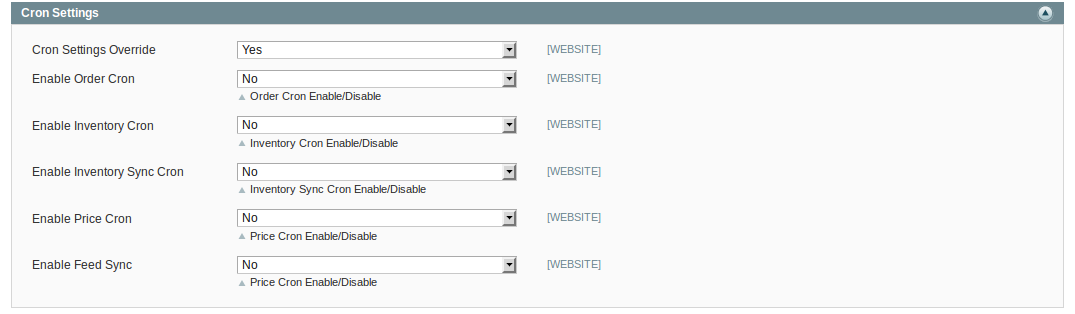
- In Enable Order Cron, select Yes if you want to enable the cron for orders to run, and the box will appear as:

- In order cron, enter the time in minutes after which the order cron will run, periodically.
- In Enable Inventory Cron, select Yes if you want to enable the cron for orders to run, and the box will appear as:

- In Product Inventory Update cron, enter the time in minutes after which the inventory cron will run, periodically.
- In Enable Inventory Sync Cron, select Yes if you want to enable the cron and the box will appear as:

- In All Product Inventory Sync, enter the time in minutes after which the all product inventory sync cron will run, periodically.
- In Enable Price Cron, select Yes if you want to enable the cron and the box will appear as:

- In Product Price Update Cron, enter the time in minutes after which the product price cron will run, periodically.
- In Enable Feed Sync, select Yes if you want to enable the feed syncing and the box will appear as:

- In Feed Sync Cron, enter the time in minutes after which the feed syncing cron will run, periodically.
Developer Settings
- Click on Developer Settings and the section will appear as:

- In Debug Mode, select Yes if you want to enable the Shopify debug mode for logging. Otherwise, select No.
- In Product Upload Chunk Size, enter the quantity of products that you want to be sent to Shopify in one batch.
- In Product Inventory Chunk Size, enter the number of inventory of products that you want to be sent to Shopify in one batch.
- In Product Price Chunk Size, enter the number of product price that you want to be sent to Shopify in one batch.
- In Category Sync Chunk Size, enter the number of categories that you want to be sent to Shopify in one batch.
Once you have completed the steps mentioned above, under all the sections, click on Save Config button. All your configuration will saved.
×


