
Sears Configuration Settings
Once the extension is successfully installed on the Merchant’s store, the Sears tab appears in the Magento Admin Panel. The merchant has to fill in the API credentials on the Sears Configuration page of the admin panel.
The user has to log in the Sears Seller account to obtain the following API credentials:
- Seller ID
- API Authorization Key
- Fulfillment Locations
After obtaining the details, the merchant has to copy all of them one by one from the Sears Seller account and paste it one by one to the Sears Configuration page of the admin panel of the merchant.
To follow the process of copying and pasting of the Id, key and fulfillment location details, open the Sears Seller account and the Magento Admin Panel in two different tabs or windows of the browser. Thus, copy the details from the Sears Seller account and paste them one by one to the Magento Admin Panel.
To copy the Id, key and fulfillment location details from the Seller panel
- Go to the Sears Seller panel.
- In the right upper corner, click the Arrow icon next to the account holder’s name.
The menu appears as shown in the following figure:
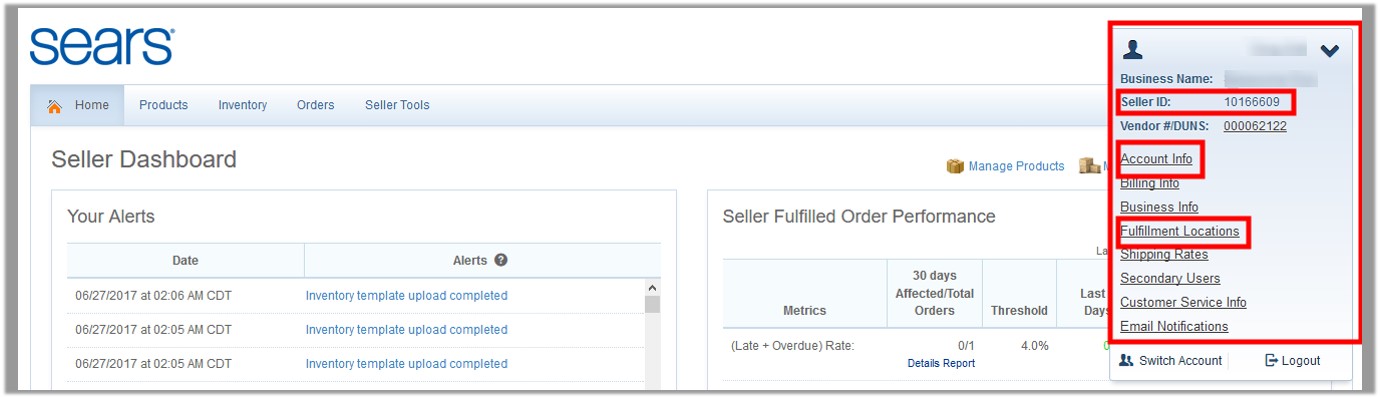
- Copy the Seller ID value, and then paste it in the Seller ID box appearing on the Sears Configuration page of the Magento Admin panel.
- Click the Account Info link, and then scroll down to find the API Authorization Key section.
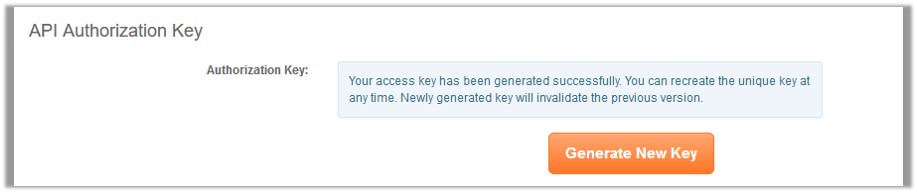
- Click the Generate New Key button.
The key is generated. - Copy the generated key and then paste it in the Authorization Key box appearing on the Sears Configuration page of the Magento Admin panel.
- Click the Fulfillment Locations link.
The page appears as shown in the following figure:

- Copy the Fulfillment Locations value and then paste it in the Fulfillment Locations Id box appearing on the Sears Configuration page of the Magento Admin panel.
To set up the configuration settings in the Magento Admin panel
- Go to the Magento Admin panel.
- On the top navigation bar, click the Sears menu, and then click Configuration.
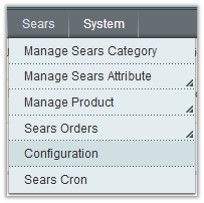
The Sears Configuration page appears as shown in the following figure:
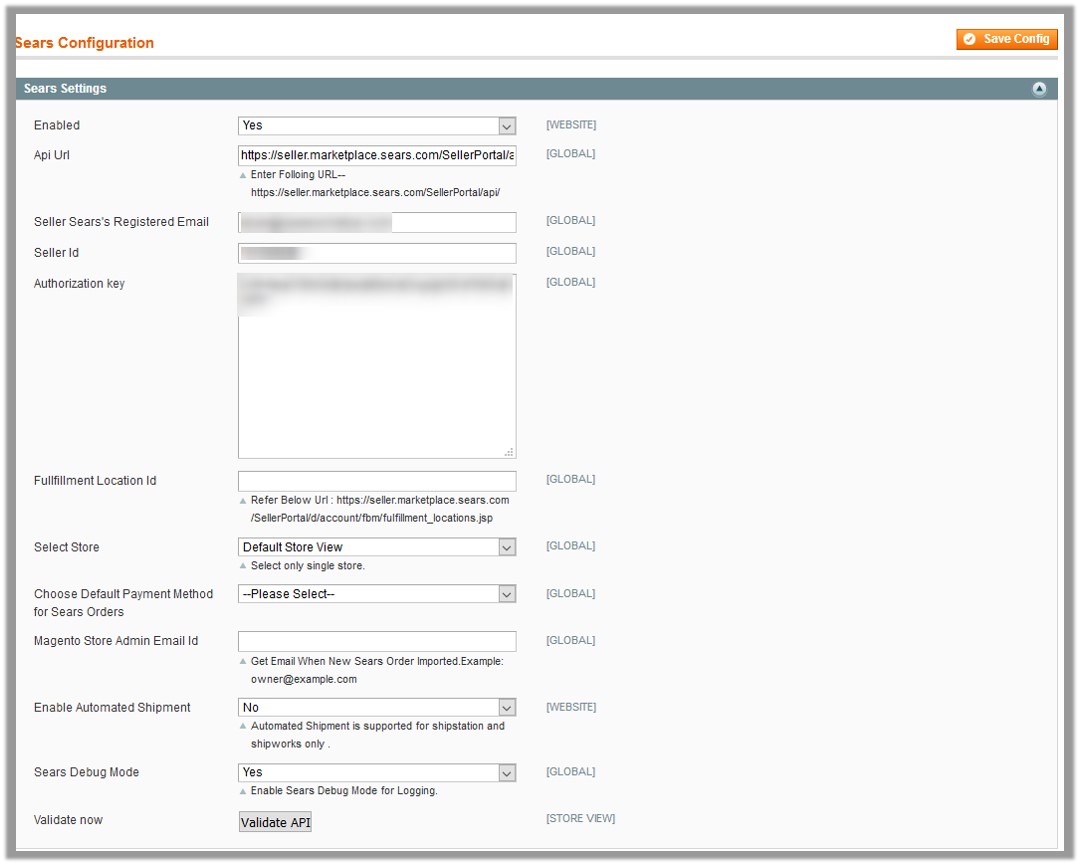
- Under Sears Settings, do the following steps:
- In the Enabled list, select Yes.
Note : Selecting the No option disables the Sears Integration extension. - In the API Url box, enter https://seller.marketplace.sears.com/SellerPortal/api/
- In the Seller Sears’s Registered Email box, enter the email id of the seller account.
- In the Seller Id box, paste the corresponding Id copied from the Sears Seller account.
- In the Authorization Key box, paste the corresponding key copied from the Sears Seller account.
- In the Fulfillment Locations box, paste the corresponding value copied from the Sears Seller account.
- In the Select Store list, select the single store.
- In the Choose Default Payment Method for Sears Orders list, select the required payment method.
- In the Magento Store Admin Email Id box, enter the email id.
- In the Enable Automated Shipment list, select Yes to enable the automated shippment.
Note: Automated Shipment is supported for shipstation and shipworks only . - In the Sears Debug Mode list, select Yes to enable Sears Debug Mode for logging.
- Click the Validate API button.
If the entered values are valid then the success message appears, and if they are not valid then an error message appears.
- In the Enabled list, select Yes.
- Scroll down to the Sears Product Settings tab, and click the tab to exapnd it.
The tab is expanded as shown in the following figure:
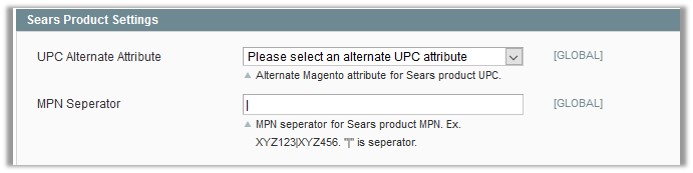
- Under Sears Product Settings, do the following steps:
- In the UPC Alternate Attribute list, select the required alternate attribute.
Alternate Magento attribute for the Sears product UPC(Universal Product Code). - In the MPN Separator box, enter a separator.
MPN Separator such as “|“.
- In the UPC Alternate Attribute list, select the required alternate attribute.
- Scroll down to the Sears Product Advanced Price Settings tab, and click the tab to exapnd it..
The tab is expanded as shown in the following figure:
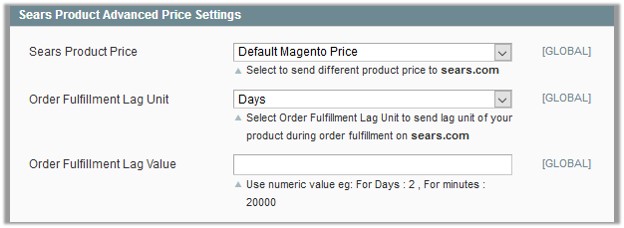
- Under Sears Product Advanced Price Settings, enter the values in the corresponding fields.
- Sears Product Price: This is to set a different price for all the products as shown in the following figure:
User can set the price on the following basis: –- Increase by Fixed Price: If selected, then the Enter Amount field appears.
- Increase by Fixed Percentage: If selected, then the Enter Percentage field appears.
Enter the numeric value to increase the price of the sears product price by the entered value % of Magento price
For Example: Magento price + 5% of Magento price.
Magento Price = 100
Select Increase By Fixed Percentage option
Enter Percentage = 5
100 + 5% of 100 = 100 + 5 = 105
Thus, Sears Product Price = 105 - Decrease by Fixed Price: If selected, then the Enter Amount field appears.
- Decrease by Fixed Percentage: If selected, then the Enter Percentage field appears.
Enter the numeric value to decrease the price of the sears product price by the entered value % of Magento price
For Example: Magento price – 5% of Magento price.
Magento Price = 100
Select Decrease By Fixed Percentage option
Enter Percentage = 5
100 – 5% of 100 = 100 – 5 = 95
Thus, Sears Product Price = 95
- Order Fullfillment Lag Unit: Select Order Fulfillment Lag Unit to send lag unit of your product during order fulfillment on sears.com
- Order Fullfillment Lag Value: Enter the numeric value for the fulfillment lag time in number of days or in minutes as required.
- Sears Product Price: This is to set a different price for all the products as shown in the following figure:
- Scroll down to the Cron Settings tab, and click the tab to expand it.
The Cron Settings tab is expanded as shown in the following figure:
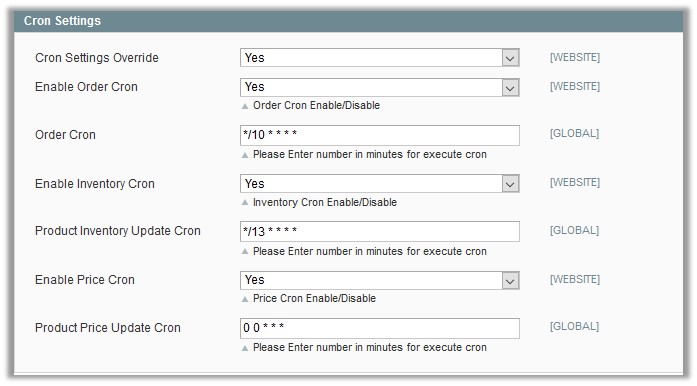
- Under Cron Settings, do the following steps:
- In the Cron Settings list, select Yes to enable the cron settings.
Note: Only when the admin selects Yes, the other fields appear. - In the Enable Order Cron list, select Yes to enable the order cron.
The Order Cron field appears.- In the Order Cron box, enter the required value.
- In the Enable Inventory Cron list, select Yes to enable the order cron.
The Product Inventory Update Cron field appears.- In the Product Inventory Update Cron box, enter the required value.
- In the Enable Price Cron list, select Yes to enable the order cron.
The Product Price Update Cron field appears.- In the Product Price Update Cron box, enter the required value.
- In the Cron Settings list, select Yes to enable the cron settings.
- Click the Save Config button.


