
Privalia Configuration Setting
After obtaining the API credentials from the Privalia Seller account, the Magento store owner has to paste them in the respective fields displayed on the Privalia Configuration page of the admin panel.
To set up the configuration settings in the Magento Admin panel
- Go to the Magento Admin panel.
- On the top navigation bar, point to the Privalia menu.
The menu appears as shown in the following figure: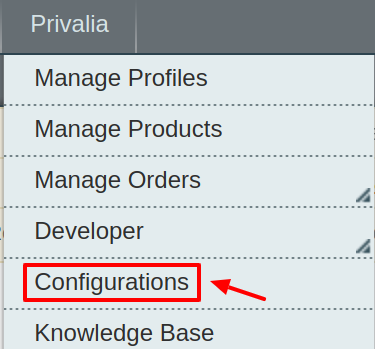
Click Configuration.
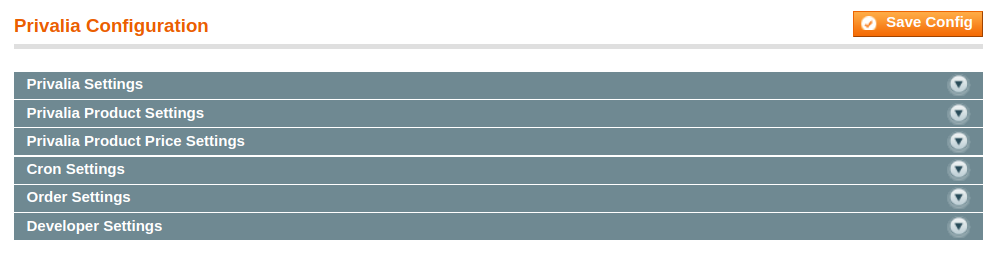
The Privalia Configuration page appears as shown in the following figure:
Click the Privalia Settings tab.
The tab is expanded and the relevant field appears under the Privalia Settings section.
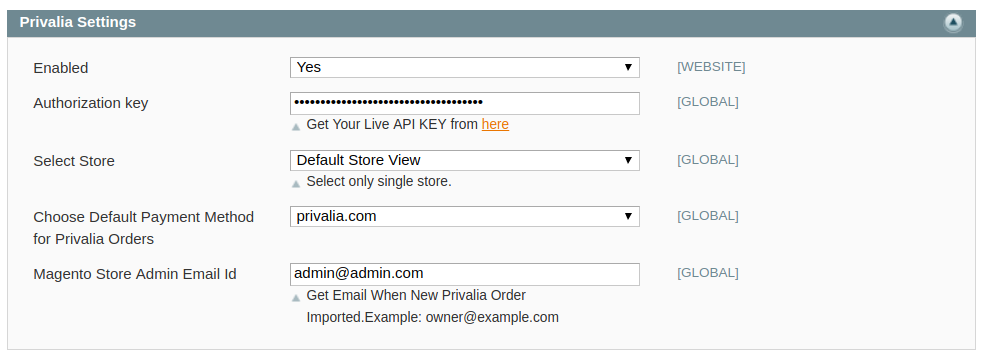
Under Privalia Settings, do the following steps:
- In the Enabled list, select Yes to enable the extension features.
- In the Authorisation key, enter the key that you are provided by Privalia once you register yourself with its seller panel.
- In the Select Store, choose the store from where you want your products to be integrated into Privalia marketplace.
- In the Choose Default Payment Method for Privalia Orders list, select Privalia.com.
- In the Magento Store Admin Email Id box, enter the email Id on which you want to receive a mail whenever an order is placed for your product, on Privalia.
- Click on Save Config to save the details that you have entered.
Click the Privalia Product Settings tab.
The tab is expanded and the relevant fields appear under the Privalia Product Settings section as shown in the following figure:
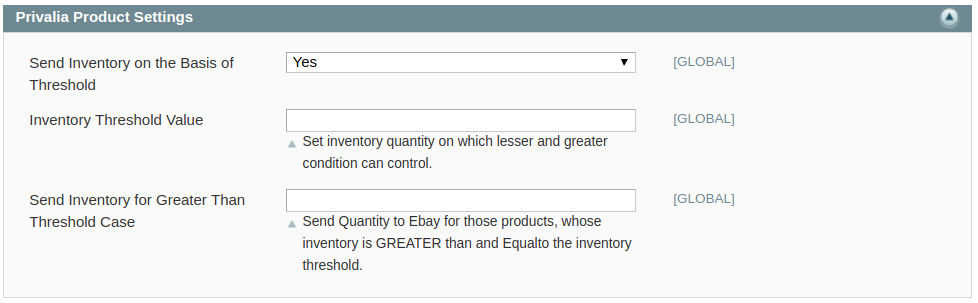
- Under Privalia Product Settings, do the following steps:
- In the Send Inventory on the Basis of Threshold, select Yes and additional menus appear.
- In the Inventory Threshold Value users can Set inventory quantity on which lesser and greater condition can control
- In the Send Inventory Greater than Threshold, users can Send Quantity to Privalia for those products, whose inventory is GREATER than and Equal to the inventory threshold.
Next, click on Privalia Product Price Settings and you’ll come across the following:
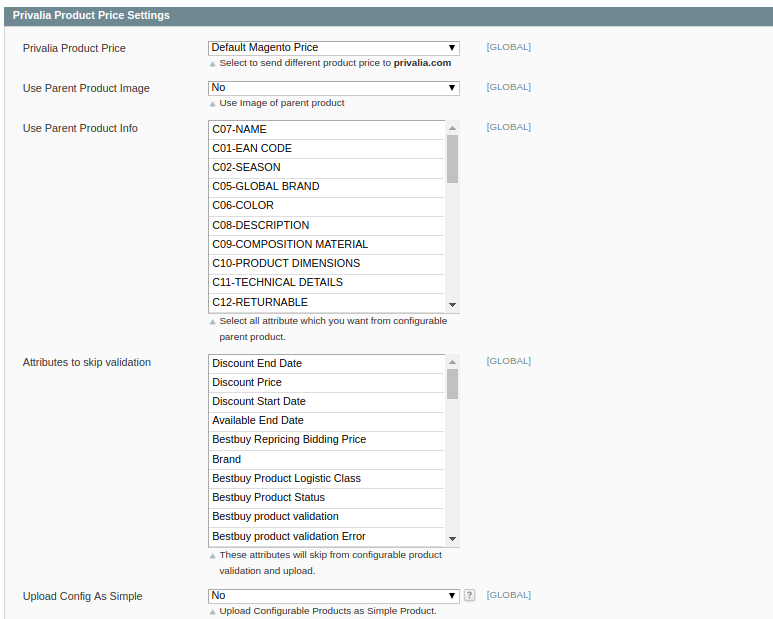
From the drop down menu here, you may come across many options that are discussed below:
- Increase by Fixed Price:
You can Enter the Amount in the field below.
If you enter a particular amount here, your product will be featured on Privalia by adding that amount to the amount of your product on your own store. For example, if you enter 10 here and your product on Magento is for 100, your product will be featured on Privalia with the price of 110.
- Increase by Fixed Percentage: If selected, then the Enter Percentage field appears below
Enter the numeric value to increase the price of the Privalia product price by the entered value % of Magento price
For Example: Magento price + 5% of Magento price.
Magento Price = 100
Select Increase By Fixed Percentage option
Enter Percentage = 5
100 + 5% of 100 = 100 + 5 = 105
Thus, Privalia Product Price = 105
- Decrease by Fixed Price: If selected, then the Enter Amount field appears below.
If you enter a particular amount here, your product will be featured on Privalia by decreasing that amount from the amount of your product on your own store. For example, if you enter 10 here and your product on Magento is for 100, your product will be featured on Privalia with the price of 90.
- Decrease by Fixed Percentage: If selected, then the Enter Percentage field appears below.
Enter the numeric value to decrease the price of the Privalia product price by the entered value % of Magento price
For Example: Magento price – 5% of Magento price.
Magento Price = 100
Select Decrease By Fixed Percentage option
Enter Percentage = 5
100 – 5% of 100 = 100 – 5 = 95
Thus, Privalia Product Price = 95
- By selecting Yes in Use Parent Product Image, the final image that is uploaded on the Privalia website will be the image of the parent product. In case you choose No, then all the individual images are uploaded.
- Use Parent Product Info, choose all the attributes you wish to include from the parent product.
- In the Attribute to skip validation, you can select all those attributes which you wish to skip from configurable product upload.
- In Upload config as simple, admins can upload the product as simple products.
Click Cron Settings tab to view the following fields.

- Select if you want to enable/disable the cron for orders/ order sync/inventory/feed/feed sync and enter the desired values for the respective cron’s execution.
- Click Save Config to save the entered details.
Click the Order Settings now and appears as below:
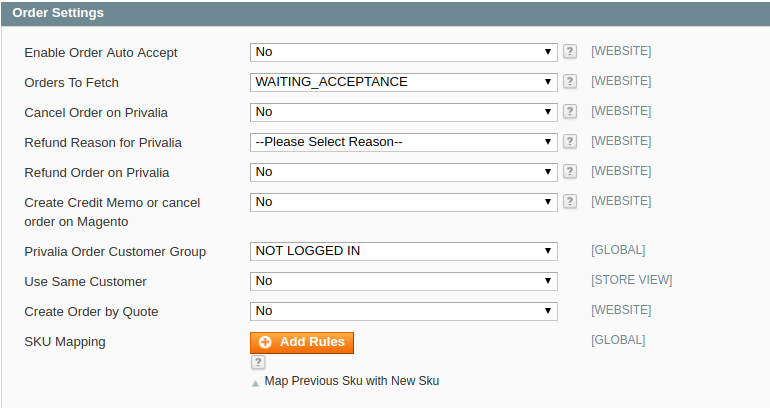
- Here, you may enable the auto acceptance or rejection of an order placed for your product on the Privalia marketplace by clicking either Yes or No.
- In the Orders to Fetch, you can select the desired source from which the orders need to be fetched.
- In the cancel order on Privalia, Choose Yes or No from the drop-down menu.
By choosing No, the cancel request will not be sent to Privalia and vice versa.
In case you wish to cancel an order on Magento as well as on Privalia then choose Yes to automatically cancel the order on Privalia. - In the refund order on Privalia, Choose Yes or No from the drop-down menu.
By choosing No the refund request will not be forwarded to Privalia.
In case you wish to refund order on Magento as well as on Privalia then choose Yes to automatically refund the order on Privalia. - In Refund Reason for Privalia, select the reason for a refund.
- In Privalia Order Customer Group, select a group in which your customers who order your products on Privalia will be listed.
- If you don’t wish to create a new customer for every order then in Use same customer, select Yes and specify the email id of the customer.
- Select Yes in create order by quote if you want to apply Magento taxes in Privalia orders.
- In SKU Mapping section, admins can add a rule as shown below:
- in case an old sku is deleted or changed then you can map the new sku with the previous one here.

- Save the configuration now by clicking on Save Config button on the top right of page.
Now click on the Developer Settings tab and it will be expanded as:
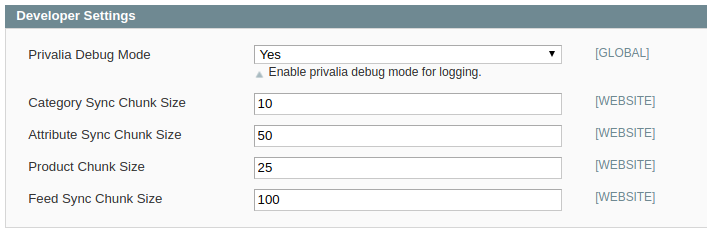
- In Privalia Debug Mode click on Enable/Disable depending on whether you want to log the data or not.
- In Category Sync Chunk Size enter the value which would be the number of categories to be synced in one batch.
- In Attribute Sync Chunk Size enter the value which would be the number of attributes to be synced in one batch.
- In Product Chunk Size enter the value which would be the number of products in one batch.
- In Feed Sync Chunk Size enter the value which would be the number of feeds to be synced in one batch.
- Click on Save Config to save the entered details.


