
OnBuy Configuration Settings
After installing the extension, you need to move to the configuration settings.
To set up the configuration settings in the Magento Admin panel
- Go to the Magento Admin panel.
- On the top navigation bar, point to the OnBuy menu.
The menu appears as shown in the following figure:
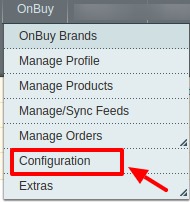
- Click Configuration.
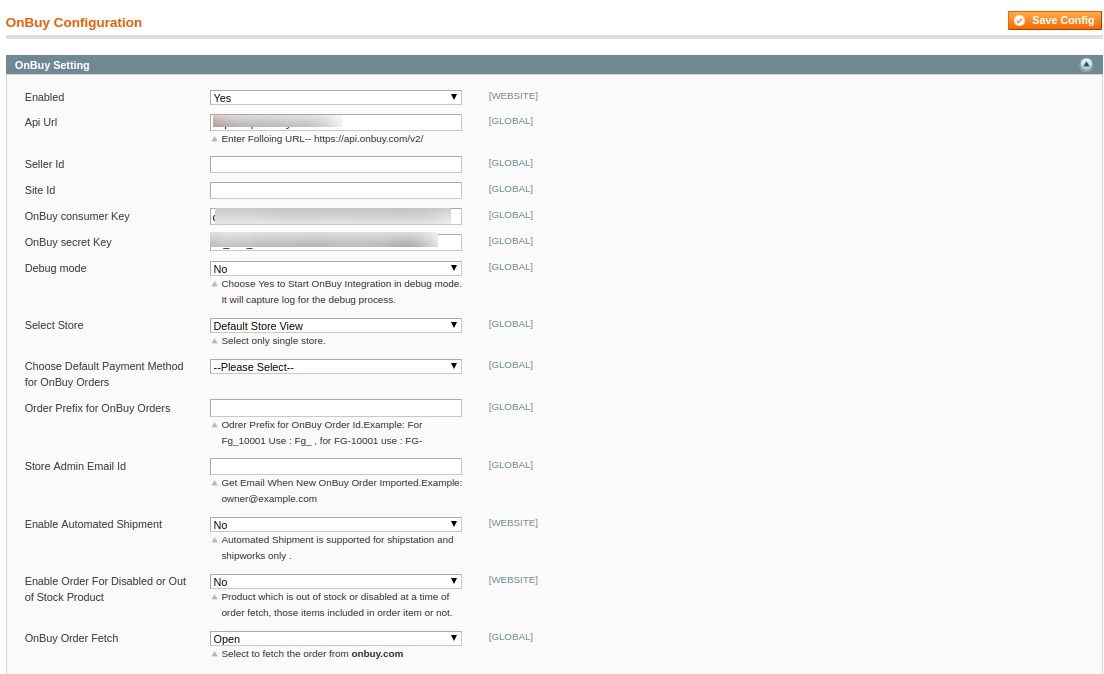
The OnBuy Configuration page appears as shown in the following figure:

- Click the OnBuy Settings tab.
The tab is expanded and the relevant field appears under the OnBuy Settings section.
- To retrieve the API details, you need to login to your OnBuy Seller Panel.
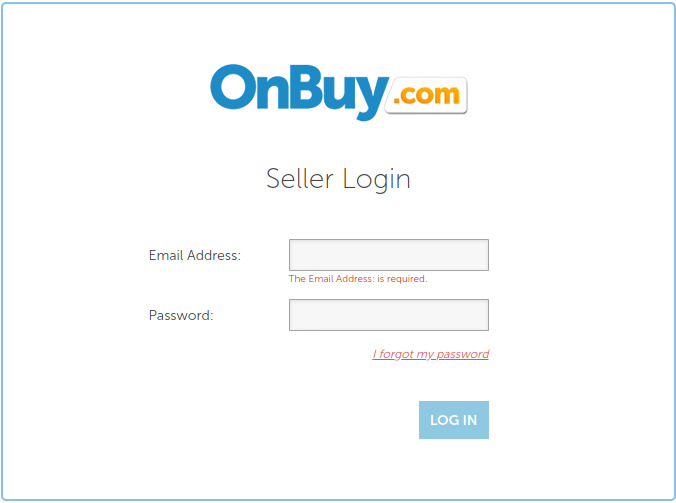
- Enter your seller credentials and login. You’ll be redirected to the OnBuy seller homepage.
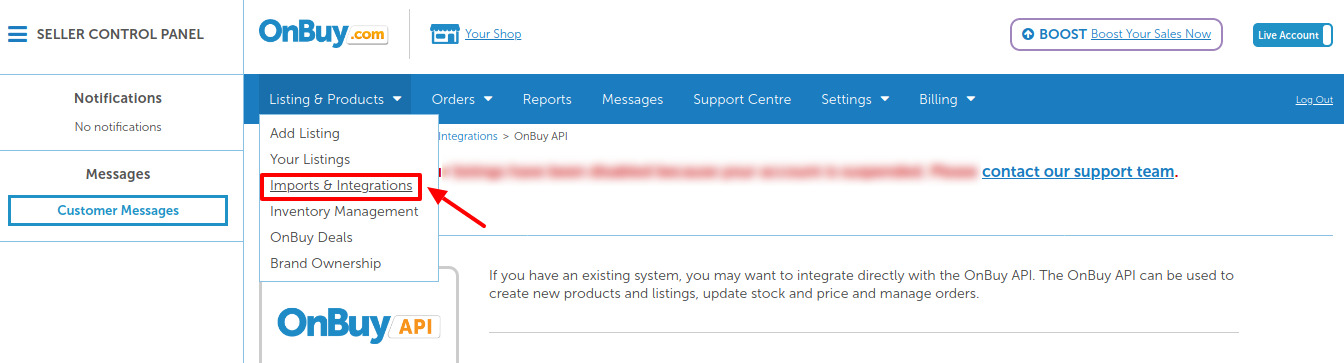
- Click on Imports & Integration under Listings & Products.
The page appears as: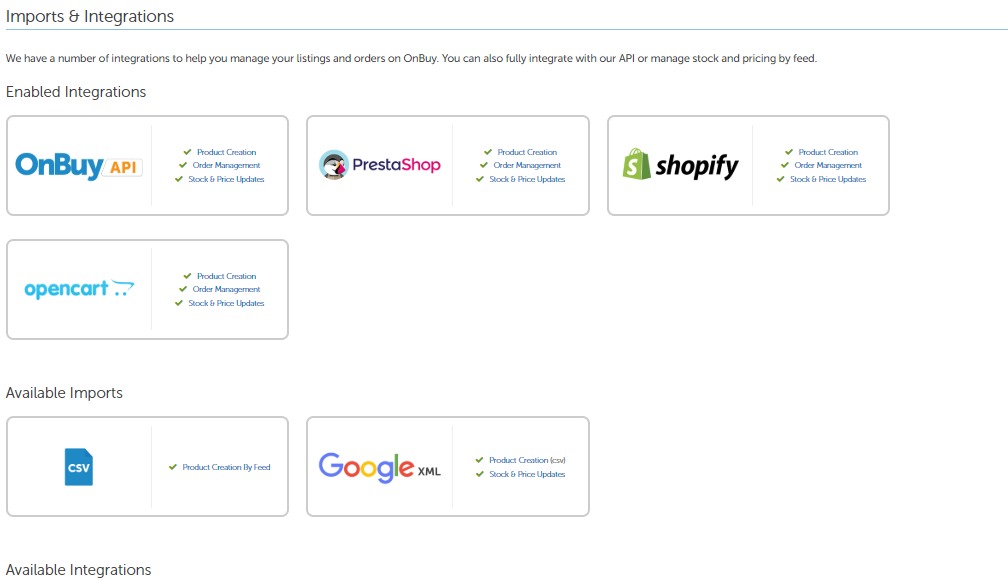
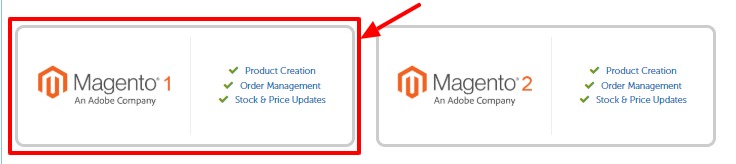
- Now to Enable Magento 1 Integration, under Available Integrations click on Magento 1 Integration.
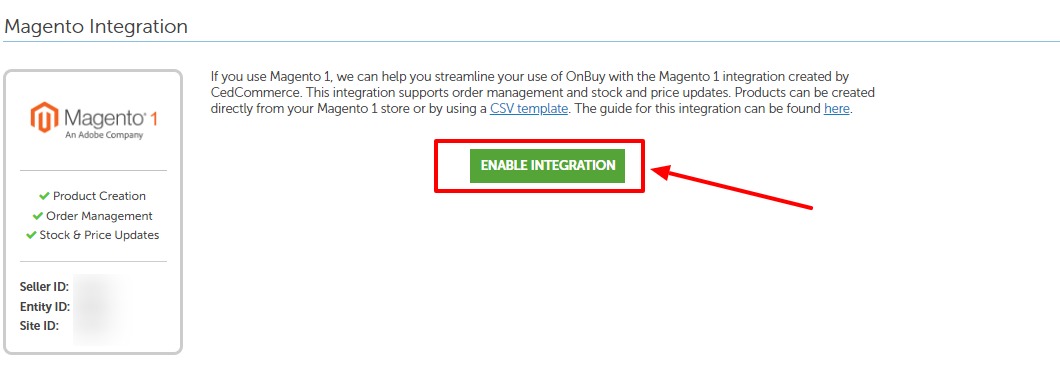
- After clicking on Magento 1 Integration, you will be redirected to the page as shown below, where you need to click on Enable Integration button for enabling the extension.
- Once the extension is enabled it will be shown in the list of Enabled Extensions.
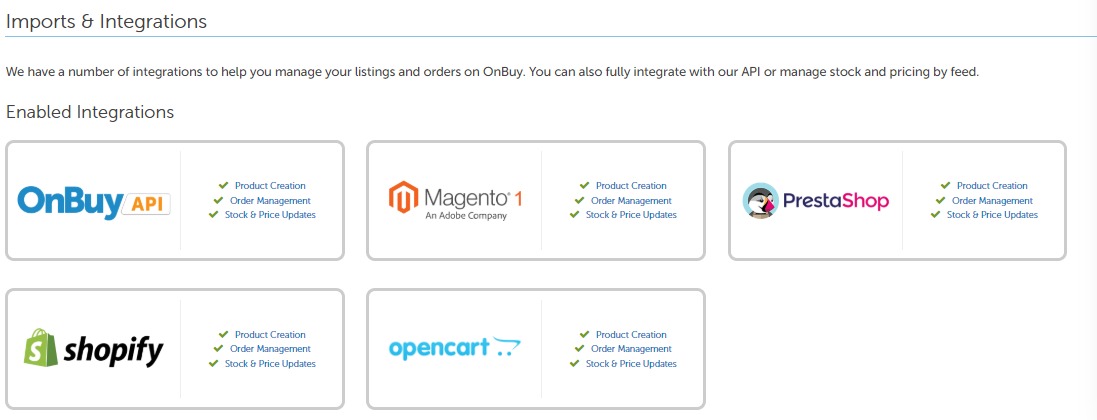
- Then under enabled extension click on Magento 1 integration.
You’ll be redirected to a new page as shown below:
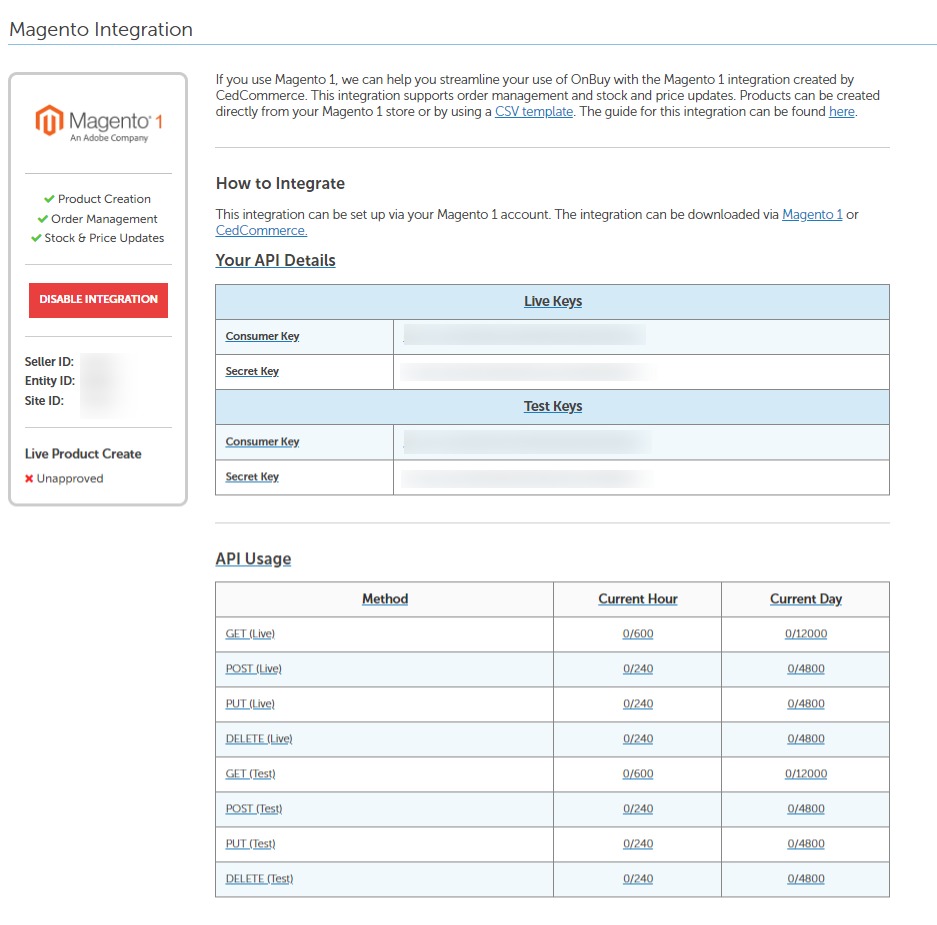
- Retrieve all the necessary details from here.
Now move back to your Magento Seller Panel and Under OnBuy Settings, do the following steps:
- In the Enabled list, select Yes to enable the extension features.
- In the API Url enter the Following URL- https://api.onbuy.com/v2/
- In the Consumer key, enter the key that you are provided by OnBuy once you register yourself with its seller panel.
- Enter the OnBuy Secret Key enter in the next column.
- Choose Yes in the Debug Mode. By doing so the extension will start capturing the log for the debug process.
- In the Select Store, choose the store from where you want your products to be integrated into OnBuy marketplace.
- In the Choose Default Payment Method for OnBuy Orders list, select OnBuy.com.
- In the Order Prefix for OnBuy Orders select the Order Prefix for OnBuy Order Id. This is for your own recognization. For example, you can use the prefix “ON” in front of the order id. The product can be identified as ON154832.
- In the Store Admin Email Id box, enter the email Id on which you want to receive a mail whenever an order is placed for your product, on OnBuy.
- Through this extension, sellers can Enable Automated Shipment which is supported for Shipstation and Shipworks by selecting Yes.
- In Enable Order For Disabled or Out of Stock Product, choose Yes if you wish to sell the items which are out of stock or disabled at a time of order fetch.
- Click on Save Config to save the details that you have entered.
Now move on to the Cron settings by clicking on the tab to view the following fields.

- In Cron Chunk Size enter the chunk size for the cron jobs to sync product on OnBuy.com
- Click on Save Config to save the entered details.
Now move to Product edit settings. Click and the section expands as shown:

- In the
- In the Auto Sync With OnBuy option, choose yes if you want to automatically sync the inventory and price at regular intervals
- Choose Yes if you want to Show Upload Button on the product edit page.
- In the next section, Choose Yes if you want to send parent product’s name during configurable products upload.
- Now, choose Yes if you want to send parent product’s price during configurable products upload.
- Same goes for the rest, Choose Yes if you want to send parent product’s price, image and description during configurable products upload.
- You can Choose whether child product needs to be archived on OnBuy.com once it’s parent config product is disabled or deleted by selecting Yes or No in the section.
Now move on to OnBuy Required Fields Mapping With Magento Attributes. The section opens up as:
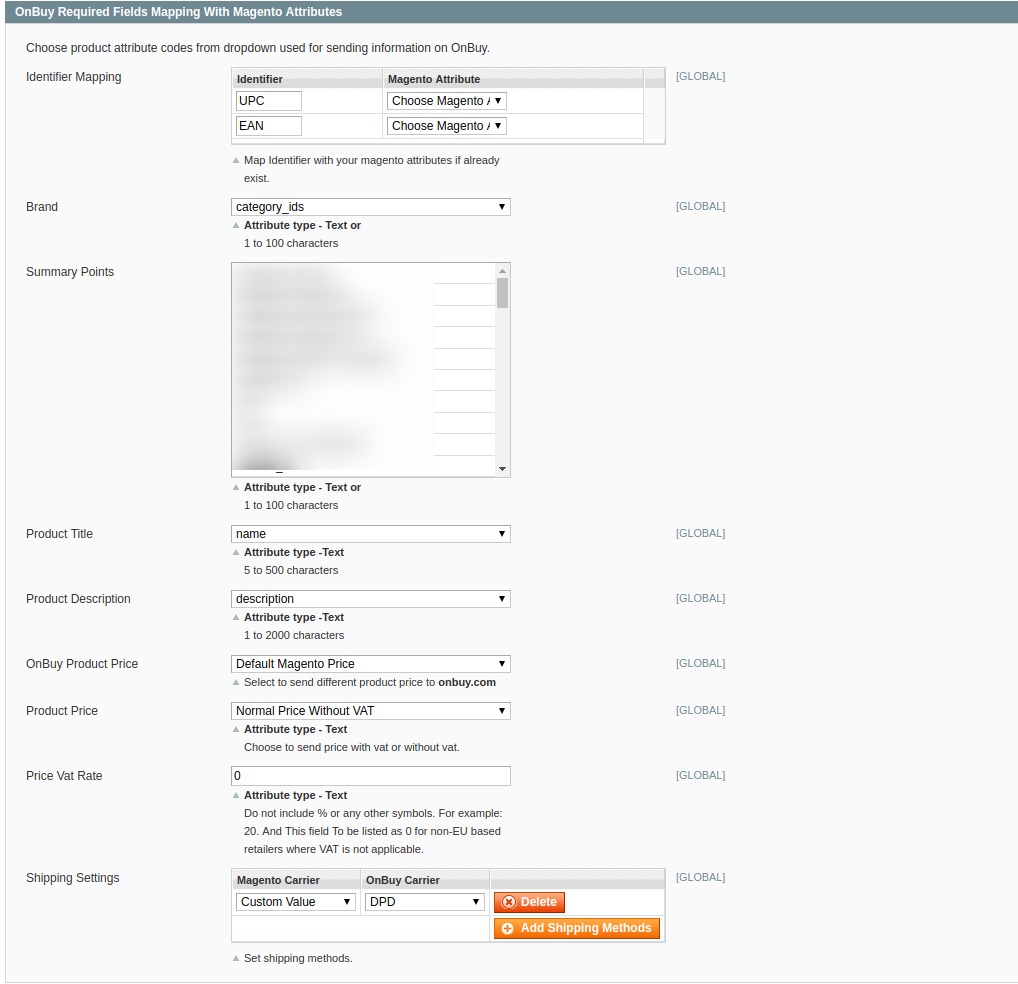
- In the Identifier Mapping section, Perform the identifier settings with the desired product attribute codes from the dropdown list.
- In the Brand, select the attribute type brand from the dropdown list.
- In the Summary Points, select the points from the list to send to OnBuy.
- In the Product Title, map the title of the product from the dropdown list.
- In the Product description, map the description of the product from dropdown list.
- In OnBuy Product Price, you may select the price option from the dropdown list.
- Default Magento Price: If this option is selected, the price for which your product will be available on OnBuy will be the same as the price of your product on Magento store.
- Increase By Fixed Price: You may select this option if you want your product price to be increased on Onbuy as compared to your Magento store.
- By choosing this option, you may enter the amount in the Enter Amount box by which you want your product price to be increased on OnBuy as compared to your Magento store. Suppose if you enter 50 in this field and your product is for 100 on your Magento store, then the amount that your product will be available for on OnBuy would be 150 (as the amount entered is 50 for Increase by fixed amount, so the price entered would be added to the price for which product is available on Magento store).
- Increase By Fixed Percentage: You may use this option if you want the price of your Magento product to be increased on OnBuy by a certain percentage. By choosing this option, you may enter the Enter Amount box the percentage amount by which you want your product price to be increased on OnBuy as compared to your Magento store. Suppose if you enter 20 in this field and your product is for 100 on your Magento store, then the amount that your product will be available for on OnBuy would be 120 (as 20% of 100 is 20 which gets added to 100).
- Decrease By Fixed Price- You may use this option if you want the price of your Magento product to be decreased on OnBuy. By choosing this option, you may enter the Enter Amount box the amount by which you want your product price to be decreased on OnBuy as compared to your Magento store. Suppose if you enter 50 in this field and your product is for 100 on your Magento store, then the amount that your product will be available for on OnBuy would be 50 (as the amount entered is 50 for Decrease by fixed amount, so the price entered would be subtracted from the price for which the product is available on Magento store).
- Decrease By Fixed Percentage- You may use this option if you want the price of your Magento product to be decreased on OnBuy by a certain percent. By choosing this option, you may enter the Enter Amount box the percentage amount by which you want your product price to be decreased on OnBuy as compared to your Magento store. Suppose if you enter 20 in this field and your product is for 100 on your Magento store, then the amount that your product will be available for on OnBuy would be 80 (as 20% of 100 is 20 which gets subtracted from 100).
- In the Product Price, you can map with the price attribute.
- In Price Vat Rate, enter the Vat rate you wish to apply to the product.
- In Shipping settings, Magento carriers are mapped with OnBuy carriers. You can add the shipping Methods by clicking on the button.
Now move on to OnBuy Recommended Fields Mapping With Magento Attributes. The section opens up as:
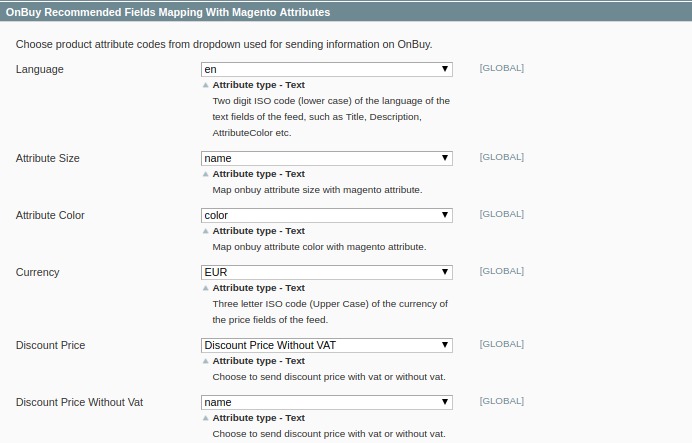
- In the Language option, select the language code.
- In the Attribute Size, map the OnBuy attribute size with the Magento attribute.
- In Attribute Color, map OnBuy attribute color with Magento Attribute.
- In the Currency option, select the currency for the product price.
- In Discount Price, select the price to be sent with VAT.
- In Discount Price Without Vat, select if you want to send a discount price without Vat.
Now move on to OnBuy Optional Fields Mapping With Magento Attributes. The section opens up as:
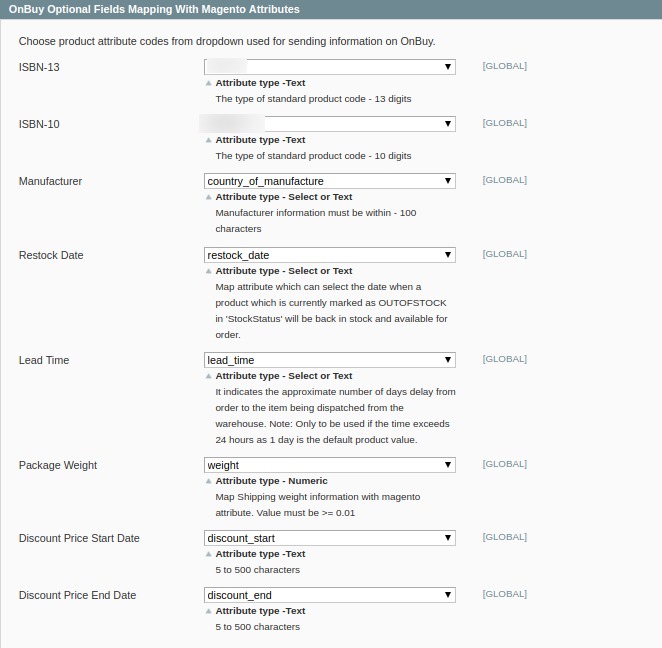
- In ISBN-13, select the type of product code of 13 digits.
- In ISBN-10, select the type of product code of 10 digits.
- In the Manufacturer, select the manufacturer information.
- In Restock Date, select the date when you want the out of stock products to be stocked and available.
- In Lead Time, select the approximate number of days delay for the order to be dispatched.
- In Package Weight, map shipping weight information with the Magento attribute.
- In Discount Price Start date, select the date on which discount starts.
- In Discount Price End Date, select the date on which discount ends.
×


