- Overview
- Google Express Integration Installation for Magento
- Getting the Google Express API Credentials
- Configure your Merchant Account
- Google Express Magento Configuration settings
- Manage Google Express account
- Manage Google Express Profiles
- Manage Product
- Google Express Orders
- Developer
- Google Express Knowledge Base
- Google Express Help & Support

5.Google Express Magento Configuration settings ↑ Back to Top
To complete the Configuration Settings, do the following:
- Go to the Magento Admin panel.
- On the top navigation bar, point to the Google Express menu, and then click Configuration.
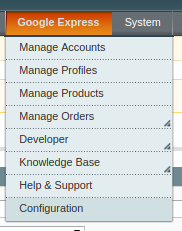 The Google Express Configuration page appears as shown in the following figure:
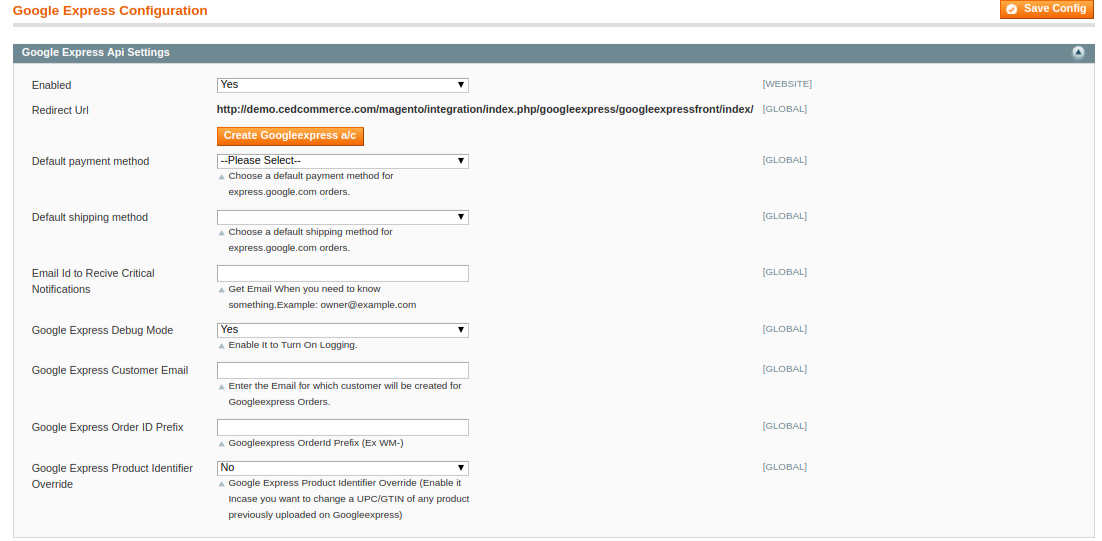
- Under Google Express API Settings, do the following steps:
- In the Enabled list, select Yes.
Note: Selecting the No option hides all other fields of Google Express API Settings. The Google Express menu does not appear on the top navigation bar. - In the Redirect URI box, paste the corresponding *******
- In the Choose Default Payment Method for Google Express Orders list, select the required option.
- In the Default Shipping Method, select the default Shipping Method.
- In Email Id to receive a critical notification, Enter the email to receive the notifications.
- In the Google Express Debug mode list, select Yes.
Note: Enable it to start Google Express Integration in the debug mode. It captures the log for the debug process. - In the Google Express Customer Email box, enter the customer email-id.
- In the Google Express Order ID Prefix box, enter the prefix that the admin wants to add before the Google Express order Id.
- In the Google Express Product Identifier Override list, select Yes.
Note: Enable it to change a UPC/GTIN of any product previously uploaded on Google Express.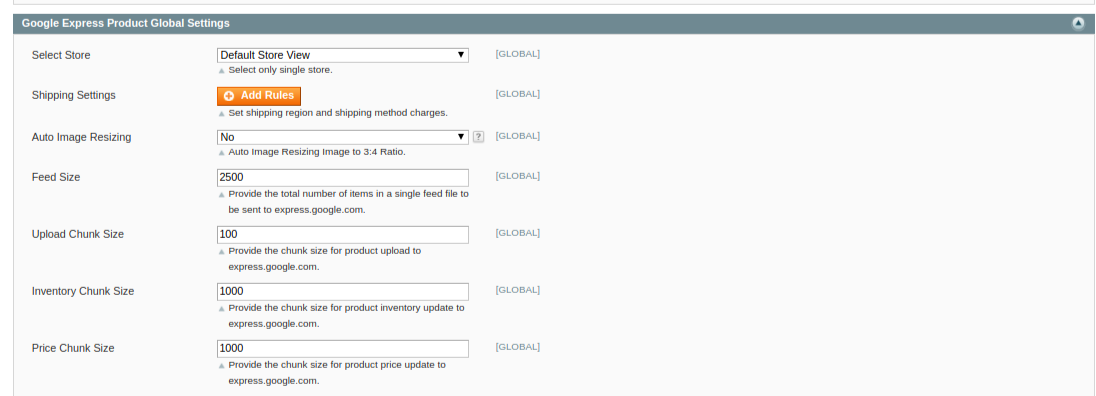
- In the Enabled list, select Yes.
- Under Google Express Settings, do the following steps:

- In Google Express Content-Language, Select target language for listing your products on the basis of your target country.
- In Google Express Product Destination, Select the Target Destination of your product for which you want to list your products.
- In Google Express Target Country, select the target country from the drop-down list.
- In Sale Price Settings, select Yes if you want specific price for the product sale.
- In Sale Price Expires on, select the date on which you want the selected product sale price to expire.
- In Tax Price Settings, you can enable it by selecting Yes and disable by selecting No.
- Under the Google Express Product Global Settings, do the following steps:
- In the Select Store list, select the single store.
- In Shipping Settings, Click on Add Rule & the section expands under Enabled, select Yes.

- Choose the Region from the drop-down menu.
Select the Method of Selling from the drop-down menu.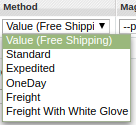 You can also choose the Magento Attribute Code for selecting from the list.
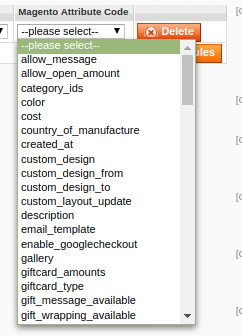
- In the Auto Image Resizing,
- Select Yes, to resize the image
- Select No, to use original image size.
- In Feed Size, Enter the number of size of Feeds in the textbox.
- In Upload Chunk Size, Enter the size of the chunk which will be used during the auto synchronization of Products.
- In Price Chunk Size, Enter the size of chunks of Price synchronization.

- In the Google Express Product Advanced Price Settings, do the following steps.
- In Google Express Product Price, enter the values in the corresponding fields.
- The user can set the price on the following basis: –
- Increase by Fixed Price: If selected, then the Enter Amount field appears.
- Increase by Fixed Percentage: If selected, then the Enter Percentage field appears.
Enter the numeric value to increase the price of the Google Express product price by the entered value % of Magento price
For Example- Magento price + 5% of Magento price.
Magento Price = 100
Select Increase By Fixed Percentage option
Enter Percentage = 5
100 + 5% of 100 = 100 + 5 = 105
Thus, Google Express Product Price = 105 - Decrease by Fixed Price: If selected, then the Enter Amount field appears.
- Decrease by Fixed Percentage: If selected, then the Enter Percentage field appears.
Enter the numeric value to decrease the price of the Google Express product price by the entered value % of Magento price
For Example Magento price – 5% of Magento price.
Magento Price = 100
Select Decrease By Fixed Percentage option
Enter Percentage = 5
100 – 5% of 100 = 100 – 5 = 95
Thus, Google Express Product Price = 95
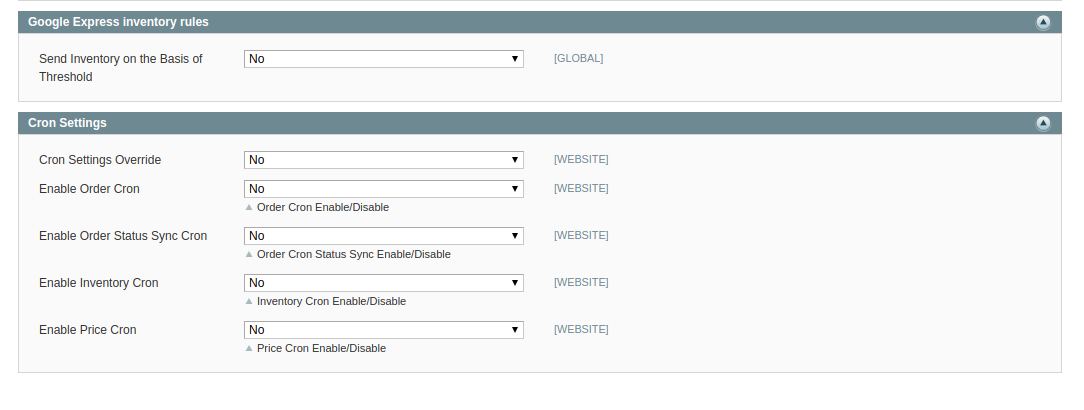
- In Google Express Inventory rules,
- In the Send Inventory on the Basis of Threshold list, select Yes to send the inventory based on a threshold.
Note: Only when the admin selects Yes, the other fields appear. The threshold Inventory is the minimum count of an item that the store owner wants to keep in stock.
- In the Send Inventory on the Basis of Threshold list, select Yes to send the inventory based on a threshold.
- In Cron Settings, do the following steps:
- In the Cron Settings Override list, select Yes to enable the cron settings.
Note: Only when the admin selects Yes, the other fields appear.- In the Enable Order Cron list, select Yes to enable the order cron.
The Order Cron field appears.- In the Order Cron box, enter the required value.
- In the Enable Inventory Cron list, select Yes to enable the order cron.
The Product Inventory Update Cron field appears.- In the Product Inventory Update Cron box, enter the required value.
- In the Enable Price Cron list, select Yes to enable the order cron.
The Product Price Update Cron field appears.- In the Product Price Update Cron box, enter the required value.
The section appears as shown in the following figure:
- In the Product Price Update Cron box, enter the required value.
- In the Enable Order Cron list, select Yes to enable the order cron.
- In the Cron Settings Override list, select Yes to enable the cron settings.
- Click the Save Config button.
×


