
Configuration
To Set up Configuration Settings
- Go to the Magento Admin Panel.
- On the top navigation bar, go to the AliExpress menu.
The menu appears as shown in the following figure:
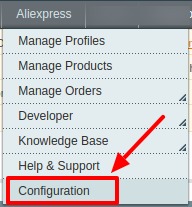
- Click on Configuration.
The Configuration page appears as shown below:

- Click the Aliexpress Api Settings tab.
The tab is expanded as shown below:
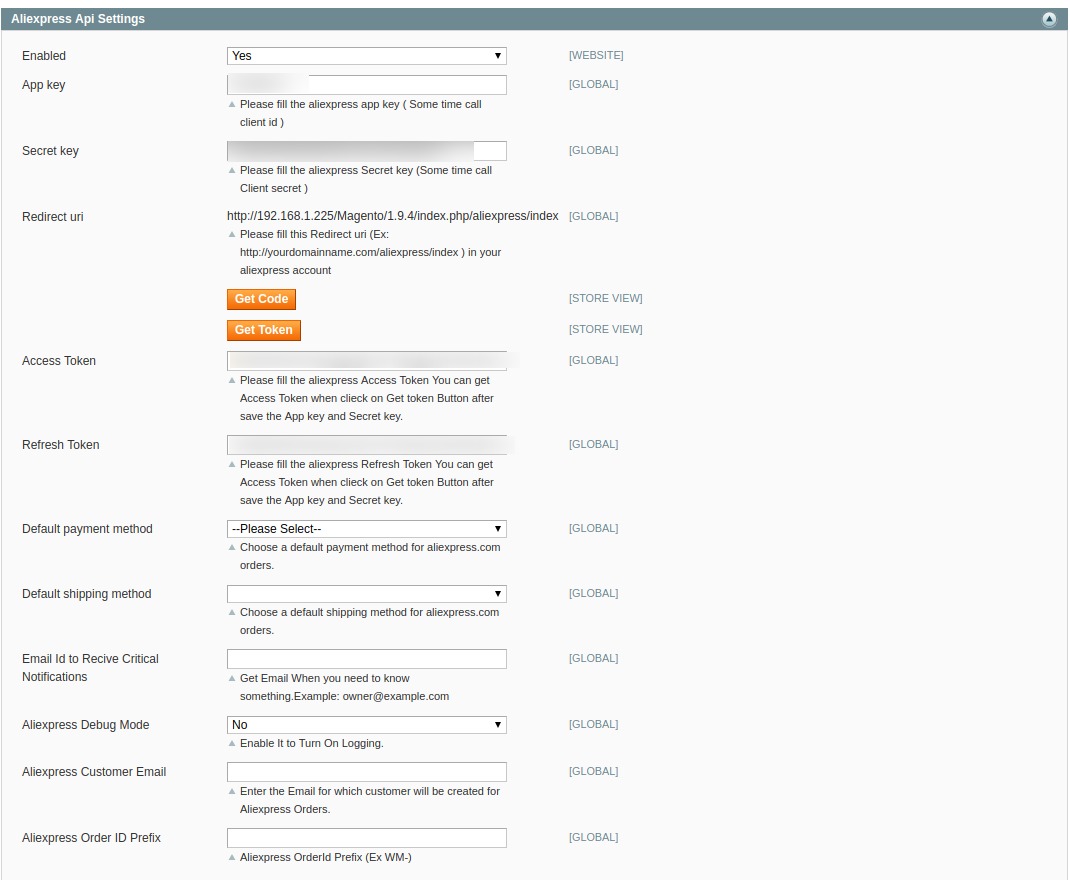
- Under AliExpress Api Settings, do the following steps:
- In Enabled, select Yes to enable the extension.
- In the App Key, copy and paste the app key here that was generated during App creation.
- In the Secret Key, copy and paste the secret key here that was generated during App creation.
- In the Redirect Url, copy this Url in your Aliexpress account.
- Click on Get Code button to get the code.
- Click on the Get Token button, and a new page will be opened where access and refresh tokens will be generated.
- Then in the Access Token and Refresh Token fields paste the tokens generated in the previous step.
- In Default Payment Method select the payment method from the dropdown menu you want as default.
- In Default Shipping Method, select the Shipping method from the menu.
- In Email Id to Receive Critical Notifications, enter the mail id on which you wish to receive notifications.
- In Aliexpress Debug mode, select Yes if want to enable logging
- In Aliexpress Customer Email, enter the mail for which the customer will be created.
- In Aliexpress Order Id Prefix, enter the prefix id for the order.
- Now scroll and click on Aliexpress Product Global Settings.
The tab is expanded as: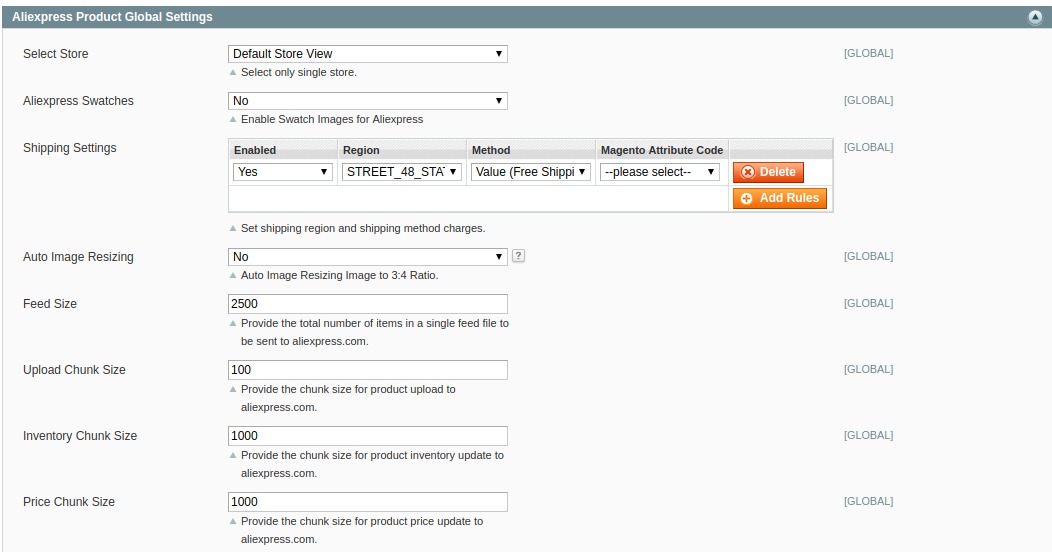
- Under Aliexpress Product Global Settings, do the following steps:
- In the Select store, select the default store view from the dropdown menu.
- In Aliexpress Swaches, select Yes to enable Swatch images.
- In Shipping Settings, set the Shipping region and shipping method.
- In Auto Image Resizing, select Yes if you want to automatically resize the images.
- In Feed Size, enter the number of items to be sent to Aliexpress.
- In Upload Chunk Size, enter the number of chunk size for product upload.
- In Inventory Chunk Size, enter the chunk size for uploading the product inventory.
- In Price chunk Size, enter the Chunk Size for Product Price.
- Scroll down and click on Aliexpress Product Advanced Price Settings.
The tab expands as shown below:

- Under Aliexpress Product Advanced Price Settings, do the following steps:
- In the Aliexpress Product price, select the required option. This is to set a different price for all the products as shown in the following figure:
- Increase by Fixed Price: If selected, then the Modify by Fix Price field appears.
- Increase by Fixed Percentage: If selected, then the Modify by Percentage Price field appears.
Enter the numeric value to increase the price of the Aliexpress product price by the entered value % of Magento price
For Example: Magento price + 5% of Magento price.
Magento Price = 100
Select Increase By Fixed Percentage option
Modify by Percentage Price = 5
100 + 5% of 100 = 100 + 5 = 105
Thus, Aliexpress Product Price = 105 - Decrease by Fixed Price: If selected, then the Modify by Fix Price field appears.
- Decrease by Fixed Percentage: If selected, then the Modify by Percentage Price field appears.
Enter the numeric value to decrease the price of the Aliexpress product price by the entered value % of Magento price
For Example: Magento price – 5% of Magento price.
Magento Price = 100
Select Decrease By Fixed Percentage option
Modify by Percentage Price = 5
100 – 5% of 100 = 100 – 5 = 95
Thus, Aliexpress Product Price = 95
- In Fulfilment Lag Time, enter the lag time.
- In the Aliexpress Product price, select the required option. This is to set a different price for all the products as shown in the following figure:
- Now scroll down to Order Configuration.
The tab is expanded as:
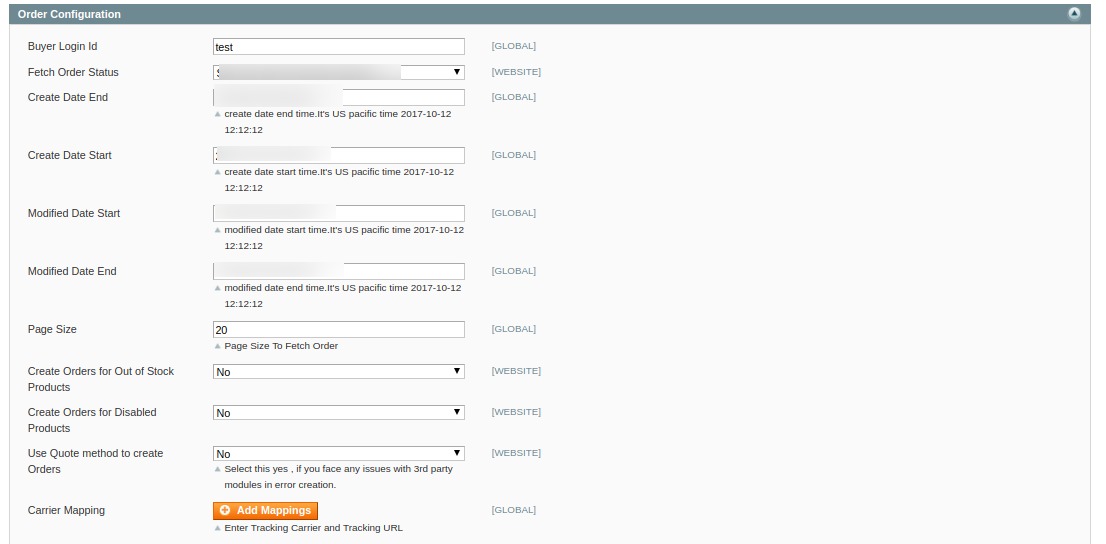
- Under Order Configuration, do the following steps:
- In Buyer Login Id, enter the login id of the customer.
- In Fetch Order Status, enter the order status.
- In Create Date End, enter the end date.
- In Create Date Start, enter the start date.
- In Modified Date Start, enter the modified start date.
- In Modified Date End, enter the modified end date.
- In the Page Size, enter the page size to fetch order.
- In Create Orders for Out of Stock Products, select Yes if you want the order to be created when the stock is finished.
- In Create Orders for Disabled Products, select Yes if you want to create orders for the disabled products.
- In Use Method to Create to Create Orders, select Yes if you face any issues with third-party modules.
- In Carrier Mapping, add mapping of tracking carrier and tracking URL.
- Now Scroll down and click on Cron Settings.
The tab is expanded as:
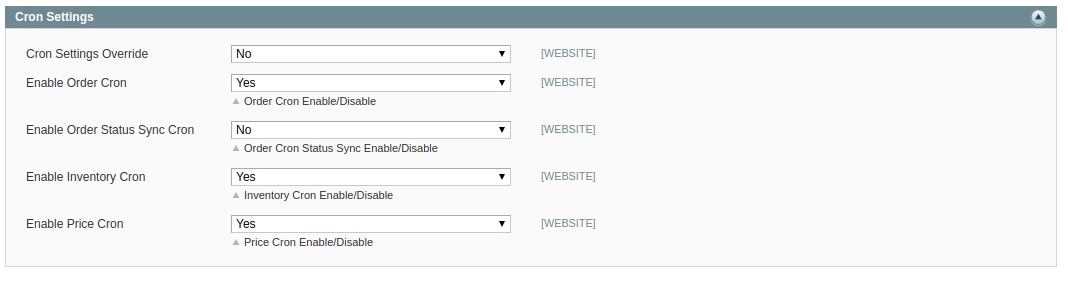
- Under Cron Settings, do the following steps:
- In Cron Settings override, select Yes if you wish to override the cron settings.
- In Enable Order Cron, select Yes to enable the orders cron.
- In Enable Status Sync Cron, select Yes if you want to enable the status syncing cron.
- In Enable Inventory Cron, select Yes to enable the inventory cron.
- In Enable Price Cron, select Yes if you want to enable the Price Cron.
- Click on Save Config button on the top right side.
The configuration will be saved.
×


