3.Configuration ↑ Back to Top
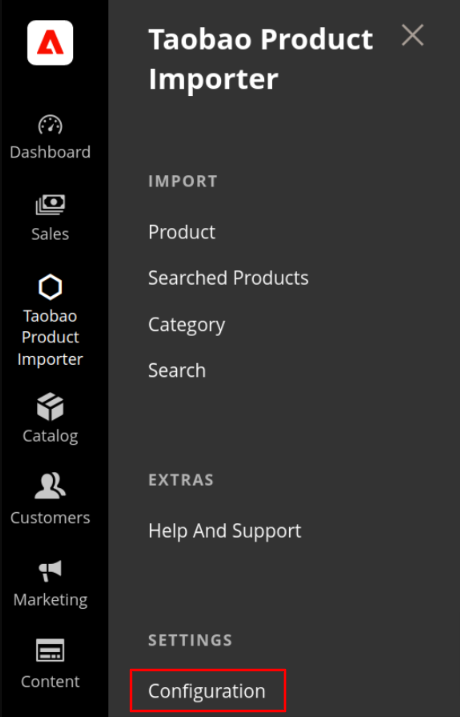
After the merchant is done with the successful installation of this extension, the Taobao Product Importer menu can be seen on the left navigation bar of the admin panel.
Now, the admin needs to go through the following steps to set up the configuration.
- Go to the Magento 2 Admin panel.
- On the left navigation bar, click the Taobao Product Importer menu.
The menu appears as shown in the following figure:
- Click on Configuration.
- On clicking it, you will be navigated to the page as shown below,

API Settings
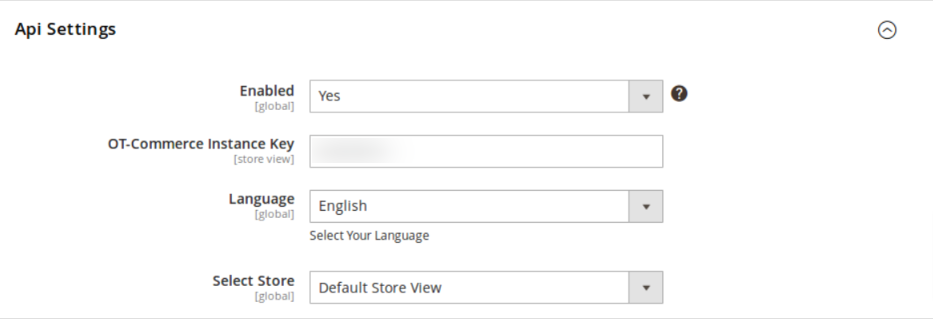
- Click API Settings and the section will expand as:

- In Enabled, select Yes to enable the extension.
- In OT-Commerce Instance Key, enter the key which you need to get from Taobao.
- Select the language in which you want to process your business operation, in Language field.
- In Select Store, select the store to which you want to import the Taobao products.
Taobao Importer Settings
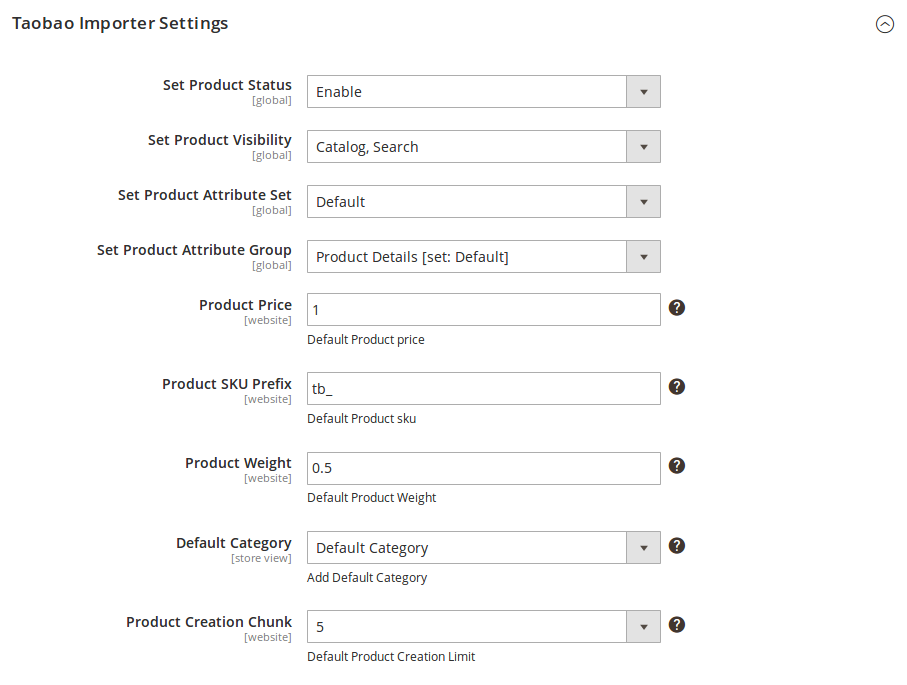
- Click Taobao Importer Settings and the section will expand as:

- In Set Product Status, set the status of the products that you are importing from Taobao to Magento. This status would reflect on Magento.
- In Set Product Visibility, select the format in which you want the imported products to be seen on your Magento store.
- In Set Product Attribute Set, select the product attribute set.
- In Set Product Attribute Group, select the attribute group for the products that you are importing.
- In Product Price, enter the default price for the products.
- Enter the prefix for the products you are importing, in the Product SKU Prefix field.
- Enter the default product weight in the Product Weight field.
- Select the default category for the products that you are importing, in the Default Category field.
- In , select the default product creation limit.
Taobao to Magento Attribute Mapping
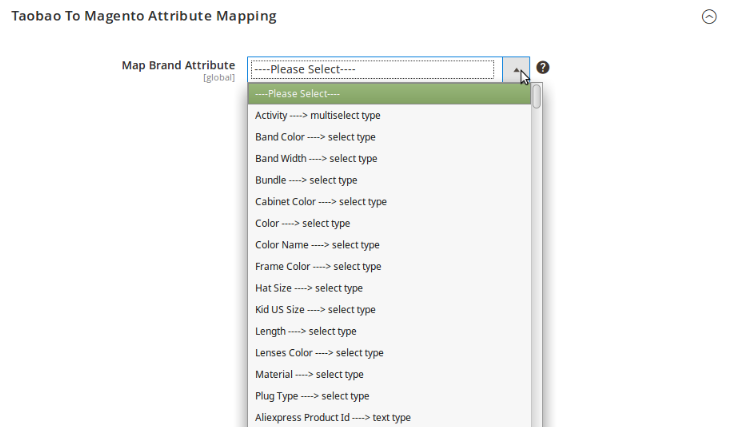
- Click Taobao to Magento Attribute Mapping and the section will expand as:

- In the Map Brand Attribute field, select the brand attribute from the list as shown in the image below:

Once you have taken all the actions described above, click on Save Config button on the top right of the page. Configuration will be saved.
×


