
Configuration Settings
To set up the configuration settings in the Magento 2 Admin panel
- Go to the Magento 2 Admin panel.
- On the left navigation bar, click the MyDeal Integration menu.
The menu appears as shown in the following figure:
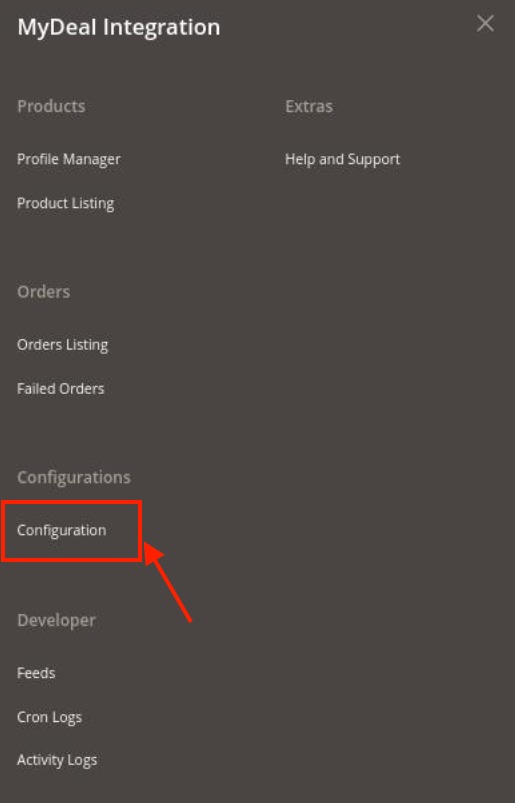
- Click on Configuration.
The Configuration page appears as shown below:

- In the right panel, click the MyDeal Seller/Developer Settings tab.
The MyDeal Seller/Developer Settings tab is expanded and the relevant fields appear as shown in the following figure:
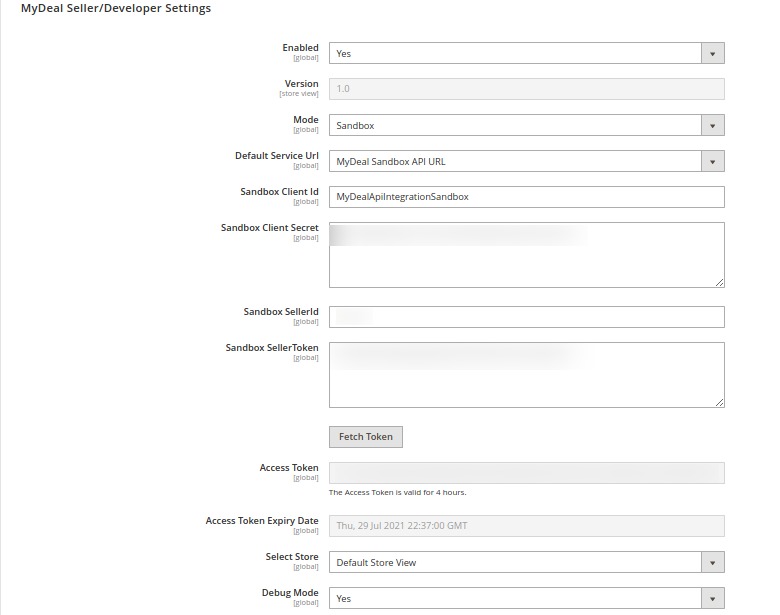
- Under MyDeal Seller/Developer Settings, do the following steps:
- In the Enabled list, select the Yes option.
- In the Mode list, select the Sandbox or Live option.
- In Default Service URL, select the Url of the store.
- In Live Client Id, enter the live id of the client from the MyDeal seller panel.
- In Live Client Secret, enter the secret key from the MyDeal seller panel.
- In Live Seller Token, enter the seller token id.
- In LiveSeller Id, enter the MyDeal Seller id.
- After filling in all the above details, click on the Save Button.
- Then click on the Fetch Token button the Access Token and Access Token Expiry Date will get automatically be fetched.
- In the Select Store list, select the required store.
- In Debug Mode, select Yes if you want the log to be created.
- Scroll down to the MyDeal Product Settings tab, and then click the tab.
The MyDeal Product Settings tab is expanded and the expanded section appears as shown in the following figure:

- Now click, on MyDeal Price Settings, the tab is expanded as shown below:

- Under MyDeal Price Settings, do the following step:
- In the Product Price list, select one of the following options:
- Increase by Fixed Price: If selected, then the Modify by Fix Price field appears.
- Increase by Fixed Percentage: If selected, then the Modify by Percentage Price field appears.
Enter the numeric value to increase the price of the MyDeal, product price by the entered value % of Magento 2 price.
For Example,
Magento 2 price + 5% of Magento 2 price.
Magento 2 Price = 100
Select Increase By Fixed Percentage option
Modify by Percentage Price = 5
100 + 5% of 100 = 100 + 5 = 105
Thus, MyDeal Product Price = 105 - Decrease by Fixed Price: If selected, then the Modify by Fix Price field appears.
- Decrease by Fixed Percentage: If selected, then the Modify by Percentage Price field appears.
Enter the numeric value to decrease the price of the MyDeal product price by the entered value % of Magento 2 price
For Example,
Magento 2 price – 5% of Magento 2 price.
Magento 2 Price = 100
Select Decrease By Fixed Percentage option
Modify by Fix Price = 5
100 – 5% of 100 = 100 – 5 = 95
Thus, MyDeal Product Price = 95
- In the Product Price list, select one of the following options:
- Now click on MyDeal Inventory Settings, the section is expanded as shown below:

- Under MyDeal Inventory Settings, do the following steps:
- In the Set Inventory on Basis of Threshold list, select the Enable option if required to set the inventory based on a threshold.
Note: Only when the admin selects Enable, the other fields appear. Threshold Inventory is the minimum count of an item that the store owner wants to keep in stock. - In the Inventory Threshold Value box, enter the required value.
- In the Send Inventory for Lesser Than Threshold Case box, enter the required value.
- In the Send Inventory for Greater Than Threshold Case box, enter the required value.
- In Use MSI, select Yes if you want MSI to be enabled for your store.
- In MSI Source Code, enter the MSI code for the inventory.
- In Use Salable Quantity, select Yes if you want salable quantity for the inventory.
- In the Set Inventory on Basis of Threshold list, select the Enable option if required to set the inventory based on a threshold.
- Scroll down and click on MyDeal Order Settings, the section is expanded as:
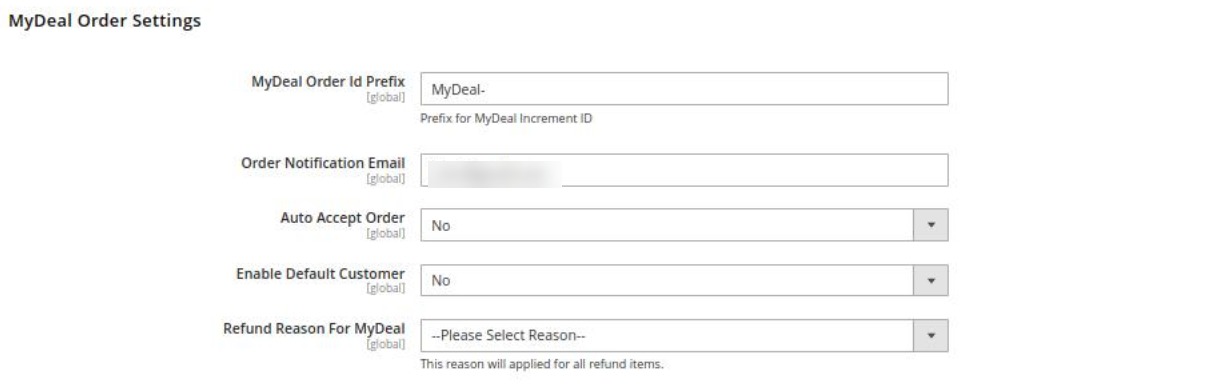
- Under MyDeal Order Settings, do the following steps:
- In the MyDeal Order Id Prefix box, enter the required order Id prefix.
- In the Order Notification Email box, enter the required email Id.
- In Auto Order Accept, select Yes if you want the orders to be accepted automatically.
- In the Enable Default Customer list, select the Yes option to enable the default customer.
- In the Default Customer Email list, enter the email id of the default customer.
- In Refund Reason for MyDeal, select the reason for a refund of the items.
- Now scroll down and click on MyDeal Cron Settings, the tab is expanded as shown below:
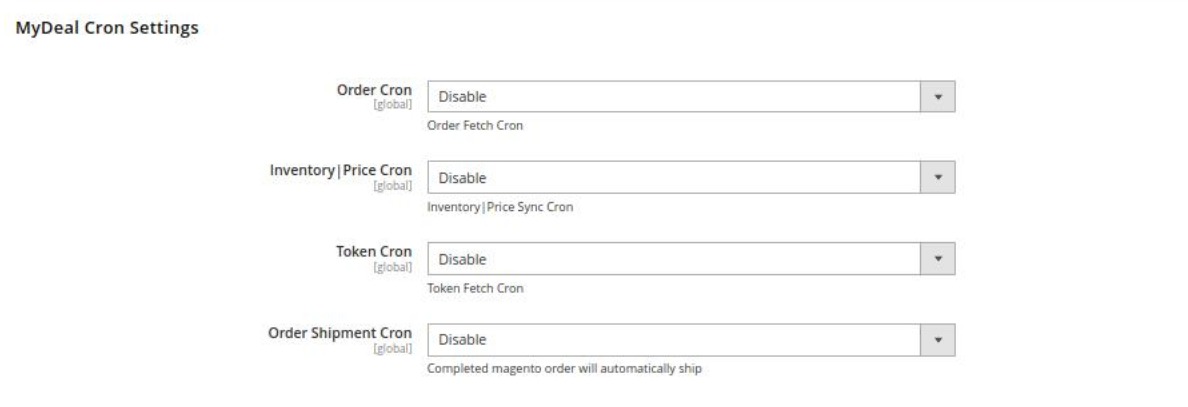
- Under MyDeal Cron Settings, do the following steps:
- In the Order Cron list, select the Enable option to enable the fetch order cron.
- In the Inventory |Price Cron list, select the Enable option to enable the Inventory & Price Sync corn.
- In Token Cron, select Enable to fetch the tokens automatically.
- In Order Shipment Cron, select Enable Option to ship Magento orders automatically.
- Click the Save Config button to save the entered values.
×


