
ManoMano Configuration Settings
Once the extension is successfully installed in the Magento 2 store, the MANOMANO INTEGRATION menu appears on the left navigation bar of the Admin Panel. The merchant has to first create a seller account in the ManoMano seller panel.
To create a seller account, the store owner (admin) has to send an introductory email to the seller.services@manomano.co.uk email id with respect to the seller company. After assessment of the seller request and the possibility of a partnership, ManoMano proceeds further for the next step.
Once the seller account is created and is approved by ManoMano, they provide the username and password of the seller account to the admin. The Magento 2 store owner can use the ManoMano Username and Password while setting up the ManoMano Configuration settings in the Magento 2 Admin panel.
To set up the configuration settings in the Magento 2 Admin panel
- Go to the Magento Admin panel.
- On the left navigation bar, click the MANOMANO INTEGRATION menu.
The menu appears as shown in the following figure:

- Click Configuration.
The Configuration page appears as shown in the following figure:
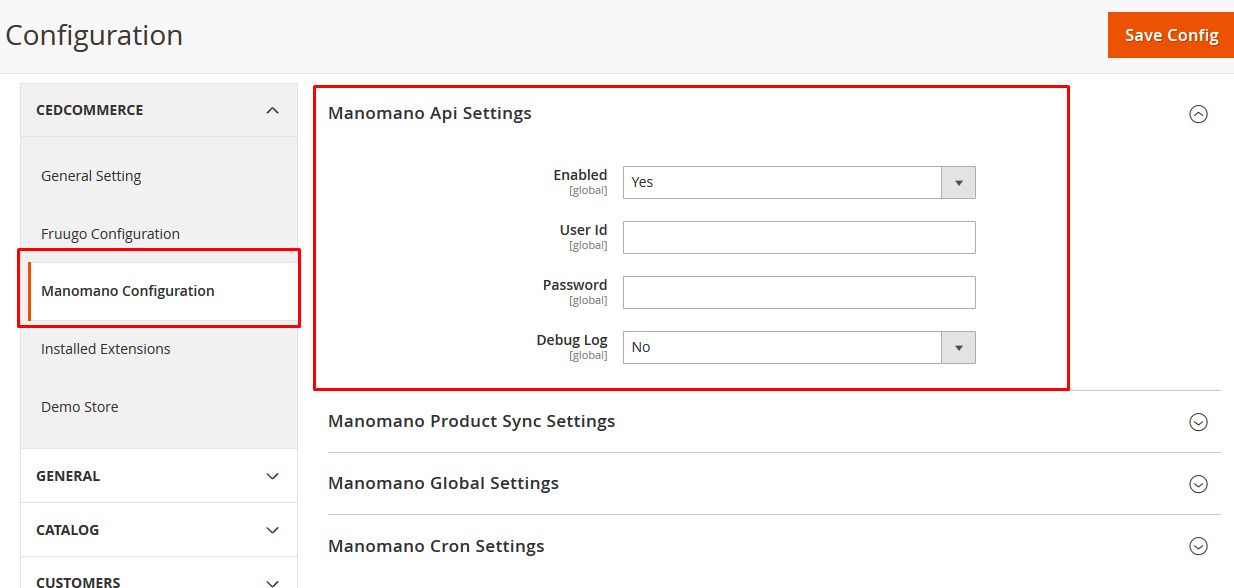
- In the right panel, under Manomano Api Settings, do the following steps:
- In the Enabled list, select Yes to enable the extension features.
- In the User ID box, enter the Username provided by ManoMano.
- In the Password box, enter the Password provided by ManoMano.
- In the Debug Log list, select Yes to start ManoMano Integration in the debug mode.
It captures the log for the debug process.
- In the Debug Log list, select Yes to start ManoMano Integration in the debug mode.
- Scroll down to the Manomano Product Sync Settings tab, and then click the tab.
The tab is expanded and the relevant field appears as shown in the following figure:
- Under Manomano Product Sync Setting, do the following step:
- In the Select Store list, select the single store.
- Scroll down to the Manomano Global Settings tab, and then click the tab.
The tab is expanded and the relevant fields appear as shown in the following figure:
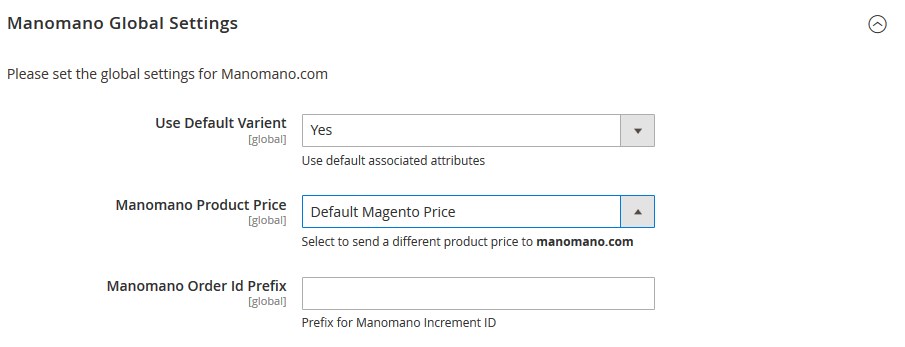
- Under Manomano Global Settings, do the following steps:
- In the Use Default Variant list, select Yes to use the default associated attributes.
- In the Manomano Product Price list, select one of the following options:
- Increase by Fixed Price: If selected, then the Modify by Fix Price field appears.
- Increase by Fixed Percentage: If selected, then the Modify by Percentage Price field appears.
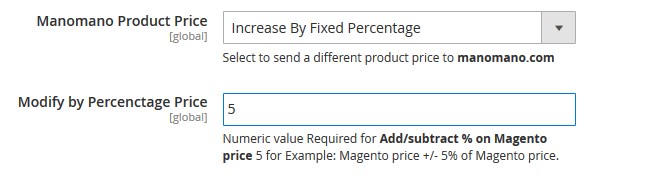
Enter the numeric value to increase the price of the Manomano, product price by the entered value % of Magento price
For Example,
Magento price + 5% of Magento price.
Magento Price = 100
Select Increase By Fixed Percentage option
Enter Percentage = 5
100 + 5% of 100 = 100 + 5 = 105
Thus, Manomano Product Price = 105 - Decrease by Fixed Price: If selected, then the Modify by Fix Price field appears.
- Decrease by Fixed Percentage: If selected, then the Modify by Percentage Price field appears.
Enter the numeric value to decrease the price of the Manomano product price by the entered value % of Magento price.
For Example,
Magento price – 5% of Magento price.
Magento Price = 100
Select Decrease By Fixed Percentage option
Enter Percentage = 5
100 – 5% of 100 = 100 – 5 = 95
Thus, Manomano Product Price = 95
- In the Manomano Order ID Prefix box, enter the required prefix value.
For instance, enter MN- for MN-10001.
- Scroll down to the Manomano Cron Settings tab, and then click the tab.
The tab is expanded and the relevant fields appear as shown in the following figure:
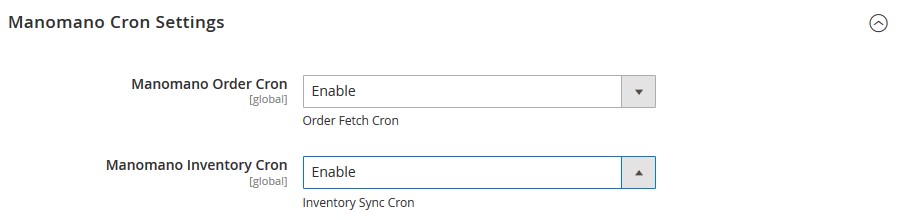
- Under Manomano Cron Settings, do the following steps:
- In the Manomano Order Cron list, select Enable to enable the order cron.
- In the Manomano Inventory Cron list, select Enable to enable the inventory cron.
- Click the Save Config button.


