
Cdiscount Configuration Settings
Once the extension is successfully installed in the Magento 2 store, the CDISCOUNT INTEGRATION menu appears on the left navigation bar of the Magento 2 store Admin panel. The merchant has to first create a seller account in the Cdiscount seller panel. Once the seller account is created and is approved by Cdiscount, then the Magento 2 store owner can use the Cdiscount Username and Password while setting up the Cdiscount Configuration settings in the Magento 2 Admin panel.
To set up the configuration settings in the Magento 2 Admin panel
- Go to the Magento 2 Admin panel.
- On the left navigation bar, click the CDISCOUNT INTEGRATION menu.
The menu appears as shown in the following figure:
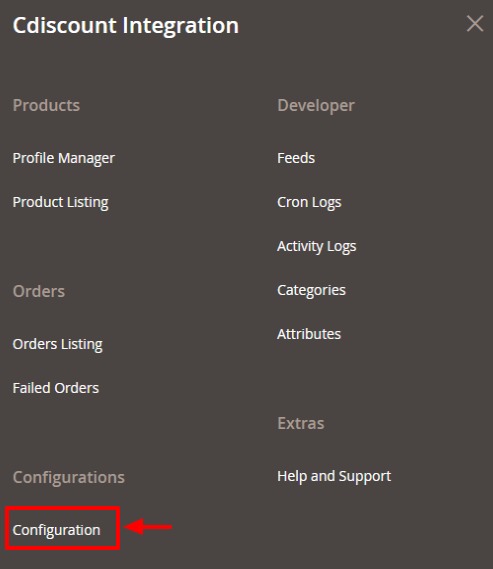
- Click Configuration.
The Configuration page appears as shown in the following figure:
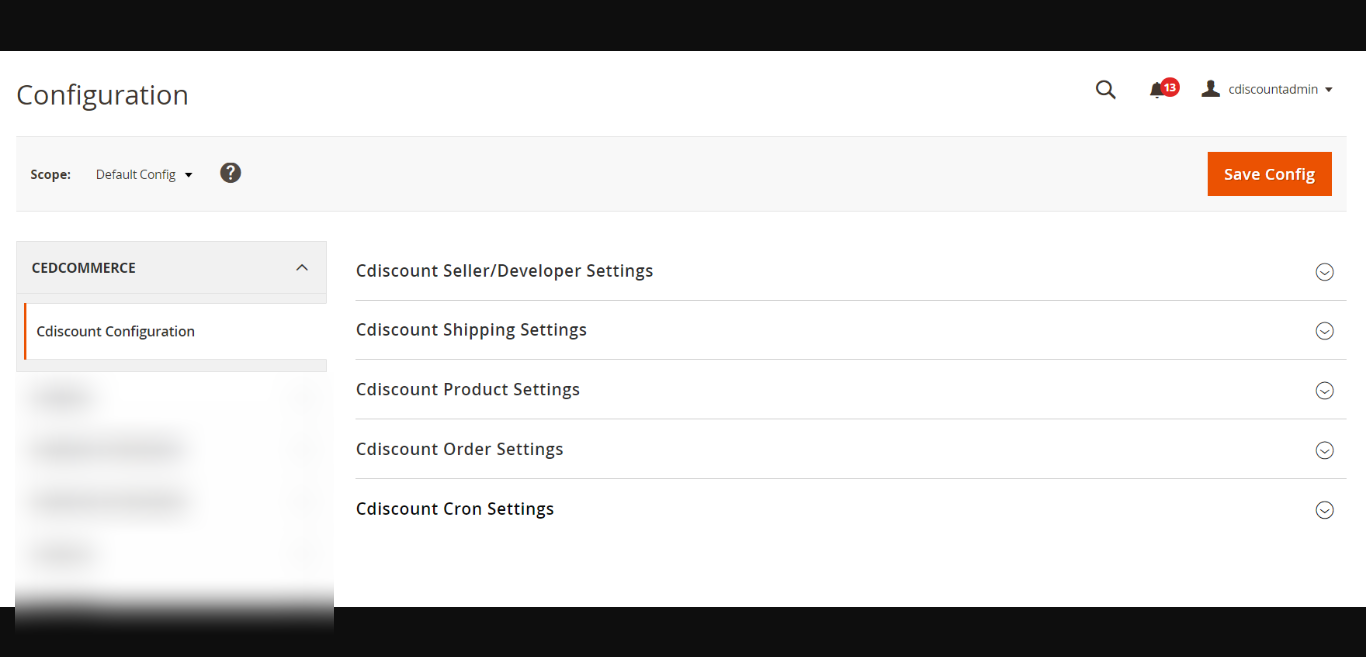
- In the right panel, click the Cdiscount Seller/Developer Settings tab.
The Cdiscount Seller/Developer Settings tab is expanded and the relevant fields appear as shown in the following figure:
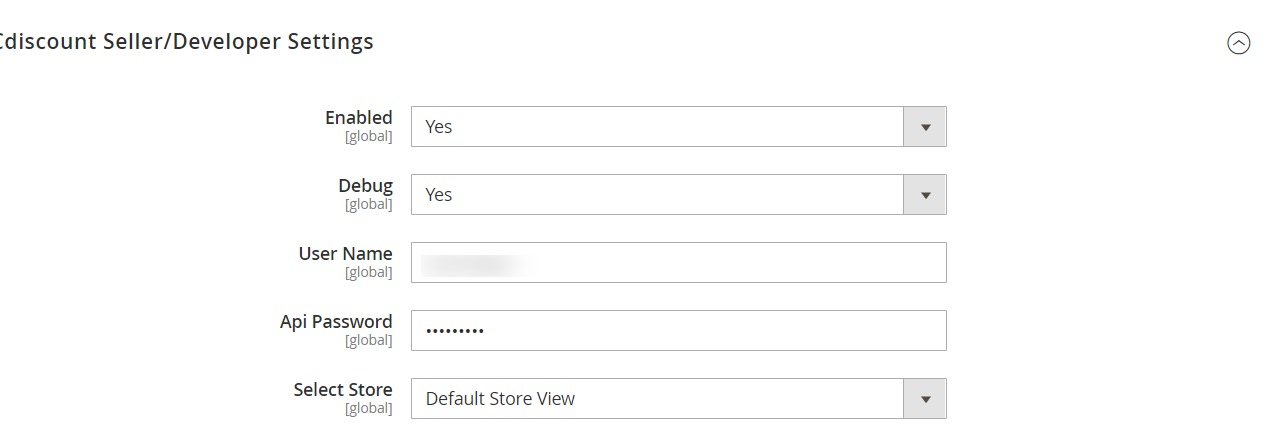
- Under Cdiscount Seller/Developer Settings, do the following steps:
- In the Enabled list, select the Yes option.
- In the Debug, select Yes to enable the debugging mode for the developer.
- Now for the User Name and Api Password, you need to create a seller account.
- To create the account, go to your Cdiscount Seller panel and click on User Rights Management.
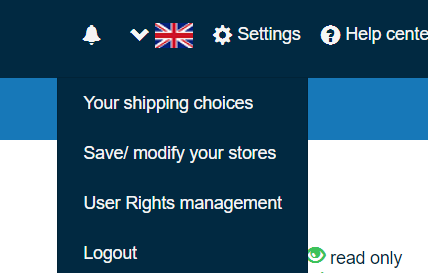
- Then click on under User Right Management, click on Add a User API.

- The Login Form will open from where you can create your API account and copy the User Name and API from here and paste in the configuration settings.
- To create the account, go to your Cdiscount Seller panel and click on User Rights Management.
- In the User Name box, enter the user id you had recently copied from API.
- In the Api Password box, enter the password of the API account.
- In the Select Store list, select the required store.
- Click the Save Config button to save the entered values.
- Scroll down to the Cdiscount Shipping Settings tab, and then click the tab.
The Cdiscount Shipping Settings tab is expanded and section appears as shown in the following figure:
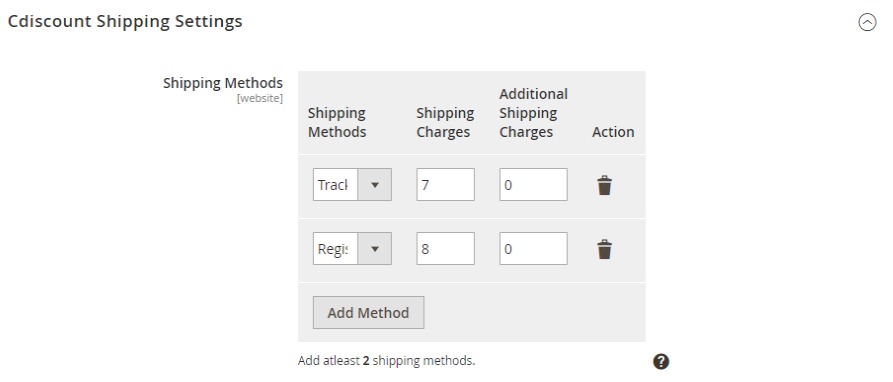
- Under Cdiscount Shipping Settings, add the Shipping methods, Shipping Charges, Additional Shipping Charges. You need to add at least 2 minimum Shipping Methods.
- Click the Save Config button to save the entered values.
- Scroll down to the Cdiscount Product Settings tab, and then click the tab.
The Cdiscount Product Settings tab is expanded and the expanded section appears as shown in the following figure:
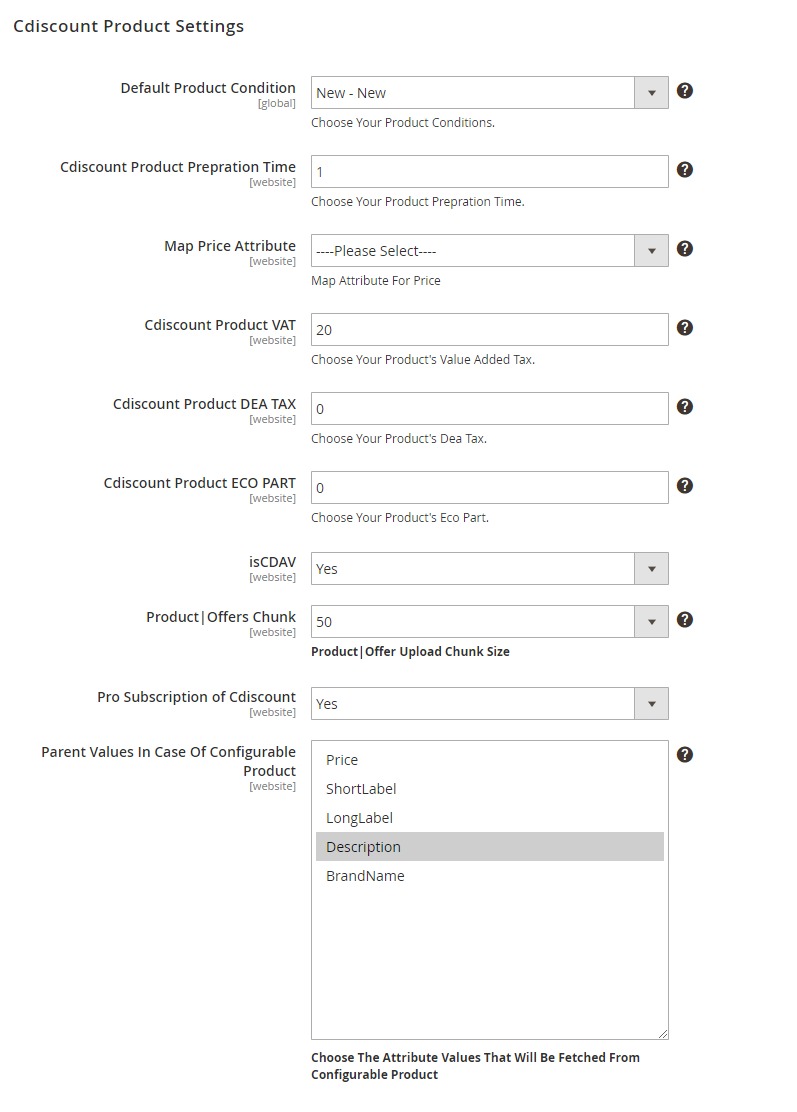
- Under Cdiscount Product Settings , do the following steps:
- In Default Product Condition, select the condition of the product.
- In Cdiscount Product Preparation Time, enter the preparation time of the product.
- In Map Price Attribute, map the price attributes.
- In Cdiscount Product VAT, enter the VAT for the products.
- In Cdiscount Product DEA TAX, enter the DEA Tax for the products.
- In Cdiscount Product ECO PART, enter the ECO part of the products.
- In isCDAV, select Yes if you want to enable the offer to benefit from CDAV program.
- In Product| Offers Chunk, enter the chunk size for uploading the products and offers.
- In Pro Subscription of Cdiscount, select Yes if want the Pro subscription.
- In Parent Values In Case Of Configurable Product, select the Attribute Values That Will Be Fetched From configurable product.
- Scroll down to the Cdiscount Order Settings tab, and then click the tab.
The tab is expanded and the section appears as shown in the following figure:
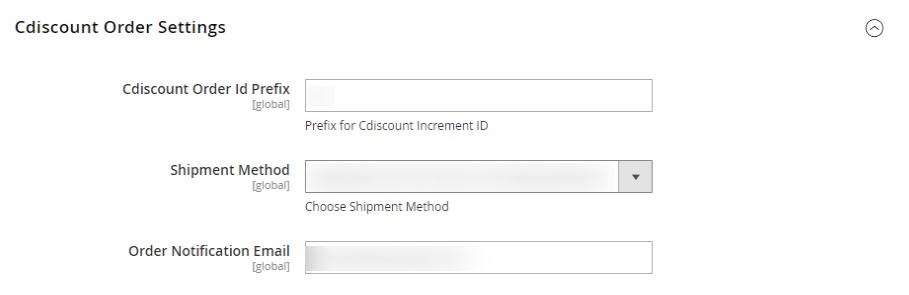
- Under Cdiscount Order Settings, do the following steps:
- In the Cdiscount Order Id Prefix box, enter the required order Id prefix.
- In the Shipment Method, choose the shipment method.
- In the Order Notification Email box, enter the required email Id.
- Click the Save Config button to save the entered values.
- Scroll down to the Cdiscount Cron Settings tab, and then click the tab.
The tab is expanded and the section appears as shown in the following figure:
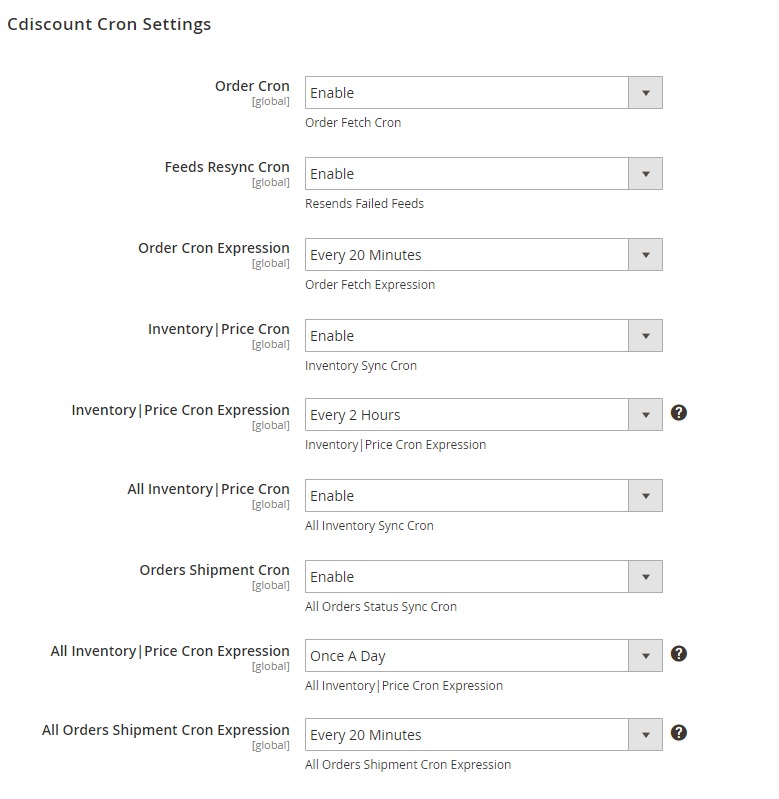
- Under Cdiscount Cron Settings, do the following steps:
- In the Order Cron list, select Enable to enable the fetch order cron.
- In Feeds Resync Cron, select Enable to resend the failed feed.
- In Order Cron Expression, enter the time to fetch orders.
- In Inventory| Price Cron, select Enable to synchronise the inventory and price.
- In Inventory| Price Cron Expression, enter the time for the inventory and price sync.
- In All Inventory| Price Cron, select Enable to sync all the inventory and price.
- In Orders Shipment Cron, select Enable to sync the orders shipment status.
- In the All Inventory|Price Cron Expression, select Enable to enable the Inventory and Price Sync cron.
- In All Orders Shipment Cron Expression, enter the time for the orders shipment cron.
- Click the Save Config button to save the entered values.
×


