
Notifications
The admin can do the following tasks:
- Add New Notifications
- Edit Existing Notifications
- Send Selected Notifications
- Delete Selected Notifications
To add a new notification
- Go to the Admin panel.
- On the left navigation bar, click the MageNative menu, and then click Add Notification.
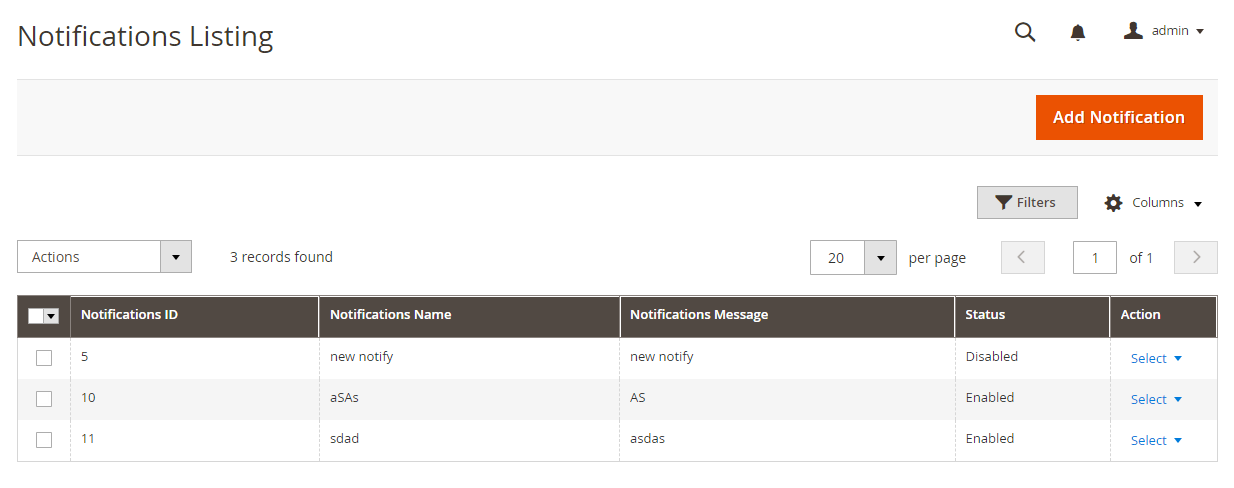
The Notifications Listing page appears as shown in the following figure:
- In the right-upper corner, click the Add Notification button.
The Notification creation page appears as shown in the following figure:
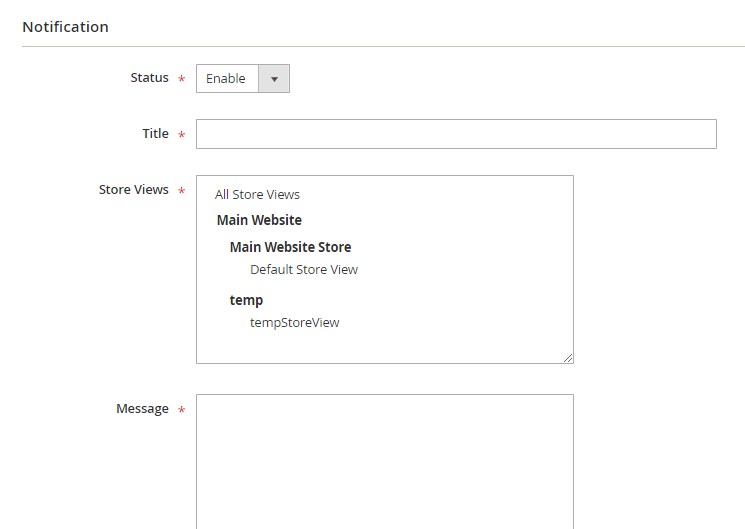
- Set the Status to Enable to use the notification
- In the Title box, enter the title for the notification.
- In the Store View list, select the required store or All Store Views
- In the Message box, enter the notification message.
- Click the Choose File button, next to the Image field, to upload the image for the notification.
- In the Choose Link Type list, select one of the following options:
- Product: To redirect the user to the Products page available on the Front-end view of the app.
Note: When the admin selects the Product option, then the Choose Product field appears below the field.- In the Choose Product list, select the product to redirect the user to the selected product page.
- Category: To redirect the user to the Category page available on the Front-end view of the app.
Note: When the admin selects the Category option, then the Choose Category field appears below the field.- In the Choose Category list, select the category to redirect the user to the selected category page.
- Static Link: To redirect the user to the specific link provided.
Note: When the admin selects the Static Link option, then the Static Link field appears below the field.- In the Static Link box, enter the required web link to redirect the user to that particular page.
- Product: To redirect the user to the Products page available on the Front-end view of the app.
- Click the Save Notification button.
The new notification is saved and appears on the Notification Listing page.
To edit the existing notification
- Go to the Admin panel.
- On the left navigation bar, click the MageNative menu, and then click Add Notifications.
The Notifications Listing page appears as shown in the following figure:

- In the Actions column, click the arrow next to the Select link associated with the required notification, and then click Edit.
The selected notification page appears for editing. - Make the required changes, and then click the Save Notification button.
The changes made in the selected notification are saved and the view moves to the Notification Listing page.
To send the selected notification
- Go to the Admin panel.
- On the left navigation bar, click the MageNative menu, and then click Add Notifications.
The Notifications Listing page appears as shown in the following figure: - In the Actions column, click the arrow next to the Select link associated with the required notification, and then click Send.
The selected push notification is sent to all the devices, and a success message appears on the page.
To delete the selected notification
- Go to the Admin panel.
- On the left navigation bar, click the MageNative menu, and then click Add Notifications.
The Notifications Listing page appears as shown in the following figure:
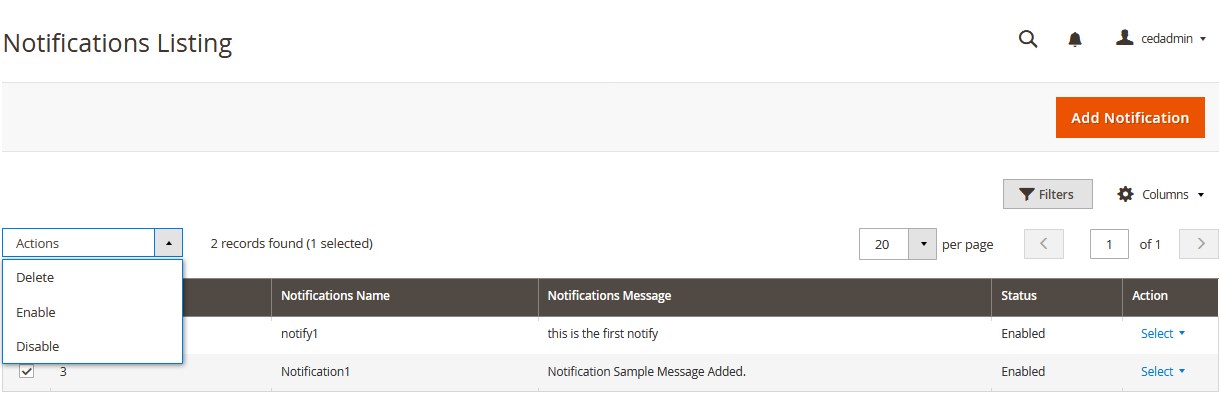
- Click to select the required checkbox associated with the corresponding notification.
- In the Actions list, select Delete.
A confirmation dialogue box appears. - Click the OK button.
The notification is deleted and a success message appears.
Note: Admin can also delete the selected deal group from the editing page.
×


