
Watermark
To set up the Watermark Settings of WP Advanced PDF PRO
- Go the Admin panel.
- On the left navigation bar, click the WP Advanced PDF PRO menu, and then click WP Advanced PDF PRO.
- In the left navigation panel, click the WATERMARK menu.
The WATERMARK page appears as shown in the following figure:
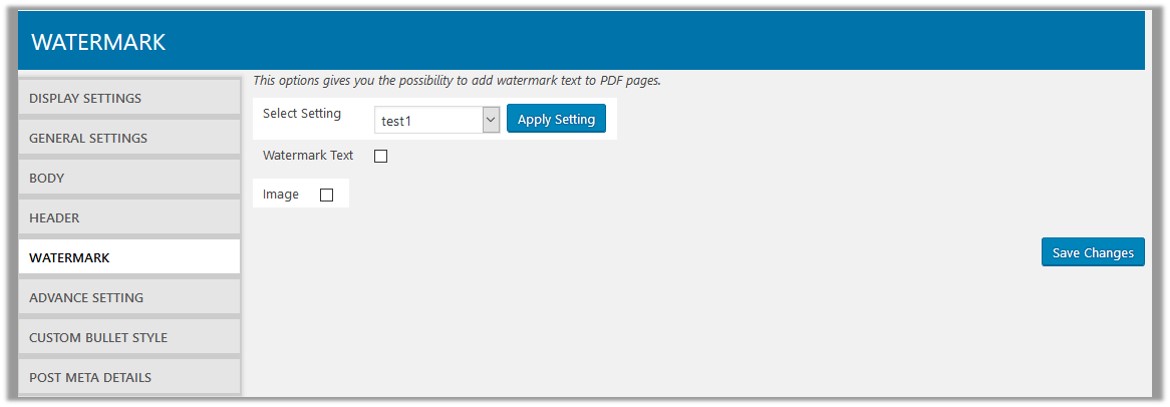
- In the right panel, do the following steps:
- In the Select Setting list, select the required setting, and then click the Apply Setting button.
A dialog box appears as shown in the following figure:
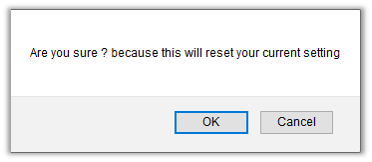
- Click the OK button to reset the setting according to the selected setting. Or click the Cancel button to retain the current settings.
- Select the checkbox next the Watermark Text field to enter the watermark text in the PDF.
Once selected the checkbox, the corresponding fields appear as shown in the following figure:
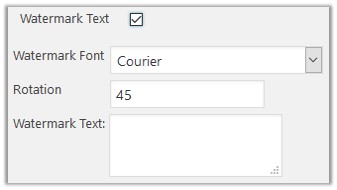
- In the Watermark Text box, enter the text for using it as the watermark.
- In the Watermark Font list, select the required font of the watermark.
- In the Rotation box, enter the value of the angle by which the admin wants to rotate the watermark text.
- Select the checkbox next the Image field to enter the watermark image in the PDF.
Once selected the checkbox, the corresponding fields appear as shown in the following figure: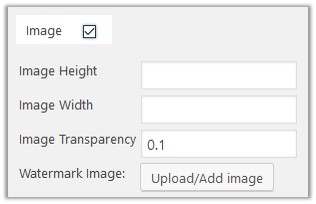
- In the Image Transparency box, enter a value defining the transparency of the image.
- In the Image Height box, enter a value defining the height of the image.
- In the Image Width box, enter a value defining the width of the image.
- Click the Upload/Add image button to upload the watermark image.
- In the Select Setting list, select the required setting, and then click the Apply Setting button.
- Click the Save Changes button to save the settings.
×


