
How To Validate The “Zoho Inventory Integration” Plugin?
- Go to your WooCommerce store.
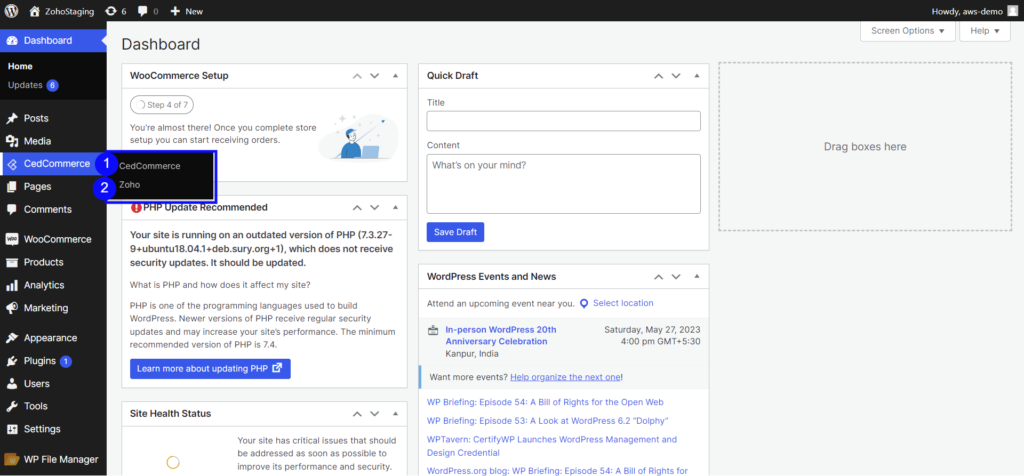
- Once you install the plugin on your WooCommerce store, you will find a new tab by the name “CedCommerce” Click on it.
- A collapsible bar with “Zoho” written will open up. Click on it.
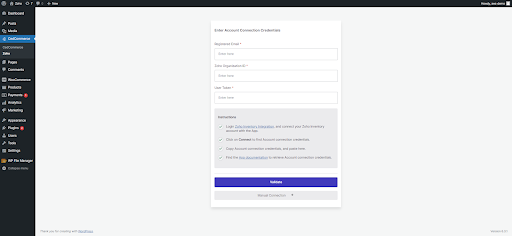
To validate the plugin you would need these mandatory details, be ready with it beforehand to complete your store connection process.
- Registered Email ID.
- Zoho Organization ID
- User Token
Enter these credentials and click on “validate.”
Note: You can also copy details from the Zoho Inventory Integration page.

Note: All three fields are mandatory to validate the plugin.
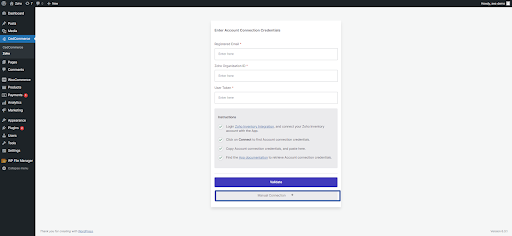
Manual Connection
If you are facing any kind of issue in the above method, kindly try using the manual connection method:
- Click on Manual Connection.
2. Click on WooCommerce>Settings->Advanced->REST API>Add Key.
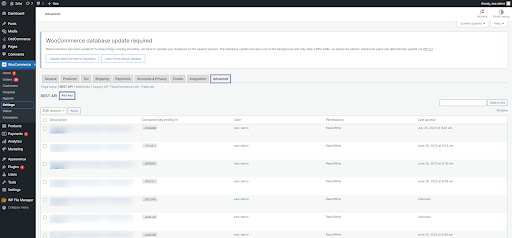
3. Fill up the description.
4. Select User.
5. Provide Read/Write permission.
6. Click on Generate API key button.
7. Copy Consumer key & secret Key.
How To Authorize The Plugin?
After successfully validating the plugin, you need to authorize CedCommerce, by clicking on “Approve.”
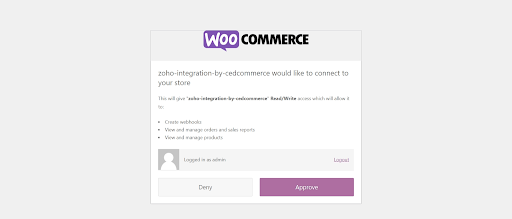
WooCommerce will now ask for approval to :
- Create webhooks
- View and manage orders and sales reports
- View and manage products
- Approve and proceed
- Your WooCommerce store is connected to Zoho Inventory successfully.
Once you approve and authorize the app you will be redirected to the “Dashboard section,” and you have been onboarded successfully.


