6.1.Upload the Selected Products ↑ Back to Top
To upload the selected products
- Go to the WooCommerce Admin panel.
- On the left navigation bar, click the SEARS menu.
- In the right panel, click the MANAGE PRODUCTS tab.
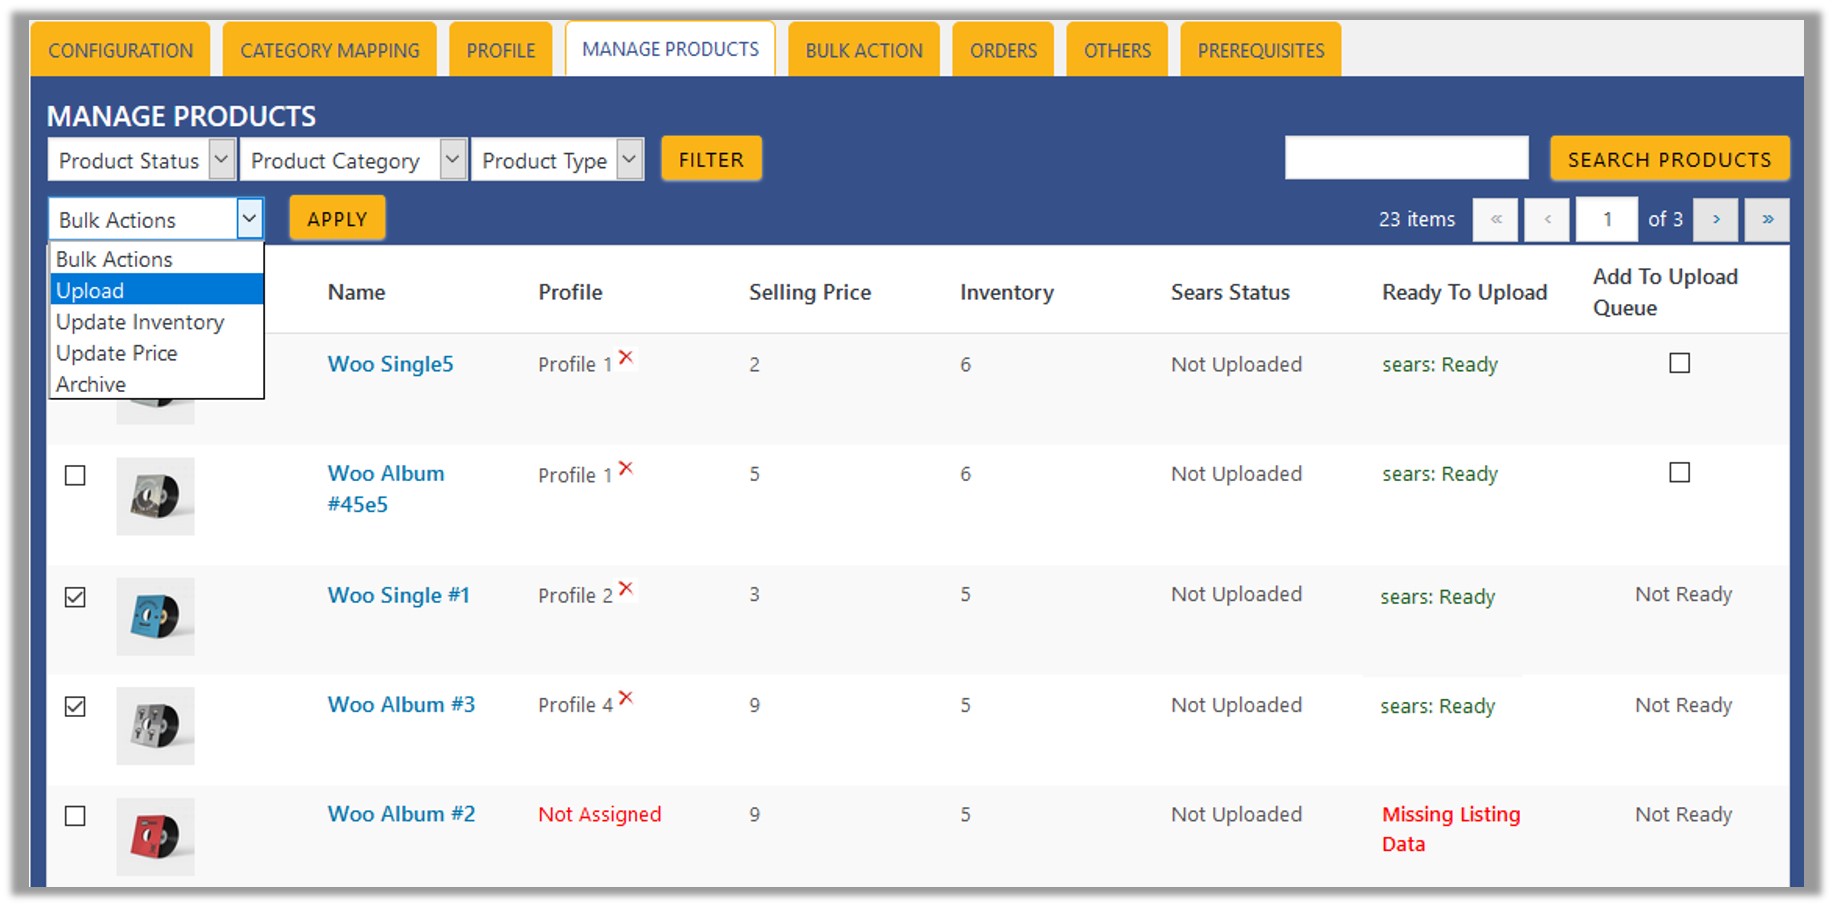
The MANAGE PRODUCTS page appears as shown in the following figure:

- Select the check boxes associated with the required products to upload.
- Click the Arrow button next to the Bulk Actions field, click Upload, and then click the Apply button.
The selected products are uploaded and a success message appears.
Note: In the Add to Upload Queue column, select the check boxes associated with the required products to queue up the product to upload them again if required.
×


