
Sales Orders
Admin can perform the following tasks on the Sales Orders page:
- Fetch all the new orders fetched from Jet.com
- View all the orders
- Synchronize all the orders
- Reset Filter
- Fetch Acknowledged Orders
- Synchronize Fulfilled orders
- Export the CSV file of the selected orders
- View the current order details
- Ship Current Order
- Cancel acknowledged order on Jet.com
To manage the sales orders
- Go to the Shopify Jet Integration App.
- On the top navigation bar, click the Orders menu.
The menu appears as shown in the following figure:
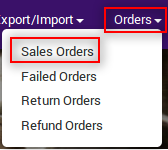
- Click Sales Orders.
The Sales Orders page appears as shown in the following figure:
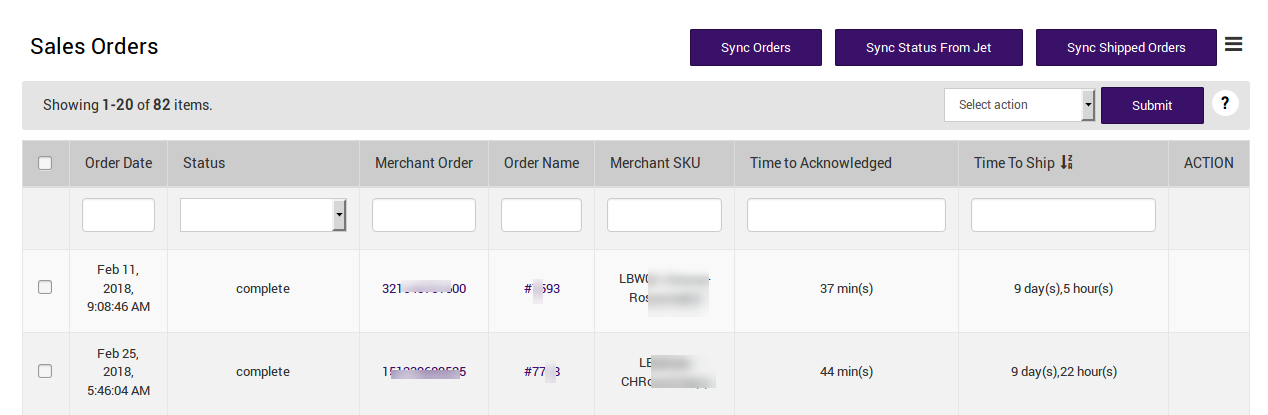
- To fetch the new orders from Jet.com, click the Fetch Orders button.
The new orders if available are fetched from Jet.com and are listed on the page.
Note: The Fetch Orders button is activated only if new orders are available on Jet.com. - To synchronize all orders, click the Sync Orders button.
The orders are synchronized and a success message appears.
Note: The Sync Orders button is activated only if there is any order, which is not yet synchronized with Jet.com. - To reset filter on available orders, click the Reset Filter button.
The filter on the orders is reset. - To fetch acknowledged orders, do the following steps:
- Click the Menu
 icon.
icon.
The menu appears as shown in the following figure:
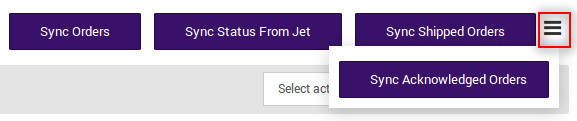
- Click Fetch Acknowledged Orders.
The acknowledged orders if available are fetched from Jet.com and are listed on the page.
- Click the Menu
- To export CSV file of the selected orders, do the following steps:
- Select the check boxes associated with the required sales orders.
- In the Select action list, select Export CSV.
- Click the Submit button.
A dialog box appears as shown in the following figure:
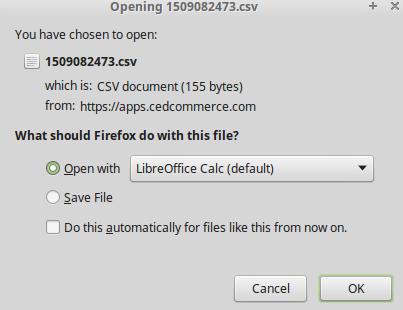
- Click to select the Save File option, and then click the OK button.
The CSV file is exported and saved at the selected location of the local system. - Make the required changes if required and then save the CSV file.
- To view the current order details, do the following steps:
- Scroll down to the required sales order.
- In the respective Action column, click the View
 icon.
icon.
The page appears as shown in the following figure:
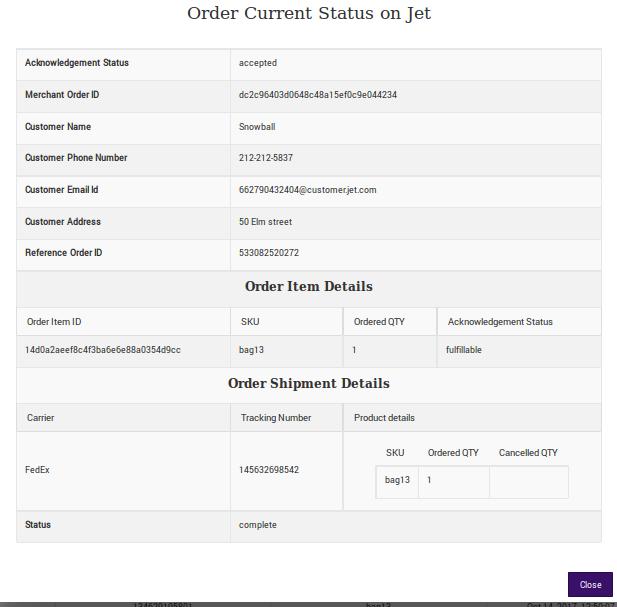
All the details of the current order appear on this page. - Click the Close button.
- To ship the current order, do the following steps:
- Scroll down to the required sales order.
- In the respective Action column, click the Shipment
 icon.
icon.
The page appears as shown in the following figure:
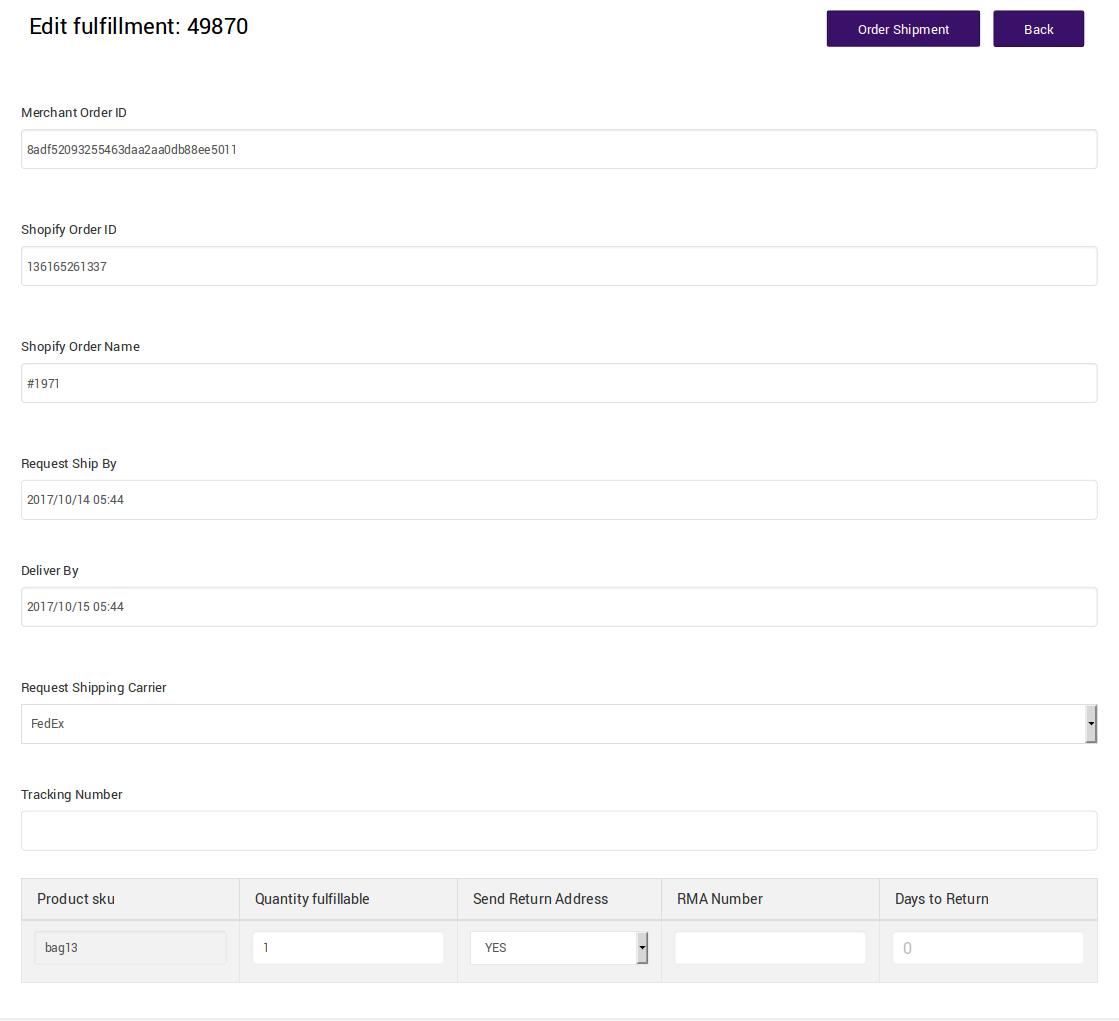
The admin can edit the fulfillment details if required. - In the Tracking Number box, enter the required tracking number.
- In the Quantity fulfillable box, enter the required quantity number.
Note: It cannot be more than the quantity ordered. - In the Send Return Address list, select the required option.
- In the RMA Number box, enter the RMA number.
- In the Days To Return box, enter the number days within which it is eligible to return the order.
- Click the Order Shipment button.The order is shipped and a success message appears.
- To cancel the acknowledged order, do the following steps:
- Scroll down to the required sales order.
- In the respective Action column, click the Cancel
 icon.
icon.
The page appears as shown in the following figure:
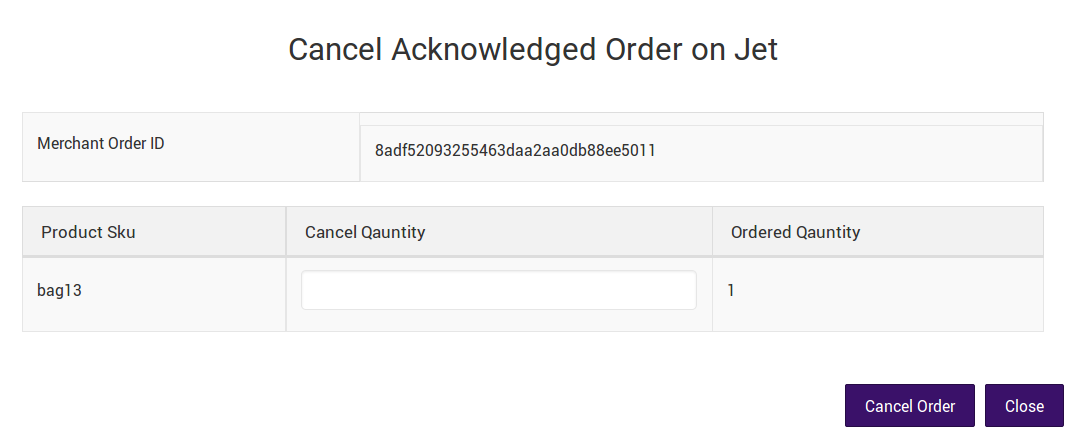
- Click the Cancel Order button.
The order is canceled.
×


