
Rakuten Configuration Settings
After obtaining the Client Id, Client Secret, and Authorization Code values from Rakuten Seller account, the Magento store owner has to paste them on the Rakuten Configuration page of the admin panel.
To set up the configuration settings in the Magento Admin panel
(1.) Go to the Magento Admin panel.
(2.) On the top navigation bar, point to the Rakuten menu, and then click Configuration.
 The Rakuten Configuration page appears as shown in the following figure:
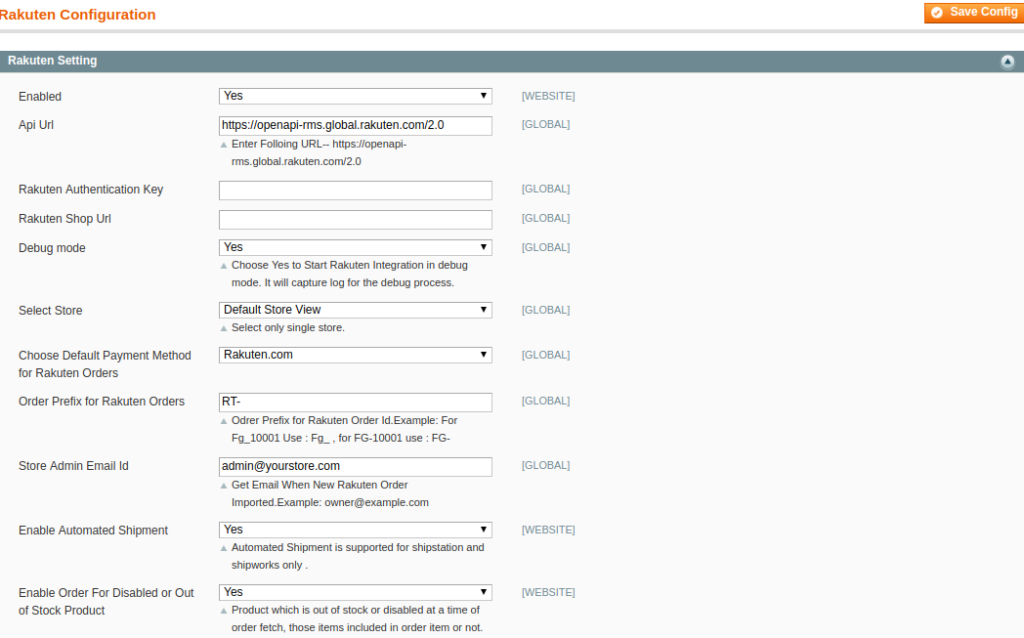
(3.) Under Rakuten Setting, do the following steps:
- In the Enabled list, select Yes to enable the Rakuten Integration extension.
- In the Sandbox list, select one of the following options:
Yes: Selecting Yes displays the following fields:- Sandbox User: Paste the Client Id copied from the Rakuten seller panel.
- Sandbox Password: Paste the Client Secret copied from the Rakuten seller panel.
- No: Selecting No displays the following fields:
- User: Paste the Client Id copied from the Rakuten seller panel.
- Password: Paste the Client Secret copied from the Rakuten seller panel.
- In the Code box, paste the Authorization Code copied from the Rakuten seller panel.
- Click the Save Config button.
The settings are saved and the corresponding values appear in the following fields:- API Url
- API Refresh Token
- Redirect URI
- API Access Token
- In the Debug mode list, select Yes.
Note: Choose Yes to Start Rakuten Integration in debug mode. It captures the log for the debug process. - In the Select Store list, select the single store.
- In the Choose Default Payment Method for Rakuten Orders list, select the required payment method.
- In the Order Prefix for Rakuten Orders box, enter the text to prefix with the Order Id.
For example, Use Rakuten- For Rakuten-10001. - In the Store Admin Email Id box, enter the email Id.
- In the Enable Automated Shipment list, select Yes to enable the automated shipment.
Note: Automated Shipment supports only Shipstation and Shipworks.
(4.) Scroll down to the Rakuten Cron Management tab, and then click the tab.
The tab is expanded and the corresponding field under the section appears as shown in the following figure:
 (5.) Under Rakuten Cron Management, do the following step:
- In the Cron Chunk Size list, select the chunk size for cron jobs to sync the product with Rakuten.com.


