
Add New Profile
To add a new profile
- Go to the Magento Admin panel.
- On the top navigation bar, click the Overstock menu.
The menu appears as shown in the following figure:
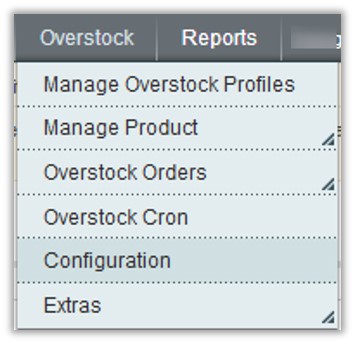
- Click the Manage Overstock Profiles menu.
The Overstock Profile Listing page appears as shown in the following figure:

- Click the Add New Profile button.
The page appears as shown in the following figure:

- In the right panel, under Profile Information, do the following steps:
- In the Profile Code box, enter a profile code.
Note: It is only for the internal use. Use the unique profile code with no spaces. Start with small letters. - In the Profile Name box, enter the name of the profile.
Note: Use the unique name to identify the profile. - In the Status list, select Active to enable the profile.
Note: The Inactive option disables the profile.
- In the Profile Code box, enter a profile code.
- Click the Save and Continue button.
- In the left navigation panel, click the Profile Configurations menu.
The page appears as shown in the following figure:
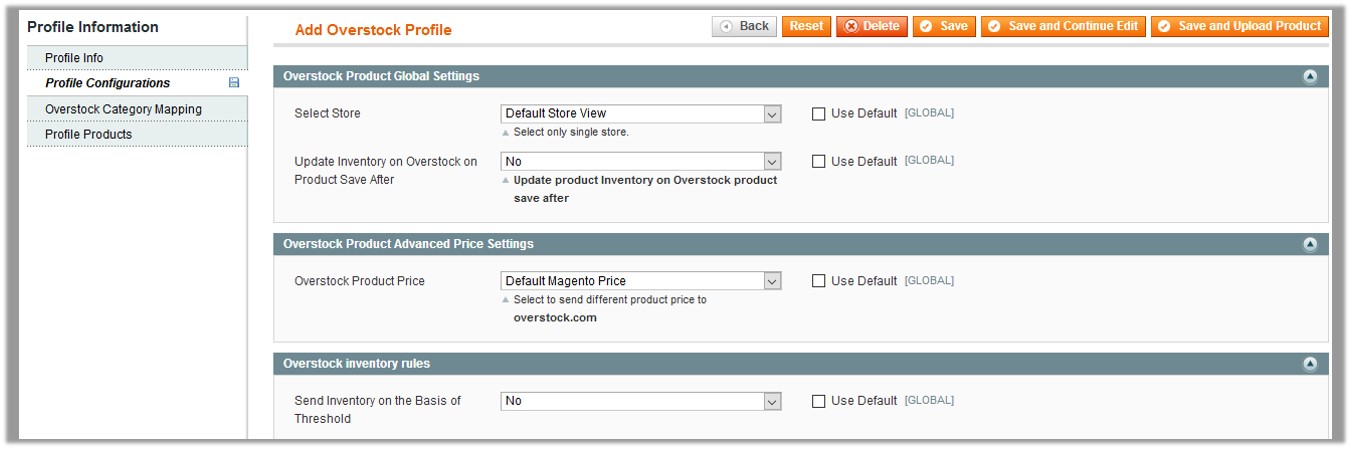
- In the right panel, under Overstock Product Global Settings, do the following steps:
- In the Select Store list, select the single store.
- In the Update Inventory on Overstock on Product Save After list, select Yes to enable the inventory update of the product on saving the product.
- In the right panel, under Overstock Product Advanced Price Settings, enter the values in the corresponding fields.
- Overstock Product Price: This is to set a different price for all the products as shown in the following figure:
User can set the price on the following basis: –- Increase by Fixed Price: If selected, then the Enter Amount field appears.
- Increase by Fixed Percentage: If selected, then the Enter Percentage field appears.
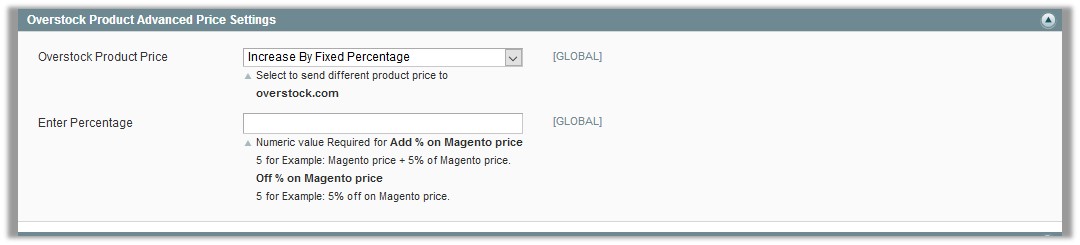
Enter the numeric value to increase the price of the the Overstock product price by the entered value % of Magento price
For Example: Magento price + 5% of Magento price.
Magento Price = 100
Select Increase By Fixed Percentage option
Enter Percentage = 5
100 + 5% of 100 = 100 + 5 = 105
Thus, Overstock Product Price = 105 - Decrease by Fixed Price: If selected, then the Enter Amount field appears.
- Decrease by Fixed Percentage: If selected, then the Enter Percentage field appears.
Enter the numeric value to decrease the price of the the Overstock product price by the entered value % of Magento price
For Example: Magento price – 5% of Magento price.
Magento Price = 100
Select Decrease By Fixed Percentage option
Enter Percentage = 5
100 – 5% of 100 = 100 – 5 = 95
Thus, Overstock Product Price = 95
- Overstock Product Price: This is to set a different price for all the products as shown in the following figure:
- In the right panel, under Overstock Inventory Rules, do the following steps:
- In the Send Inventory on the Basis of Threshold list, select Yes to send the inventory based on threshold.
Note: Only when the admin selects Yes, the other fields appear.
The section appears as shown in the following figure:
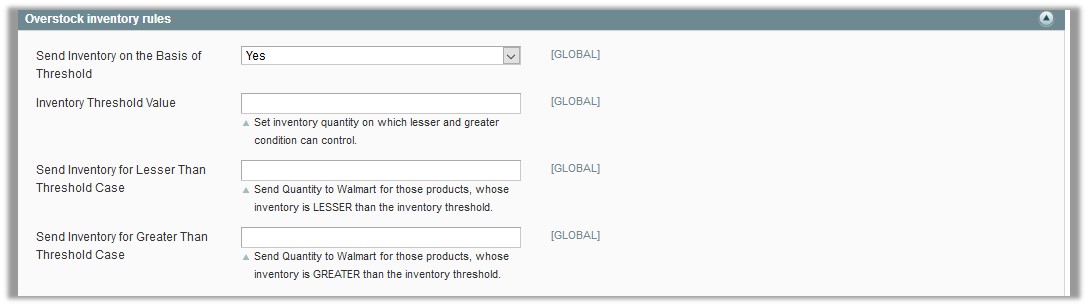
Note: Inventory Threshold Value is the minimum quantity of the inventory that the admin wants to have in hand. - In the Inventory Threshold Value box, enter the required value.
- In the Send Inventory for Lesser Than Threshold Case box, enter the required value.
- In the Send Inventory for Greater Than Threshold Case box, enter the required value.
- In the Send Inventory on the Basis of Threshold list, select Yes to send the inventory based on threshold.
- Click the Save and Continue button.
- In the left navigation panel, click the Overstock Category Mapping menu.
The page appears as shown in the following figure:
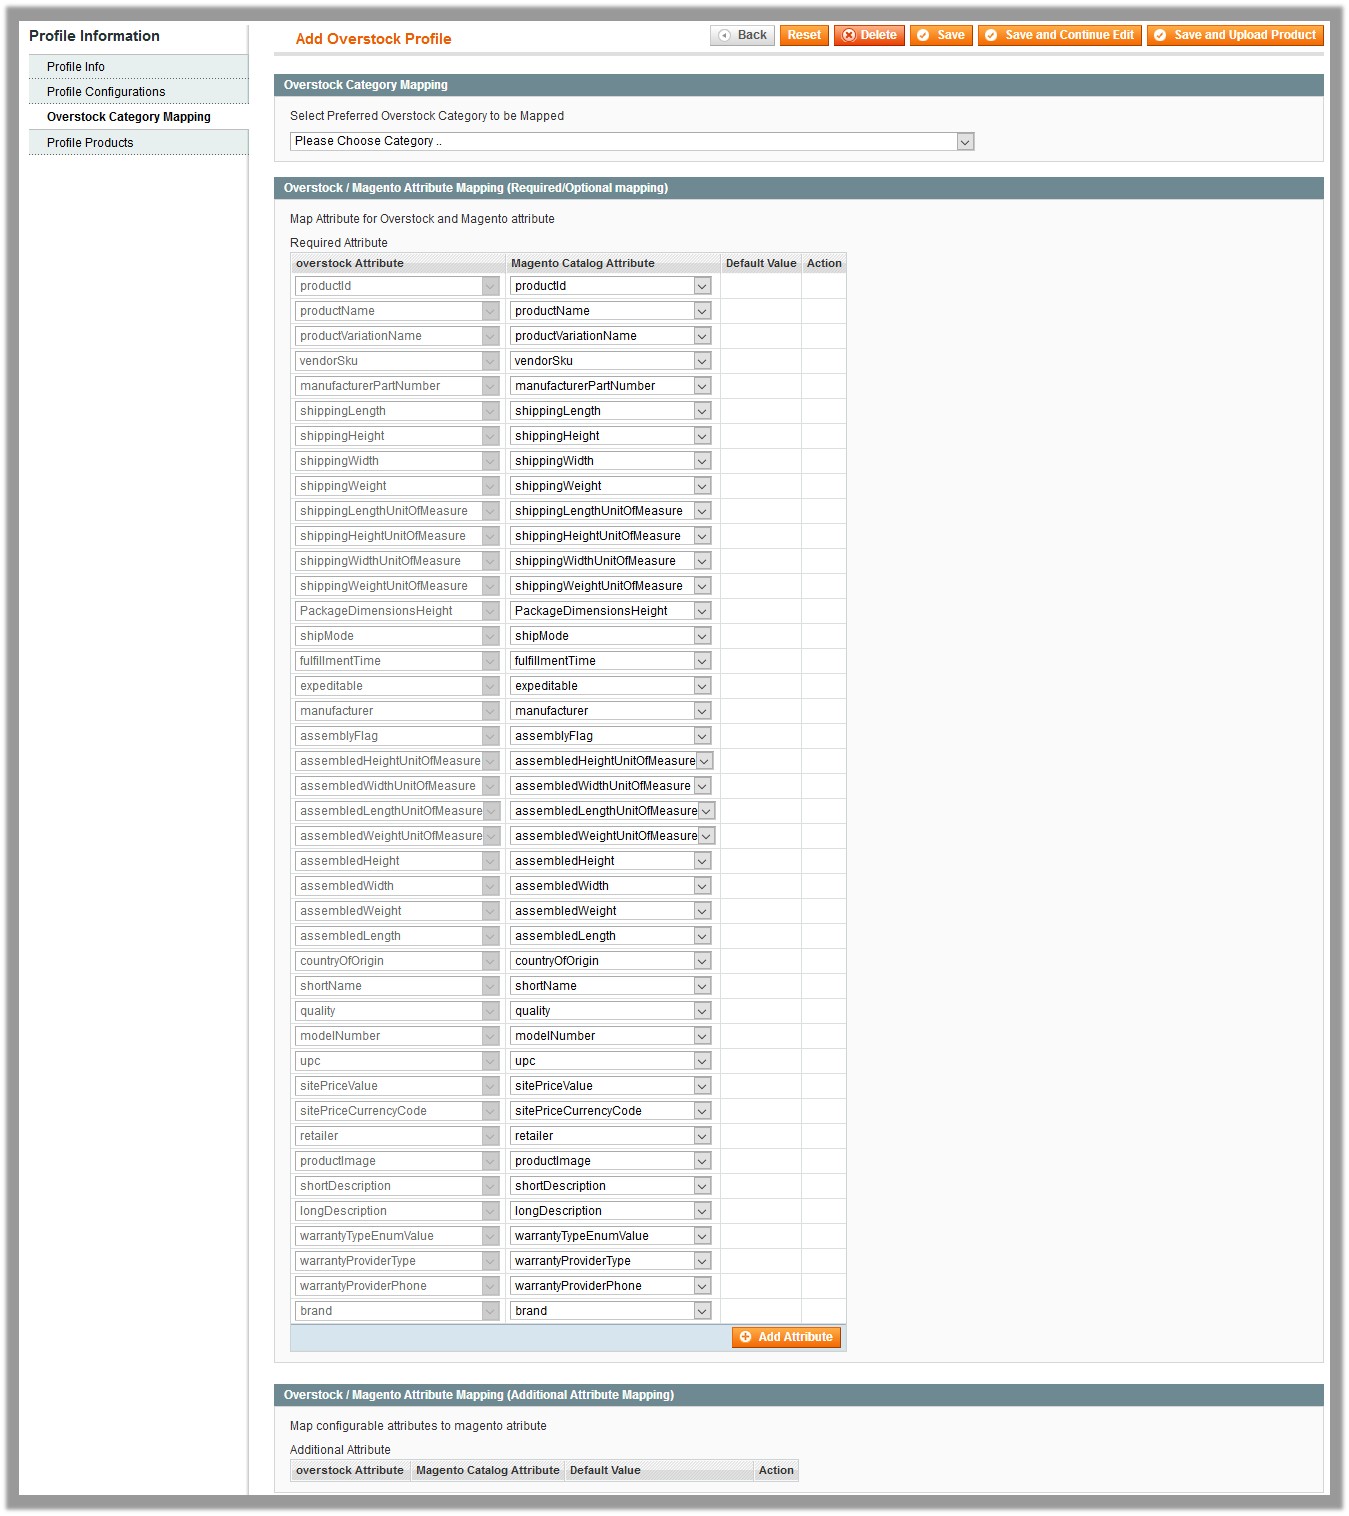
- In the right panel, under Overstock Category Mapping, do the following steps:
- In the category list, select the preferred Overstock category that the admin wants to map.
- In the right panel, under Overstock / Magento Attribute Mapping (Required/Optional mapping), do the following steps:
-
In the Magento Catalog Attribute column, select the required Magento attribute to map it with the corresponding Overstock attribute.
- Repeat the mapping of all the required or optional Magento attributes listed with the corresponding Overstock attributes.
- Click the Add Attribute button to add more attributes.
-
- In the right panel, under Overstock / Magento Attribute Mapping (Additional Attribute Mapping), do the following steps:
Note: Map configurable attributes to magento atribute.
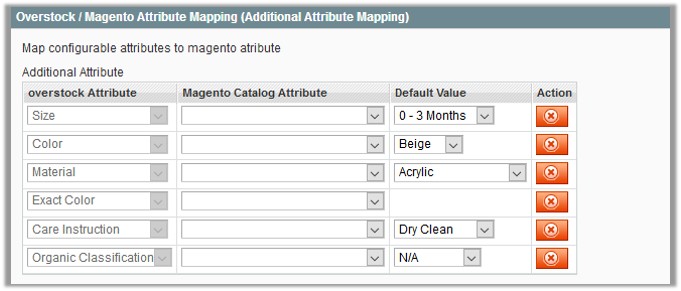
- In the Magento Catalog Attribute list, select the required Magento attribute to map it with the corresponding Overstock attribute.
- In the Default Value list, select the required option.
Note: In the Action column, click the button if the admin wants to delete the corresponding attribute.
- Click the Save and Continue button.
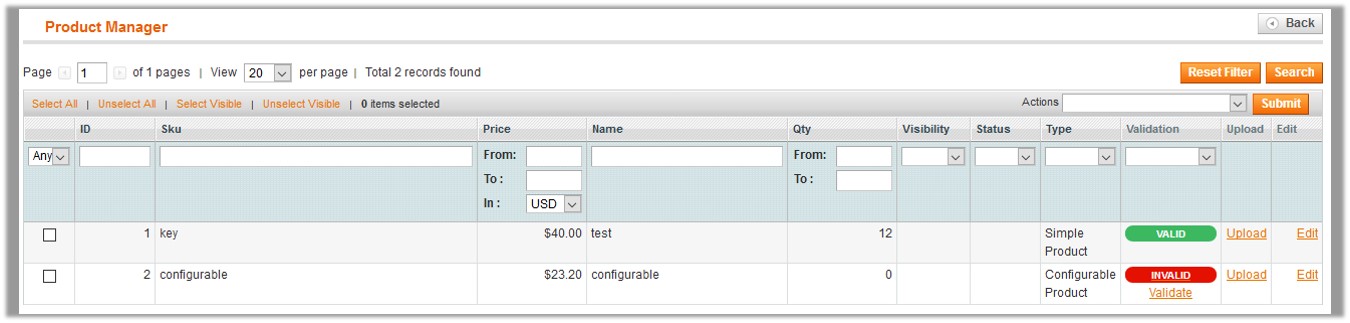
- In the left navigation panel, click the Profile Products menu.
The page appears as shown in the following figure:

Since no products as assigned to the profile, there are no products listed in the table. - Click the Reset Filter button.
All the products are listed in the table as shown in the following figure:

- Select the check box associated with the required product that the admin wants to assign to the new profile.
Note: Admin can assign a product to only one profile. - Click the Save button.
The created profile is saved and listed on the Overstock Profile Listing page.

Or
Click the Save and Continue Edit button to save the created profile and continue editing, if required.
Or
Click the Save and Upload Product button to save the profile and make ready to upload the product on Overstock.
The assigned products are listed on the Product Manager page as shown in the following figure:
×


