
Newegg B2B Configuration Settings
Once the extension is successfully installed on the Merchant’s store, Newegg B2B tab appears in the Magento Admin Panel. The merchant has to fill in the API credentials in the Newegg B2B Configuration page of the admin panel.
The user has to log in the Newegg B2B Seller account to obtain the following API credentials:
- Seller id
- Secret Key
- Authorization Id
The seller can get the Seller Id from the Merchant Panel. For Secret key and Authorization Id can be obtained through the mail from Newegg B2B Marketplace. Seller needs to consult with them through the mail.
How to get the Seller Id from Newegg B2B seller panel.
- Go to Merchant Panel of Newegg B2B as given in the below figure.
- Login to the seller panel
- After login, a screen will be displayed as given in the below screen.
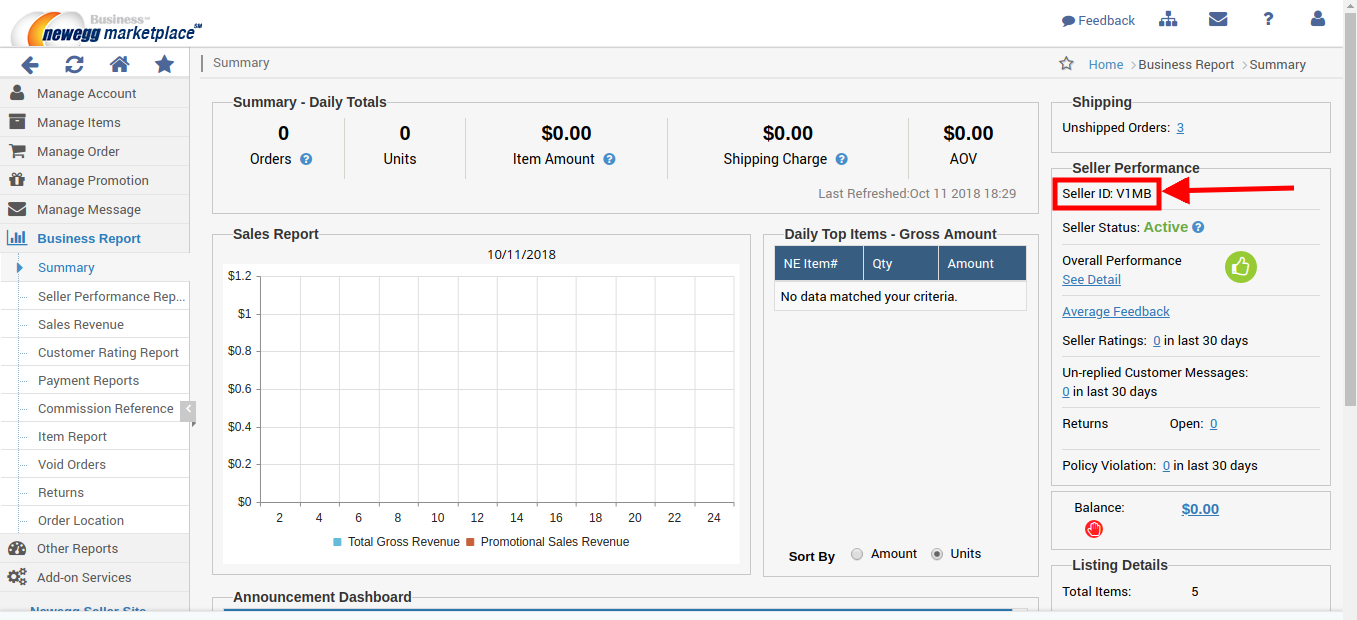
- In the above image, you can see the Seller Id highlighted in the rectangular box.
To Set up the Configuration settings in the Magento store Admin panel
- Go to the Magento Admin panel.
- Click the Newegg B2B tab, as given into the following figure.

- Then click on the Configuration a page will be displayed as given in the below figure.
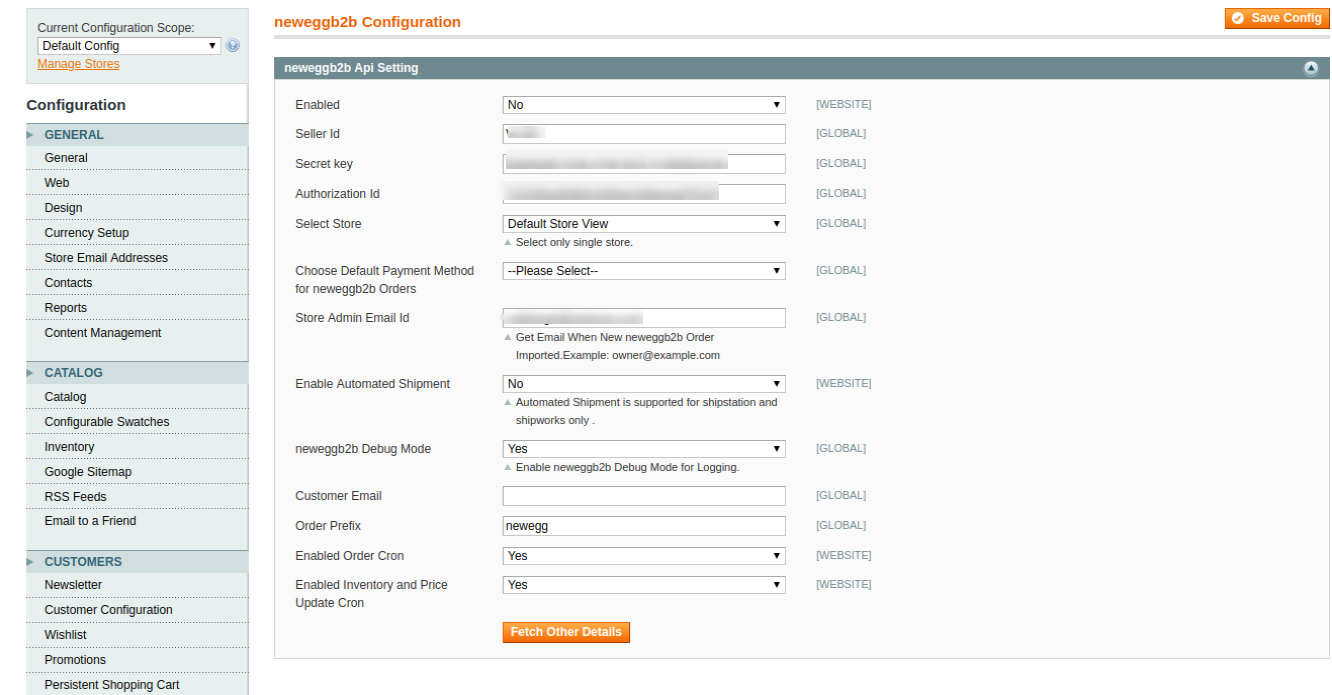
Now fill the details in respective attributes in neweggb2b API Setting as given in the following figure.
- In Enabled attribute,
- Select Yes, to enable the extension.
- Select No, to disable the extension.
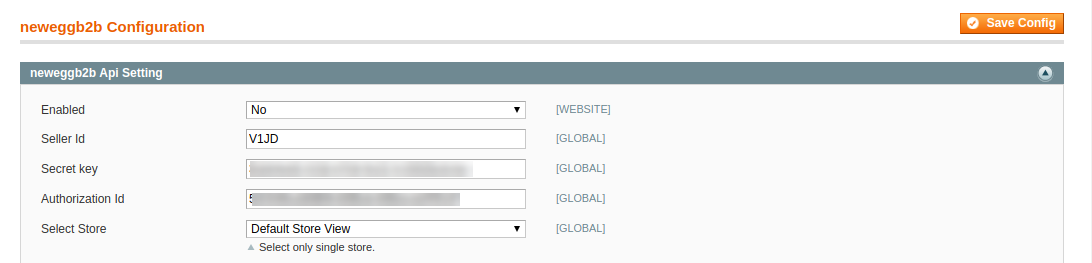
- In Seller Id, Enter the Seller Id number which you have fetched from your Merchant Panel.
- In Secret Key and Authorization Id, Enter the details received from Newegg B2B Marketplace.
- In Select Store,
- Select your store view of your store, if you have the multiple store view.
- If you have a single store, Select the Default Store view.
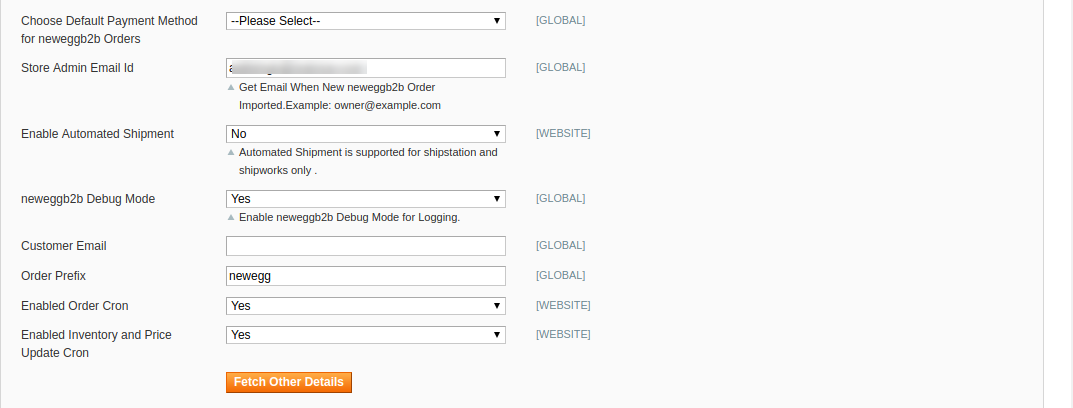
In Choose Default Payment Method for Neweggb2b Orders
- You can select the default payment method according to your need.
In Store Admin Email Id,
- Enter your email Id to get the notification when an order fetched from Newegg B2B
In Enable Automated Shipment,
- Select Yes, to enable the automated shipment
- Select No, to disable the automatic shipment.
In Neweggb2b Debug mode
- Select Yes, to debug and recognize the issues.
- Select No, to disable the debug mode.
In Customer Email,
- Enter the default email Id to create an order if the customer details are not available.
In Order Prefix,
- Enter the prefix in order to recognize the of NeweggB2B
- For Eg: – NB2B (This keyword will add in your Id as Prefix)
In Enabled Order Cron,
- Select Yes, to enable the Order Cron.
- Select No, to disable the Order Cron.
In Enabled Inventory and Price Update Cron.
- Select Yes, to enable the Inventory and Price Cron.
- Select No, to disable the Inventory and Price Cron.
Click on the Fetch Other Details, to import the other details like Manufacturer from your seller panel.


