
Configuration
To complete the configuration,
- Go to your Magento admin panel.
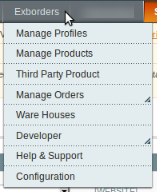
- On the top navigation bar, place cursor on Exborders, which appears when you have installed the extension.
- When the menu appears, click on Configuration.
- On clicking it, you will be navigated to the page as shown below, with different sections:

Exborders API Settings
- Click on the Exborders API Settings. The section will expand as:

- In Enabled, select Yes to enable the extension.
- On selecting Yes, the section will further expand as:

- In Public, enter the specific user credential needed for authentication and which you may get from your Exborders seller account
- Same as Public, in Salt too, enter the credential that you may get from your seller account.
- In Upload Product Using FTP, select Yes if you want to enable product upload via FTP.
- Enter the Host name in the Host Name field.
- Enter your User Name in the next field.
- Enter the FTP password in the Password field.
- For the creation of Exborders account, you may click the Create Exborders a/c which will take you to the Exborders seller registration page.
- To get the Exborders Credentials, click Get Exborders Credentials and you will be navigated to your account where you may get the necessary credentials.
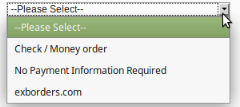
- In Default Payment Method, choose the payment method that you want for your Exborders orders. The options you have to choose from have been shown in the image below:
- Choose a default shipping method for Exborders orders in Default Shipping Method field.
- In Store Admin Email Id, fill the email id on which you want to receive Email Notifications for newly imported orders.
- In , select Yes if you want to Enable Exborders Debug Mode for Logging.
- Enter Customer Id in so that you don’t have to create new customers in Magento for order imported from Exborders.
- In , enter the prefix that you want to be attached to all the orders for your products that you will get on Exborders.
Exborders Product Global Settings
- On clicking the Exborders Global Settings, the section will expand as:

- In Select Store, select the one store that you want to integrate with Exborders.
Warehouse and Courier Settings
- On clicking it, the section will expand as:

- In Select Warehouses, select the warehouse for your product shipping.
- In Select Courier Companies, select the courier companies for your products’ shipping.
Exborders Product Advanced Price Settings
- On clicking Exborders Product Advanced Price Settings, the section will expand as:

- In Exborders Product Price, you may select the price that you want to be sent to Exborders for your products. The price options are:
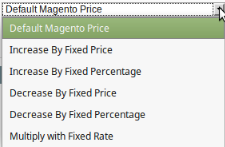
- Default Magento Price: If this option is selected, the price for which your product will be available on Exborders will be same as the price of your product on your Magento store.
- Increase By Fixed Price: You may select this option if you want your product price to be increased on Exborders as compared to you Magento store. If you select this option, a box appears as shown below:
![]()
- By choosing this option, you may enter in the Enter Amount box the amount by which you want your product price to be increased on Exborders as compared to your Magento store. Suppose if you enter 50 in this field and your product is for 100 on your Magento store, then the amount that your product will be available for on Exborders would be 150 (as the amount entered is 50 for Increase by fixed price, so the price entered would be added to the price for which product is available on Magento store).
- Increase By Fixed Percentage: You may use this option if you want the price of your Magento product to be increased on Exborders by a certain percentage. By choosing this option, you may enter in the Enter Percentage box the percentage amount by which you want your product price to be increased on Exborders as compared to your Magento store. Suppose if you enter 20 in this field and your product is for 100 on your Magento store, then the amount that your product will be available for on Exborders would be 120 (as 20% of 100 is 20 which gets added to 100).
- Decrease By Fixed Price- You may use this option if you want the price of your Magento product to be decreased on Exborders. By choosing this option, you may enter in the Enter Amount box the amount by which you want your product price to be decreased on Exborders as compared to your Magento store. Suppose if you enter 50 in this field and your product is for 100 on your Magento store, then the amount that your product will be available for on Exborders would be 50 (as the amount entered is 50 for Decrease by fixed price, so the price entered would be subtracted from the price for which the product is available on Magento store).
- Decrease By Fixed Percentage- You may use this option if you want the price of your Magento product to be decreased on Exborders by a certain percentage. By choosing this option, you may enter in the Enter Percentage box the percentage amount by which you want your product price to be decreased on Exborders as compared to your Magento store. Suppose if you enter 20 in this field and your product is for 100 on your Magento store, then the amount that your product will be available for on Exborders would be 80 (as 20% of 100 is 20 which gets subtracted from 100).
- Multiply with Fixed Rate- You may use this option if you want your Magento products price to be multiplied and that price to be reflected on Exborders. Suppose your Magento product prices for certain products are $100, $50, and $300, and if you enter 5 in the Enter Rate box after selecting the Multiply with Fixed Rate option, the amounts for which your products will be available on Exborders will be $500, $250, and $1500 respectively.
Cron Settings
- On clicking Cron Settings, the section expands as:

- In Cron Settings Override, select Yes if you want to set the crons according to your needs.
- On selecting Yes, the section further expands as:
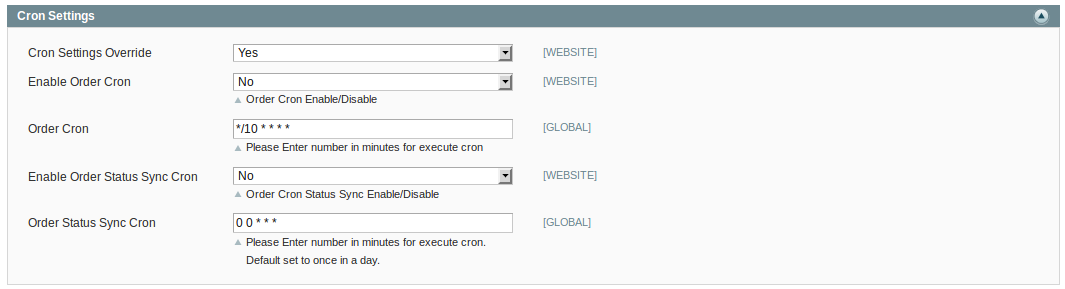
- In Enable Order Cron, you may select Yes and enable it.
- In Order Cron, you may enter the number in minutes after which the order cron will run periodically.
- In Enable Order Status Sync Cron, select Yes if you want to enable it.
- In Order Status Sync Cron, enter the number for minutes after which the cron will get executed periodically.
Once you have completed the process, click on Save Config button on the top right side of the page to save the configuration settings. The configuration will be saved.
×


