
Magento Wizard Setup
The Miravia setup wizard consists of four steps. These are registration, account onboarding, default policies, and summary.
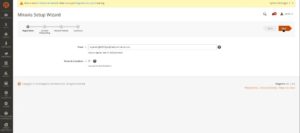
Step 1: Navigate to the left side menu and click on the MIRAVIA MARKETPLACE option.
Step 2: Input the Email address and check the Terms and Condition box.
Step 3: Click on the Next button located at the top right corner. It will redirect you to the Account Onboarding page.
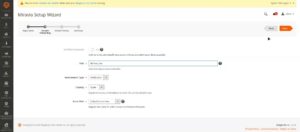
Step 4: Input the following information in the Account Onboarding page.
- Title – It will be a title that you can use to internally identify your Miravia account.
- Environment Type – It will be either production or sandbox and need not be changed.
- Country – Choose the country in which you have registered your Miravia account.
- Store View – Choose an appropriate Magento store view in which you desire to display product information during product upload and update on the Miravia marketplace.
Step 5: Click on the Next button located at the top right corner. It will redirect you to the Miravia Marketplace Dev page.
Step 6: Input the Country, Account and Password. Click on the Authorize button.

Step 7: . It will redirect you to the Default Policies page of Miravia Setup Wizard. Here you will find default policies for Image, Inventory, Pricing, Order and Synchronisation.
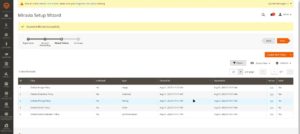
Step 8: Ensure to validate these policies if the Valid column for the policy is No. Follow step 9 and 10 only if the value in the Valid column is No for a policy, else skip to step 11.
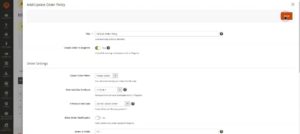
Step 9: Click on the Edit in the Action column.

Step 10: You will see a pop up for the Add/Update Policy page. Input the data in the mandatory fields. Click on the Save button.
Step 11: On the Miravia Setup Wizard page click on the Next button. And, then click on the Finish button present at the top right corner.


