
Registration and Configuration
Now that the app is installed, it’s time to register and then configure the products to be pushed to Bonanza for sale. The entire procedure concerning this process will be explained in this section.
The Step 1: Basic Information
Registration page appears as shown in the following figure:
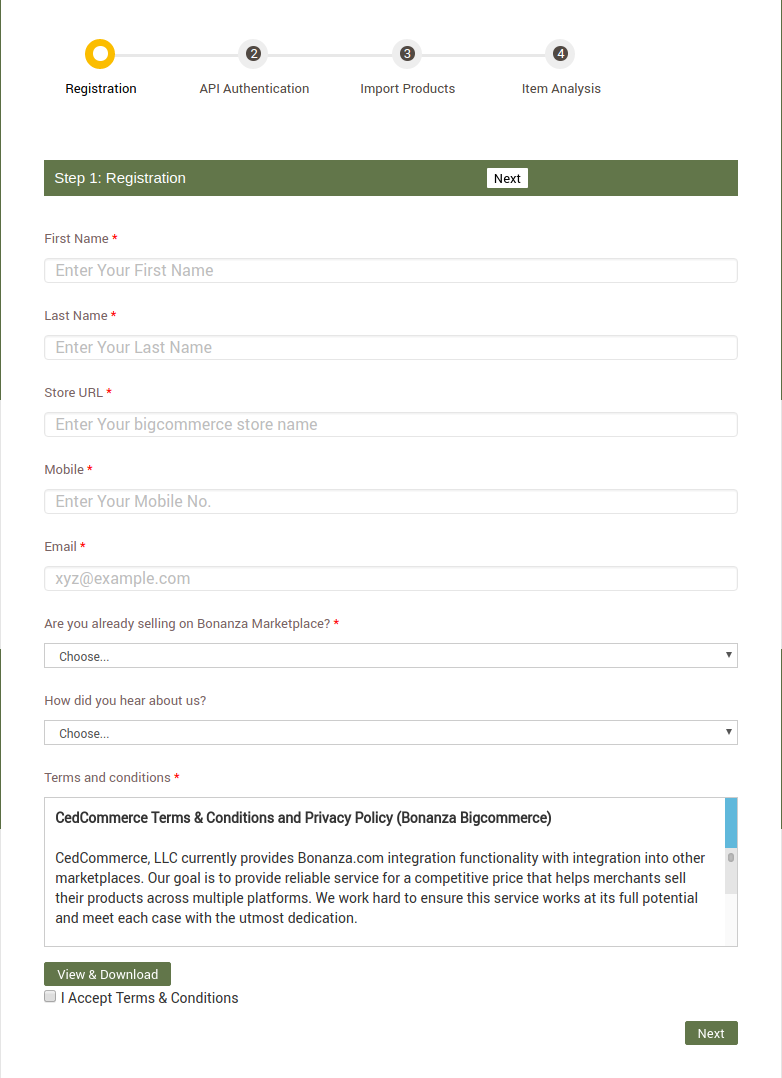
- Now enter the details in the required fields – Name, Store URL, Mobile, Email, Your Primary Time Zone, Your Preferred Time Slot, Time Format.
- Then comes the survey questions – “Are you already selling on Bonanza?” and “How did you hear about us?”.
- Under Terms and conditions, read the content and then select the checkbox associated with the Agreement text. Click the Next button.
The Step 2: API Authentication
The page appears as shown in the following figure:
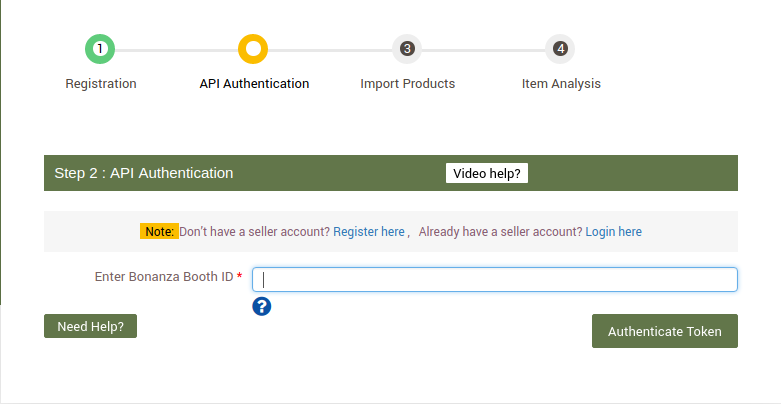
- Here enter the Booth ID fetched from the Bonanza seller panel and hit Authenticate Token.
- After authenticating the token you will be redirected to next page where you have to click on the Back to CedCommerce.com.
Note: Token is a unique id request from Developers which Bonanza grants in order to carry all the API-related operations.
The Step 3: Import Products:
Now that API Authentication process is completed, it’s time to import desired products into the app (so that they can be forwarded to Bonanza to create listings).
Import Products page appears as shown in the following figure:
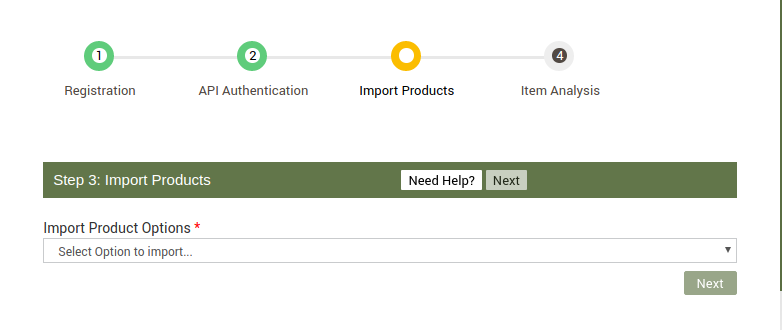
1Under Import Product Options, click the Arrow button.
The options list appears as shown in the following figure:
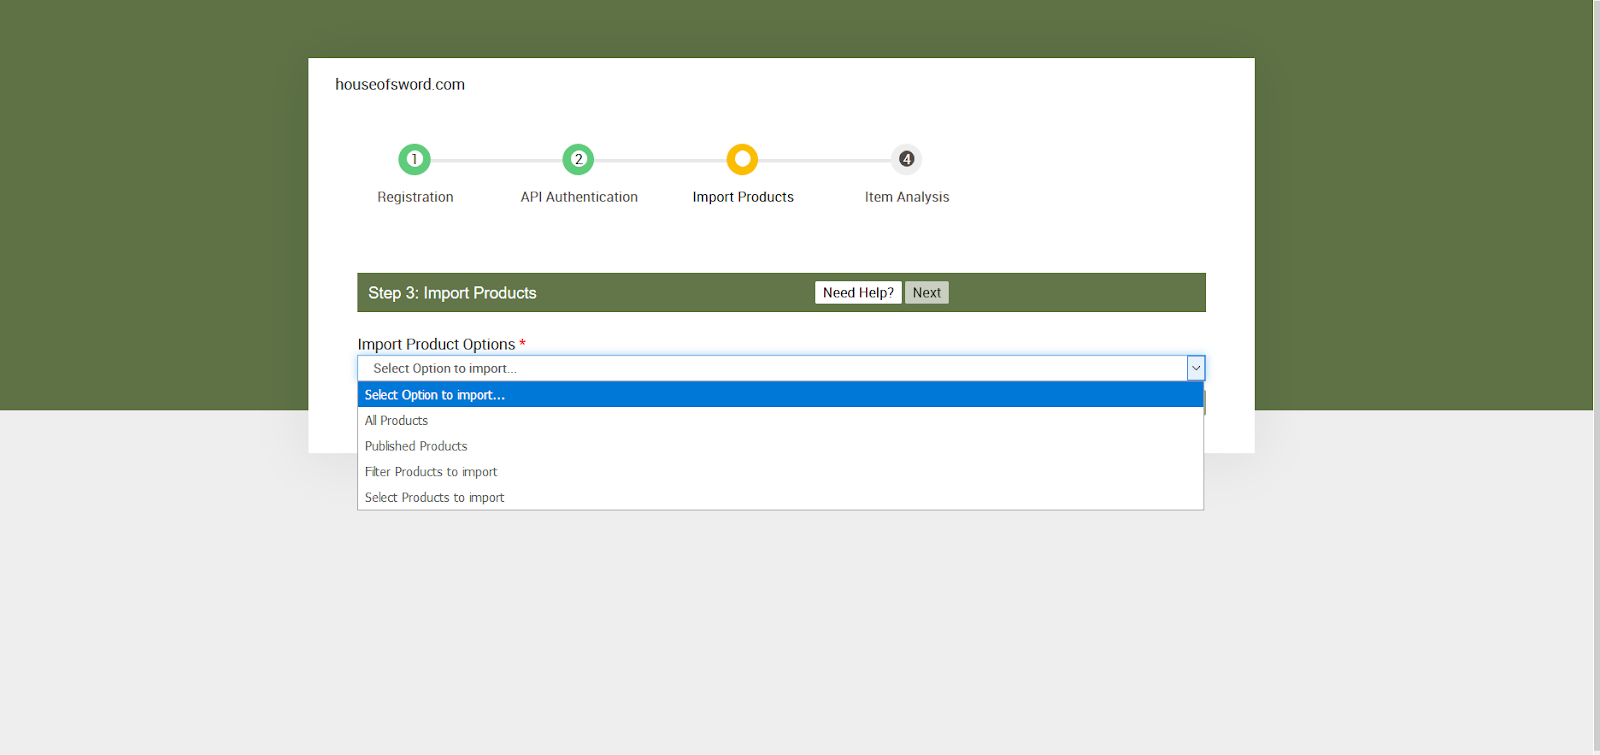
2 In the Import Product Options list, select one of the following options:
All products: It enables the store owners to import all the Bigcommerce store products in the app.
Published Products: It enables the store owners to import only those products which are available at the Bigcommerce store front-end.
Filter Products to Import: It enables the store owners to import only those products which they want to upload from their Bigcommerce store to the app.
3 If selected the All Products or the Published Products option, then the page appears as shown in the following figure:
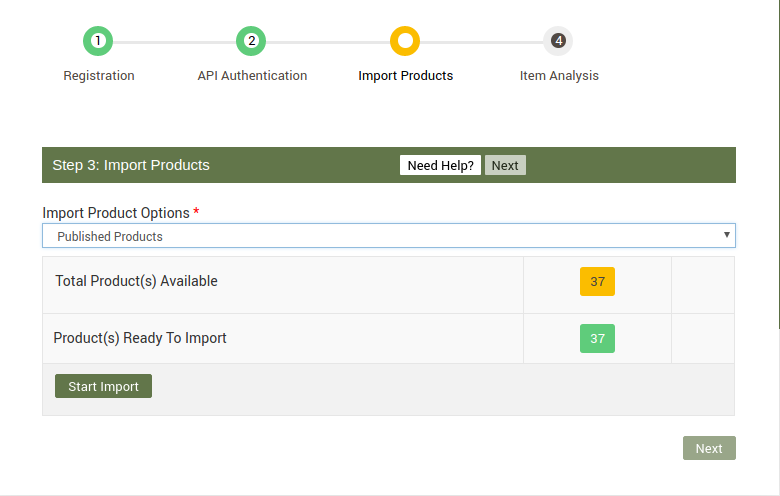
4 Click the Start Import button.
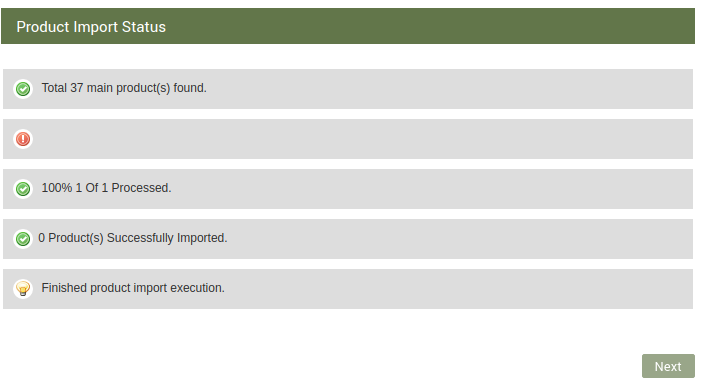
The Product Import Status section appears.
5 If selected the Filter Products to Import option, then the page appears as shown in the following figure: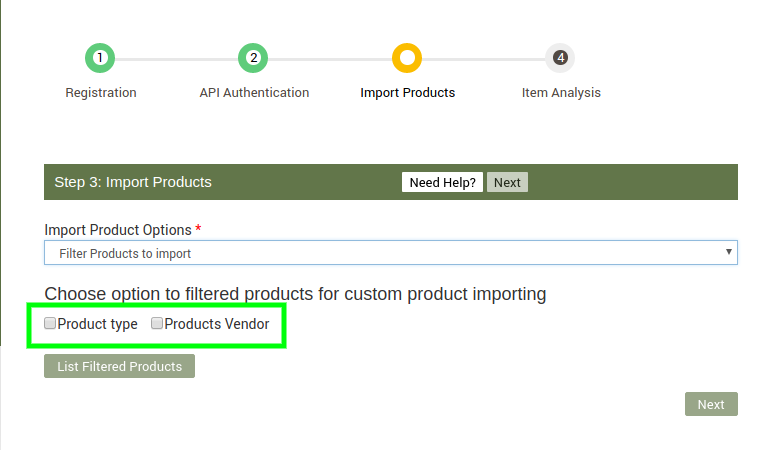
6 Select the required checkbox.
Based on the selection, the corresponding Filter Product Type and Filter Product Vendor fields appear as shown in the following figure:
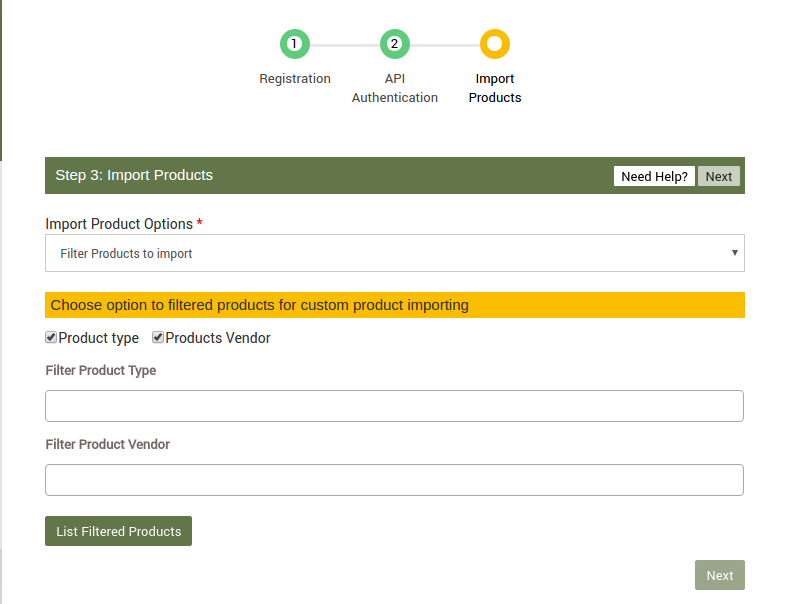
7 In the Filter Product Type list, select the required option.
8 In the Filter Product Vendor list, select the required option.
9 Click the List Filtered Products button.
The page appears as shown in the following figure:

10 Do one of the following steps:
Select the checkboxes associated with the required product SKU.
Or
Select the checkbox associated with the SKU label to select all the products listed on the page.
11 Scroll down to the Start Import button and then click the button.
The Product Import Status section appears as shown in the following figure:
As soon as this registration process completes you’re redirected to your app dashboard which we will talk about in our next segment


