
Profiling - Menu
It is important here to first understand what a profile is. A profile is a way of Product Upload Management which enables the seller to modify product details such as price, inventory, categories, shipping setting, etc before uploading products to Marketplaces such as Walmart, Jet, Bonanza, etc. In Simple Words, Profile provides sellers the ability to control products before getting them uploaded on various Marketplaces
It means, rather than making the changes in the common attributes of each and every product, admin can create a profile and assign it to all the products having common attributes, and thus make the changes in the meta-keys available on the profile page.
While creating and editing the profile, admin can select the product and the corresponding attributes. These attributes are applicable to all the products that are assigned to the profile.
Admin can perform the following tasks:
- Add New Profile
- View Profile
- Edit Profile
- Delete Profile
To add a new profile
- Go to the Bonanza Marketplace Integration App.
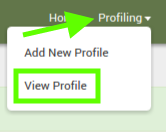
- On the top navigation bar, click the Profiling menu.
The menu appears as shown in the following figure:

- Click the Add New Profile button.
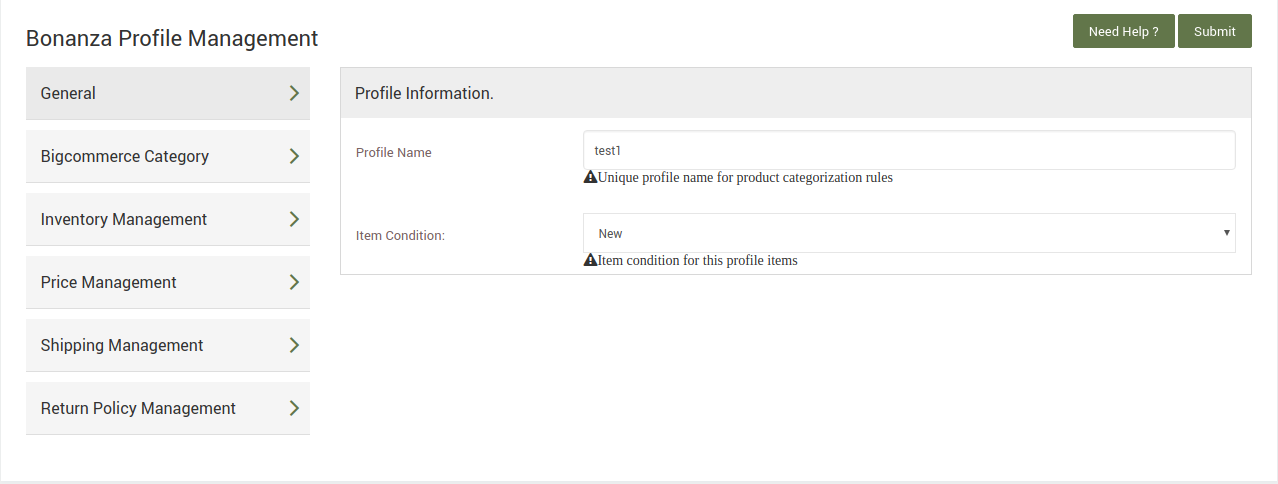
The Bonanza Profile Management page appears as shown in the following figure:

- In the right panel, under Profile Information, do the following steps:
- In the Profile Name box, enter the name of the profile.
- In the Item Condition list, select the required option.
- In the Profile Status list, select the required option to enable or disable the profile accordingly.
- In the left navigation panel, click the Bigcommerce Category menu.The Category Management section appears in the right panel.
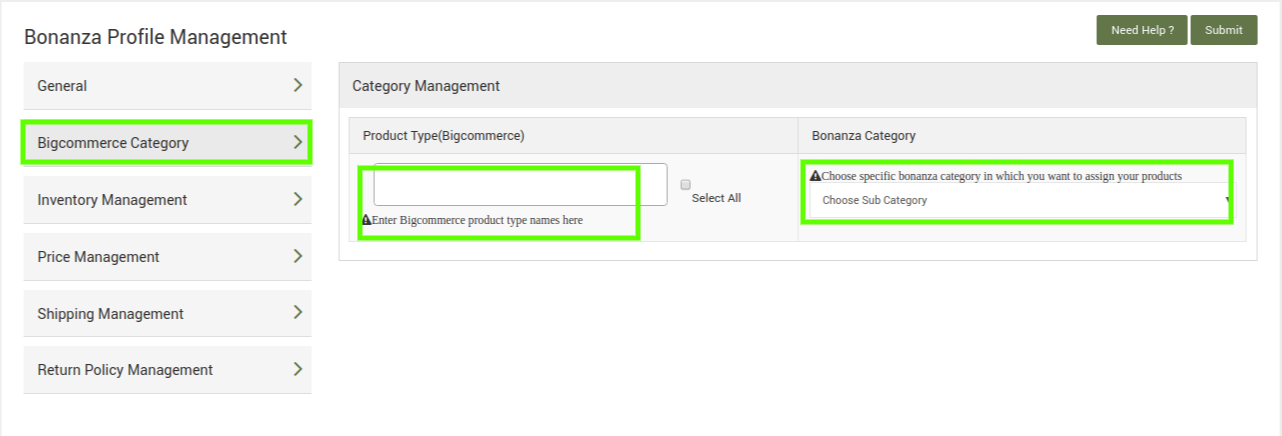
- Under Category Management, do the following steps:
In Product Type box, click to display the list of product types.a) In the Bonanza Category list, select the required category.
b) If the selected category has a subcategory, then another category list appears below as shown in the following figure:
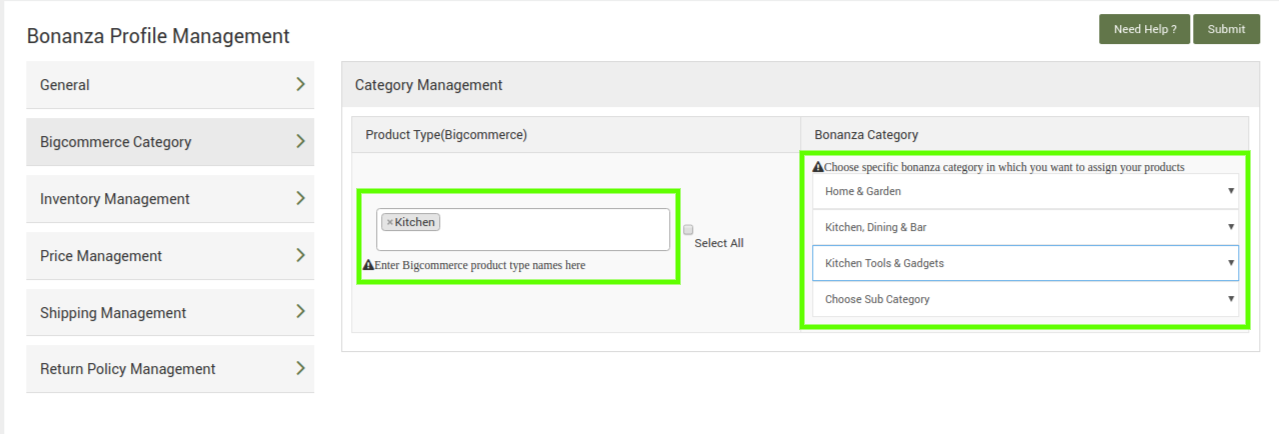
c) Select the required Bonanza subcategories to map it to the selected Bigcommerce Product Type.
- In the left navigation panel, click the Inventory Management menu.The Inventory Management section appears in the right panel.
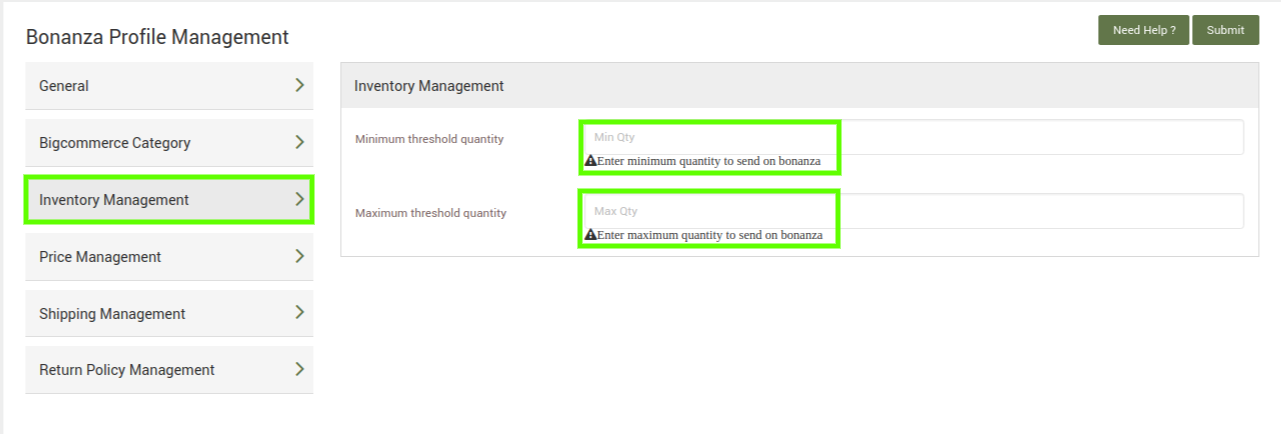
- Under Inventory Management, do the following steps:
a) In the Minimum quantity box, enter the minimum quantity to send on Bonanza.b) In the Maximum quantity box, enter the maximum quantity to send on Bonanza.c) In the if current quantity < minimum quantity, remove product from bonanza list, select Yes to remove the products from Bonanza if condition applied.
10) In the left navigation panel, click the Price Management menu.
The Price Management section appears in the right panel as shown in the following figure:
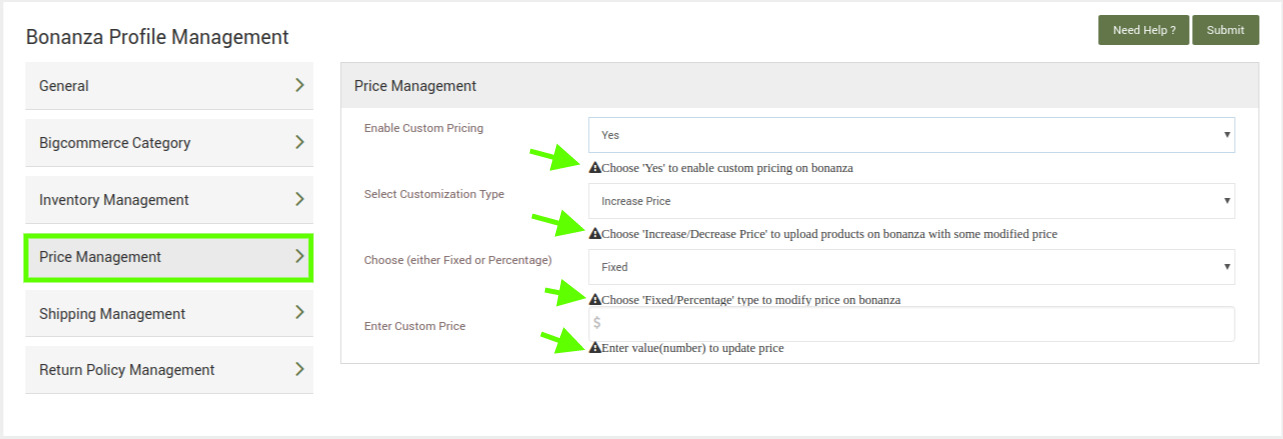
11) Under Price Management, do the following steps:
a) In the Enable Custom Pricing list, select Yes to enable the custom pricing.
b) In the Select Customization Type list, select Increase Price or Decrease Price as per the need.
c) In the Choose(either Fixed or Percentage) list, select Percentage or Fixed as per the need to increase or decrease the price by percentage or the fixed amount.
d) In the Enter Custom Price box, enter the required value.
Enter the numeric value to increase the price of the Bonanza product price by the entered value % of Bigcommerce price.
For Example, Bigcommerce price + 5% of Bigcommerce price.
Bigcommerce Price = 100
Select Increase Price and Percentage options
Enter Custom Price = 5
100 + 5% of 100 = 100 + 5 = 105
Thus, Bonanza Product Price = 105
- In the left navigation panel, click the Shipping Management menu.
The Shipping Management section appears in the right panel as shown in the following figure:
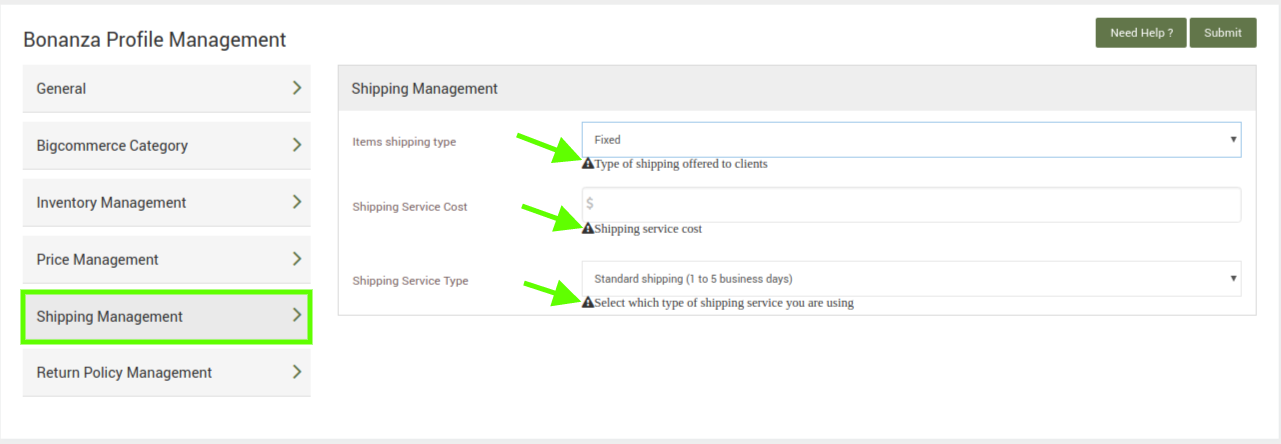
13) Under Shipping Management, do the following steps:
- In the Items shipping type list, select the required option.
- In the Free Shipping Items list, select Yes to make the domestic shipping free.
- In the Shipping Carrier list, select the required carrier.
- In the Shipping Service Type list, select the required type of shipping service.
- In the Shipping Service Cost box, enter the cost.
14 In the left navigation panel, click the Return Policy Management menu.
The Return Policy Management section appears in the right panel as shown in the following figure:
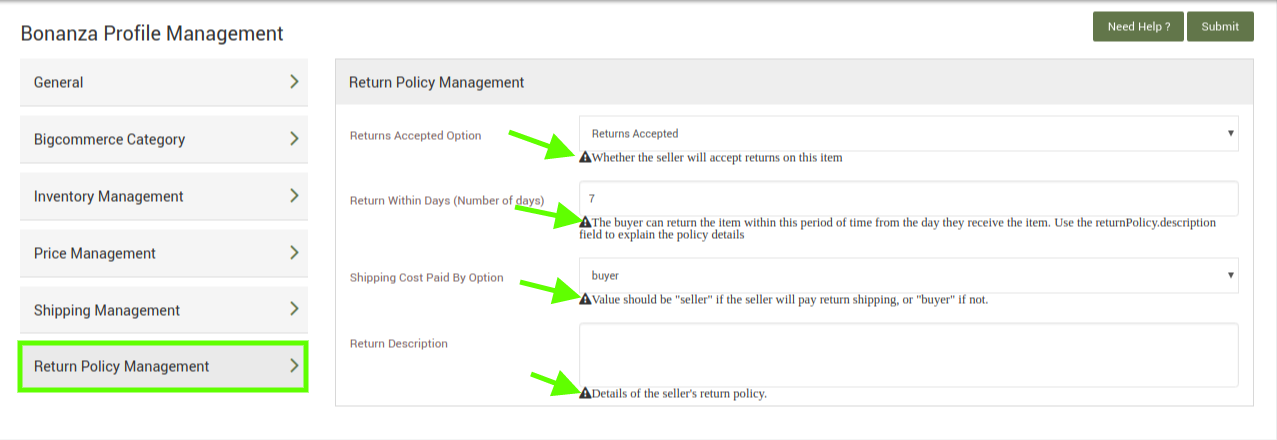
- Under Return Policy Management, do the following steps:a) In the Returns Accepted Option list, select the required option with the intimation whether the seller will accept returns on this item or not.
b) In the Return Within Days (Number of days) box, enter the required number of days.
c) In the Shipping Cost Paid By Option list, select buyer or seller as per the need.
d) In theReturn Description box, enter the description of the return policy.
- Click the Submit button.
The new profile is created and a success message appears on the page.
The store owners can view the profile details.
To view the profile details
- Go to the Bonanza Marketplace Integration App.
- On the top navigation bar, click the Profiling menu.
The menu appears as shown in the following figure:
- Click View Profile.
The Bonanza Profile Management page appears as shown in the following figure:

- Scroll down to the required profile row.
- In the respective row, click the Update Profile
 icon.
icon.
The page appears as shown in the following figure:
The profile information appears. - In the left navigation panel, click each menu to view the details of the respective information.
- Click the Back icon of the browser to go back to the Bonanza Profile Management
The store owners can edit the profile details.
To edit the profile details
- Go to the Bonanza Marketplace Integration App.
- On the top navigation bar, click the Profiling>View Profile.
The Bonanza Profile Management page appears as shown in the following figure
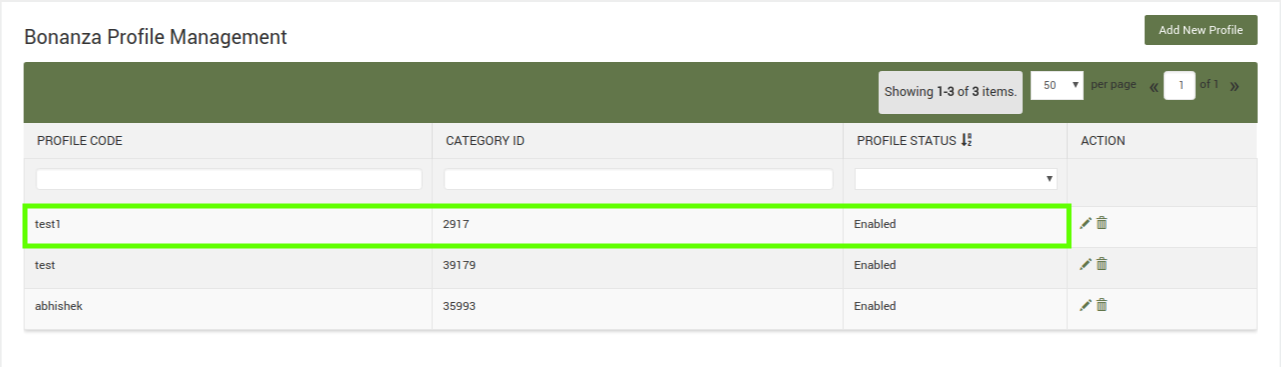
- Scroll down to the required profile row.
- In the respective row, click the Update Profile icon.
The editing page appears as shown in the following figure:
The store owners can delete the profile that is no more required.
To delete the profile
- Go to the Bonanza Marketplace Integration App.
- On the top navigation bar, click the Profiling>View Profile
The Bonanza Profile Management page appears as shown in the following figure:
- Scroll down to the profile row that is no more required.
In the respective row, click the Delete icon.
icon.
A confirmation dialog box appears.
- Click the OK button.
The profile is deleted and a success message appears.


