
General Settings
To set up the General Settings of WP Advanced PDF PRO
- Go the Admin panel.
- On the left navigation bar, click the WP Advanced PDF PRO menu, and then click WP Advanced PDF PRO.
- In the left navigation panel, click the GENERAL SETTINGS menu.
The GENERAL SETTINGS page appear as shown in the following figure:
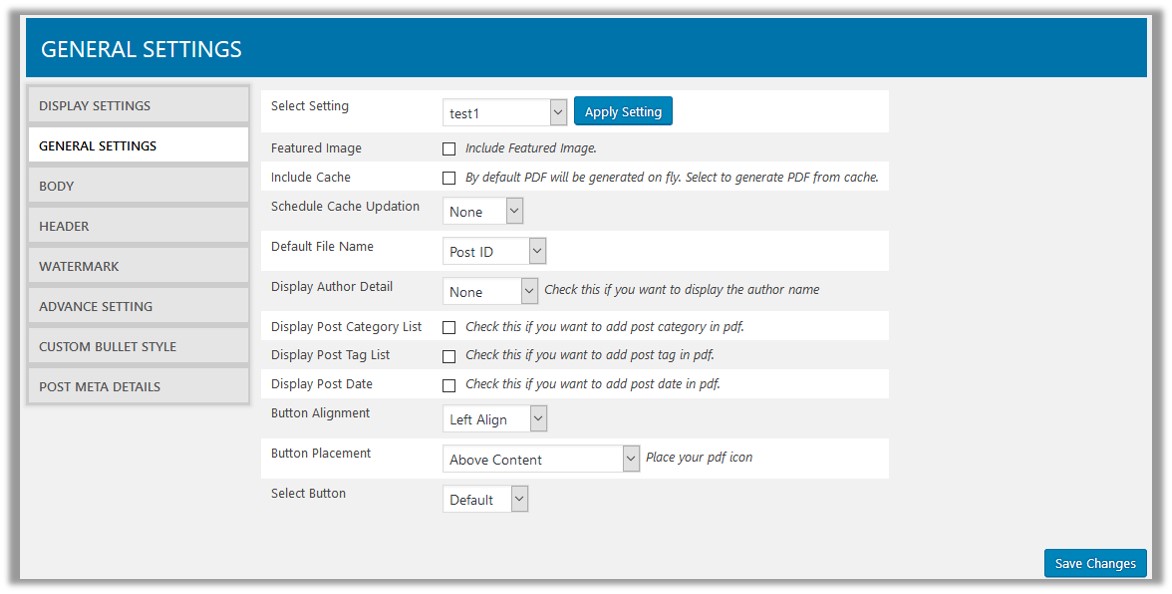
- In the right panel, do the following steps:
- In the Select Setting list, select the required setting, and then click the Apply Setting button.
A dialog box appears as shown in the following figure:
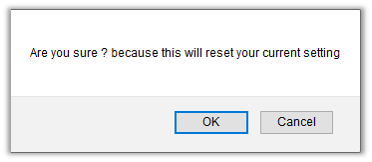
- Click the OK button to reset the setting according to the selected setting. Or click the Cancel button to retain the current settings.
- Select the checkbox next to the Featured Image field to include the featured image.
- Select the checkbox next to the Include Cache field to generate PDF from the cache, if available.
- In the Schedule Cache Updation list, select the duration for updating the cache.
Option are listed as follows:- None
- Daily
- Weekly
- In the Default File Name list, select the file name for the generated PDF.
Here are the options:- Post ID
- Post Name
- In the Display Author Detail list, select the required options:
- None
- First Name
- Last Name
- Nickname
- Select the checkbox next to the Display Post Category List field, to add the post category in the pdf.
- Select the checkbox next to the Display Post Tag List field, to add the post tag in the pdf.
- Select the checkbox next to the Display Post Date field, to add the post date in the pdf.
- In the Button Alignment list, select one of the following options to align the PDF icon accordingly:
- Left Align
- Right Align
- Center
- None
- In the Button Placement list, select one of the following options to place the PDF icon accordingly:
- Above Content
- Below Content
- Below and Above Content
- In the Select Button list select one of the following options to display the selected type of PDF icon:
- Default
- Custom
- In the Select Setting list, select the required setting, and then click the Apply Setting button.
- In the lower-right corner of the page, click the Save Changes button to save the settings.
×


