
2.1.3.How to create a campaign ↑ Back to Top
Follow the steps to create a campaign:
- Go to the dashboard. You will come across a Welcome screen if you are creating a campaign for the first time.
- On the welcome screen, you will see a prompt to ‘Create your First Campaign.’ Click on ‘Create Campaign.’
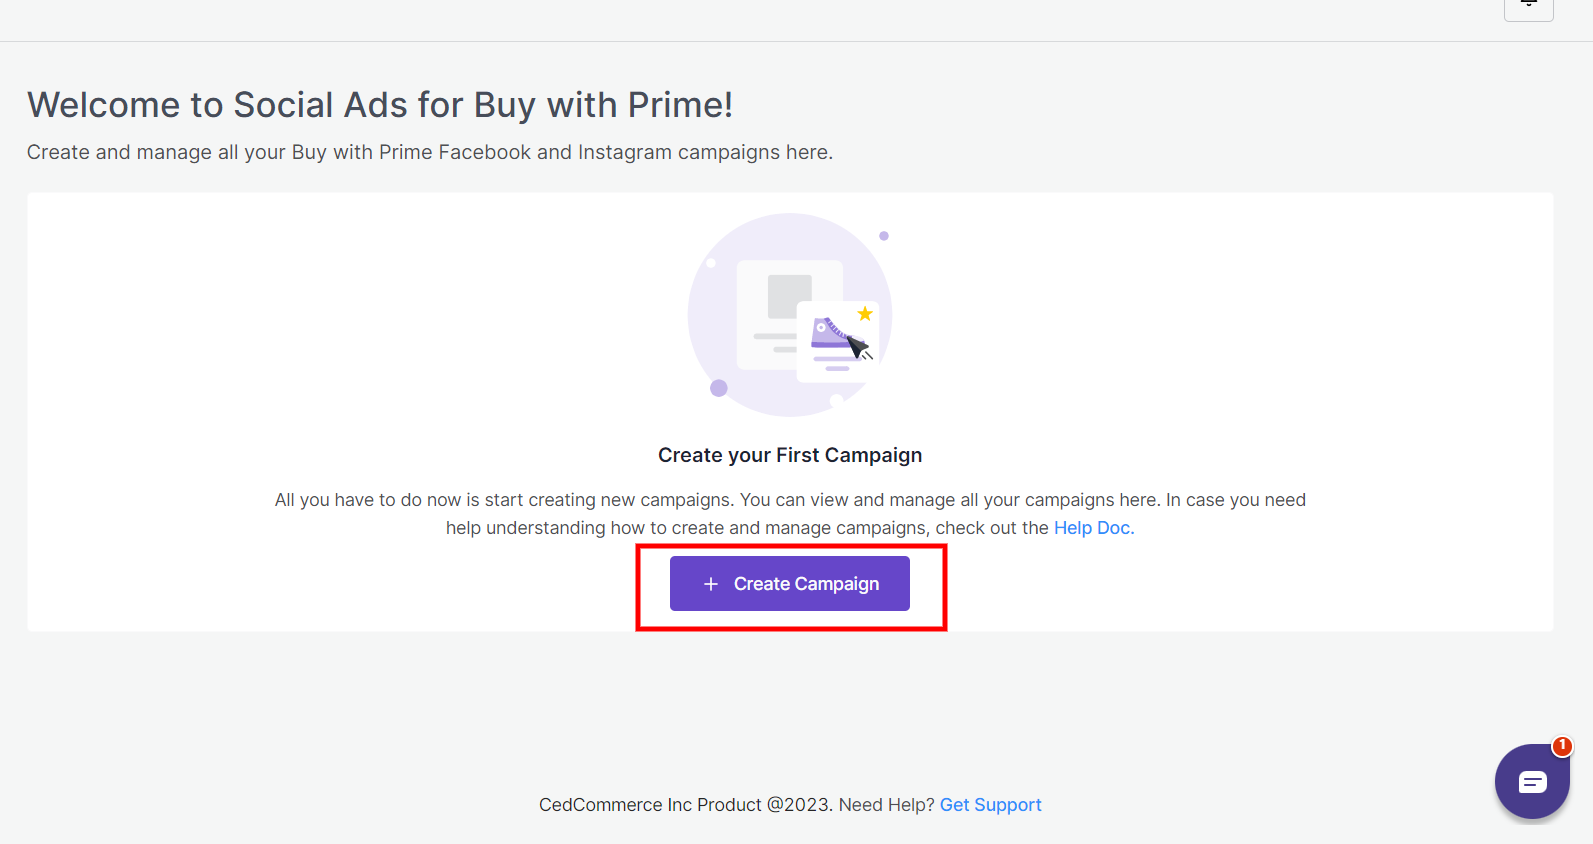
Note: The ‘Create Campaign’ button will appear in the upper right corner if this is not your first campaign.
- You will be redirected to the ‘Setup Campaign’ page.
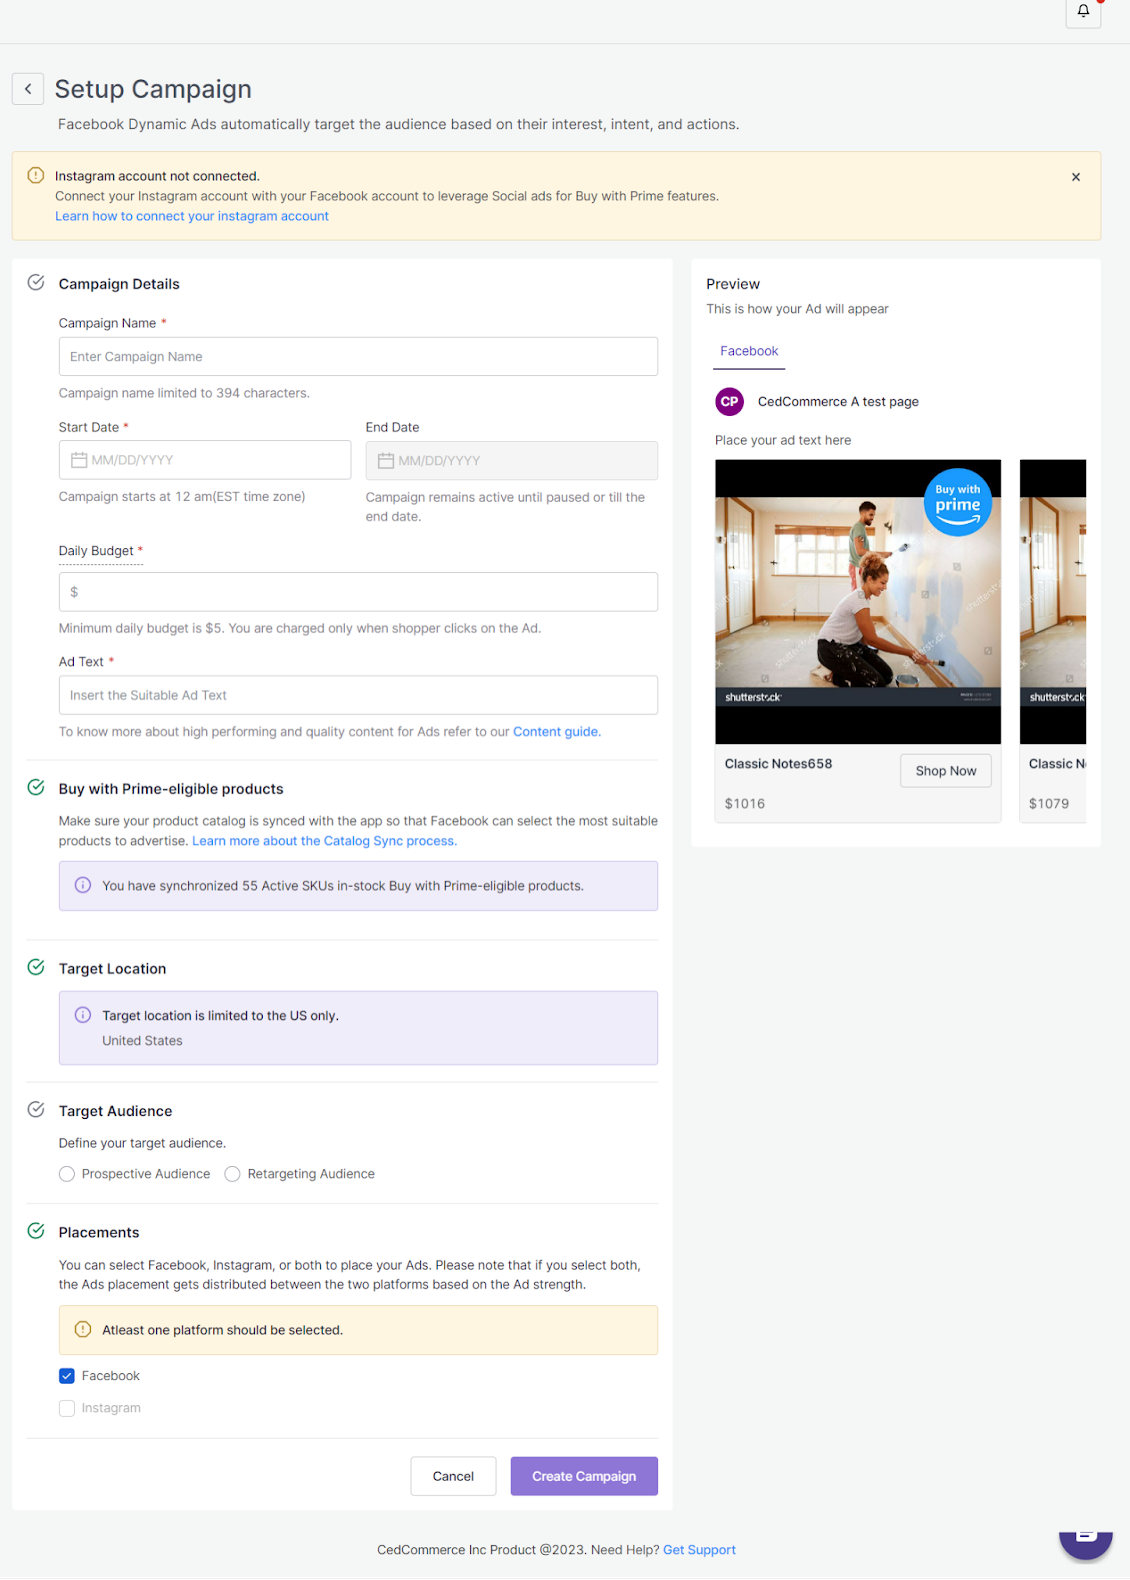
- Once you are on the Setup Campaign page, fill out the Campaign details to set up your campaign:
- Provide a suitable Campaign Name for your ad. Please note that the maximum limit for the Campaign name is limited to 394 characters.
- Choose a Start Date and an End Date. Please note that only scheduled campaigns will start at 12 am (EST time zone), while active or paused campaigns may have different start times.
- Set a Daily Budget for your campaign. Please note that the minimum daily budget is $5, and you will only be charged when a user clicks on your ads.
- Now give a suitable ‘Ad Text.’ To learn more about high-performing and quality content for Ads, please refer to the following Content Guide.
Note: Please note that you will only be able to create campaigns when your product catalog has successfully synced in the channel.

- By default, the app will select the US as the target location since the services are limited to the US only.
- The next step is to select a target audience for your ad campaign. With Social Ads for Buy with Prime, you have the feasibility to create two types of ad campaigns. These ad campaigns are based on the targeted audiences. The two types of audiences are:
- Prospective Audience: Prospective audiences are the type of audience you wish to target directly. In simpler words, the prospective audiences are your direct target audiences for whom you have developed your services or products. These target audiences are based on demographic, interests, behavior, actions, and more.
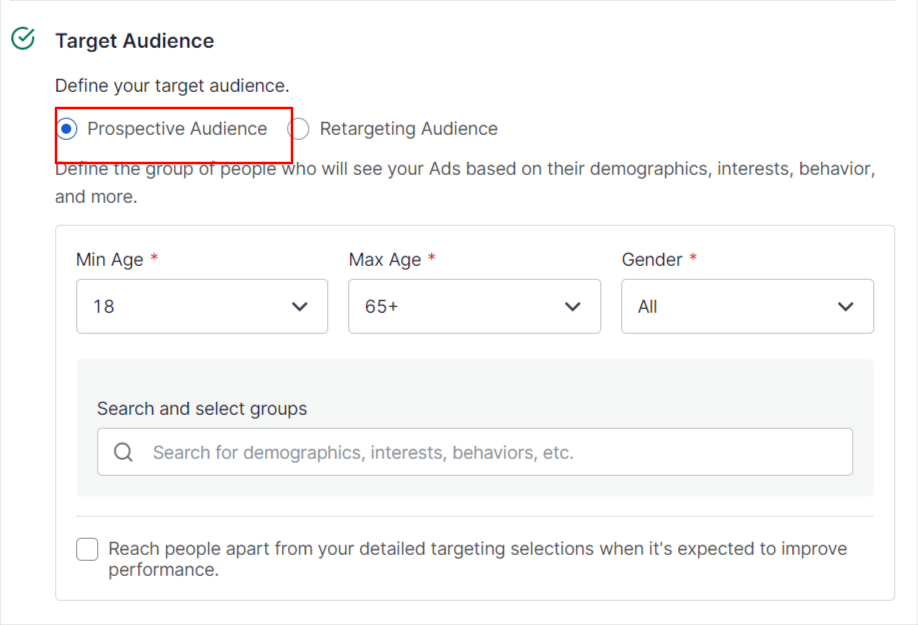
- If you select Prospective Audience, a drop-down section will appear where you will have to define the group of people who will see your Ads based on their demographics, interests, behavior, and more.
- Fill out the minimum age, maximum age, and gender of the audience you want to target. Now enter your search, and select from the audience that you want to target, which is based on their interests, behavior, and demographics.
- After you have defined your target audience, you will see a checkbox below. This checkbox will allow Facebook to increase the range of your target audience, irrespective of the audience you have selected. However, it will only expand your target audience beyond the defined limit if it improves the campaign’s performance.
- Prospective Audience: Prospective audiences are the type of audience you wish to target directly. In simpler words, the prospective audiences are your direct target audiences for whom you have developed your services or products. These target audiences are based on demographic, interests, behavior, actions, and more.
- Retargeting Audience: A retargeting audience is the audience that has previously interacted with your products. They might have added your product to the cart and did not go on to complete the purchase.
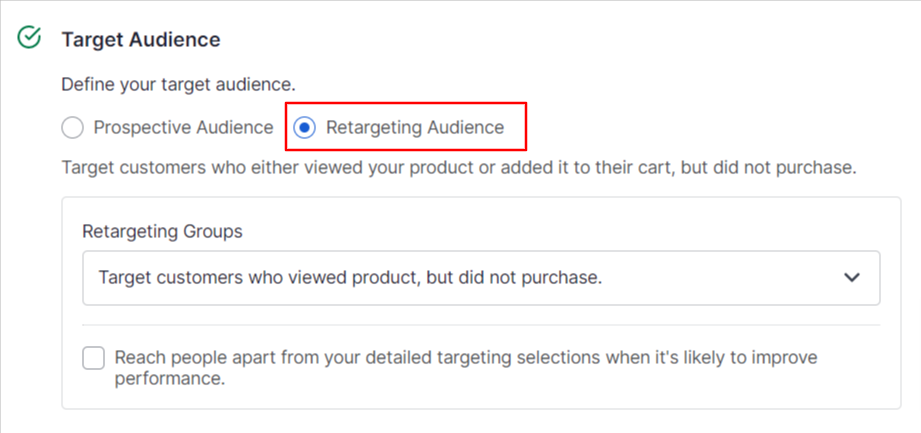
- If you select Retargeting Audience, a drop-down section will appear.
- Select your retargeting groups. There are two types of groups available that you can retarget.
- Target customers who viewed the product but did not purchase.
- Target customers who added your product to the cart but did not purchase.
- After you have selected your target audience, you now have to select the platform where you want to place your ads.
- From the Placement section, select Facebook or Instagram. Additionally, you can select both platforms to place your Ads. However, if you select both Facebook and Instagram, the Ads placement gets distributed between the two platforms based on the Ad strength.
- In case you select both Facebook and Instagram, the Ads placement will be distributed between the two platforms based on the strength of the Ad performance.
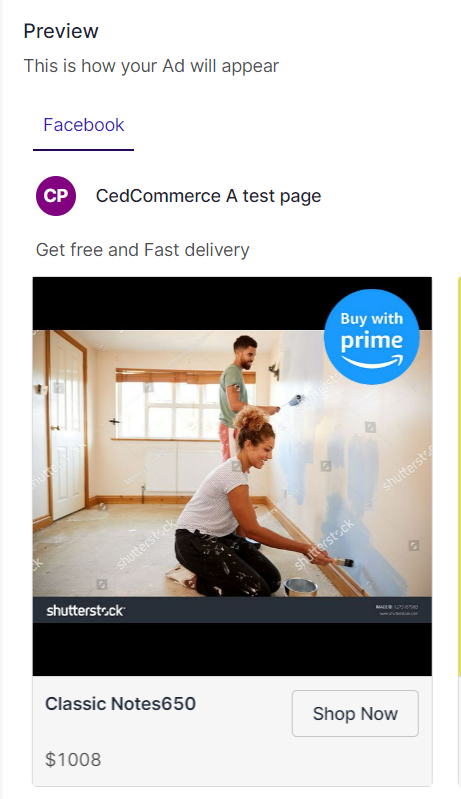
- Check the Preview of your ad, displayed on the right side of the panel. Please note that you can preview how the ads will be displayed on Facebook and Instagram. However, you can only preview the ad placement on Instagram if you have connected your Instagram profile as well.
- Please check all the details again, and click on ‘Create Campaign.’
- Your Ad Campaign will be successfully created.
×


