
Walmart Canada Configuration Settings
The user has to log in the Walmart Seller account to obtain the following API credentials:
- Walmart Consumer Id
- API Secret Key
- Consumer Channel Type Id
After obtaining the ids and the private keys, the merchant has to copy all of them one by one from the Walmart Canada Seller account and paste it one by one to the Configuration page of the admin panel of the merchant.
To follow the process of copying and pasting of the consumer ids and private keys,
- Open the Walmart.Ca Seller account and the Magento Admin Panel in two different tabs or windows of the browser. Thus, copy the keys from the Walmart.Ca Seller account and paste them one by one to the Magento Admin Panel.
OR
- Use the Get Walmart Credentials button available on the Walmart Configuration page of the admin panel of the merchant.
To copy the API Credentials from the Walmart Canada Seller account
- Open the Walmart Seller account.
- Click the Settings
 icon.
icon.
The General Settings menu appears as shown in the following figure:
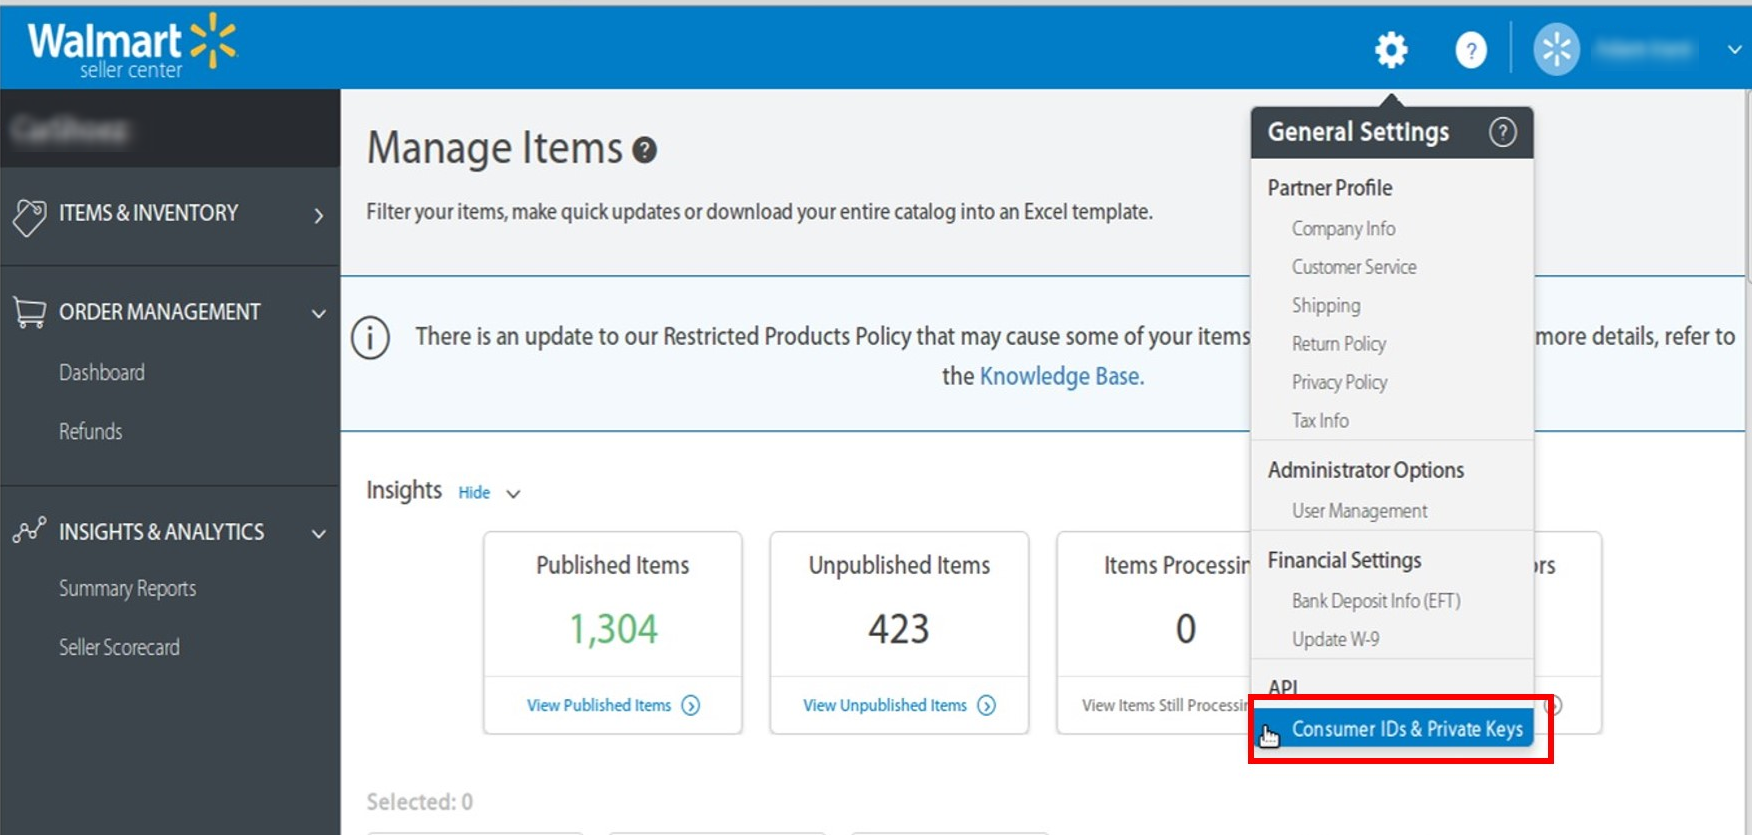
- Under API, click Consumer IDs & Private Keys.
The page appears as shown in the following figure:
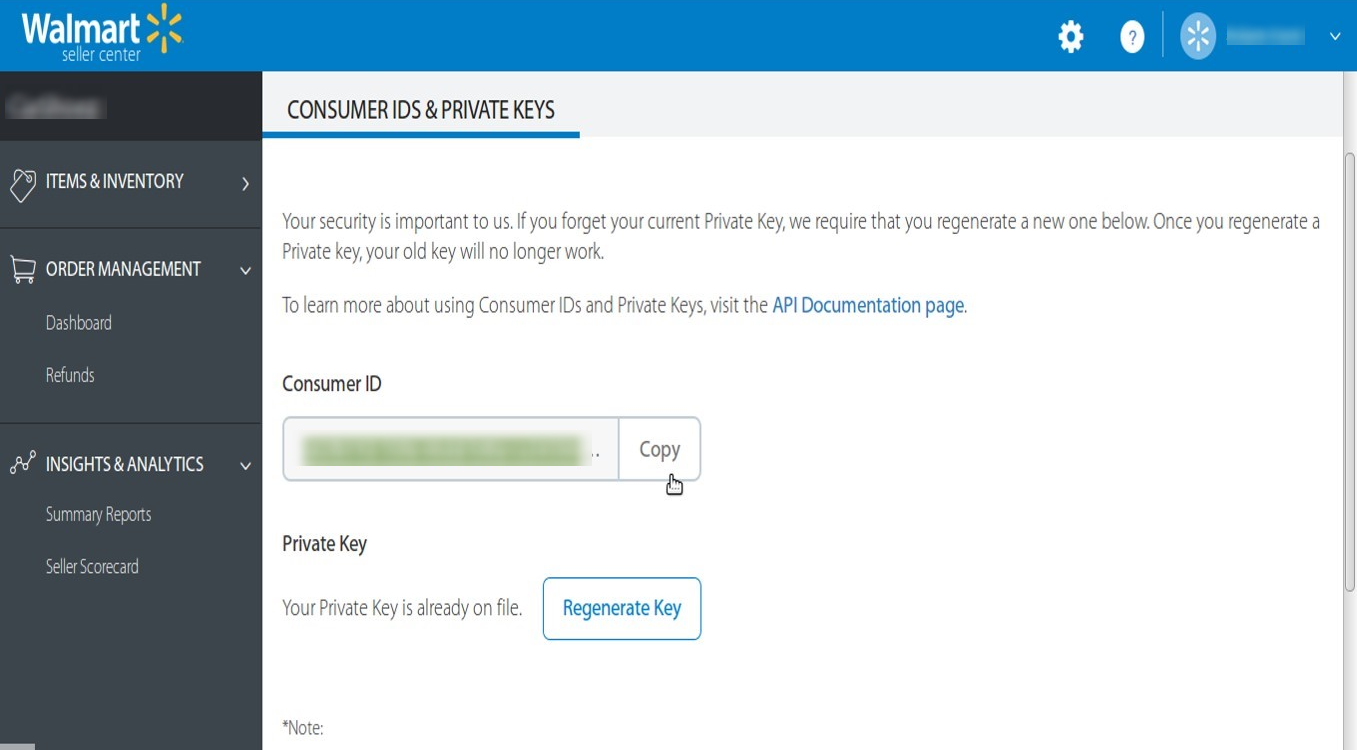
- Under Consumer ID, click the Copy button.
- Under Private Key, click the Regenerate Key button.
The Regenerate Secret Key dialog box appears as shown in the following figure:
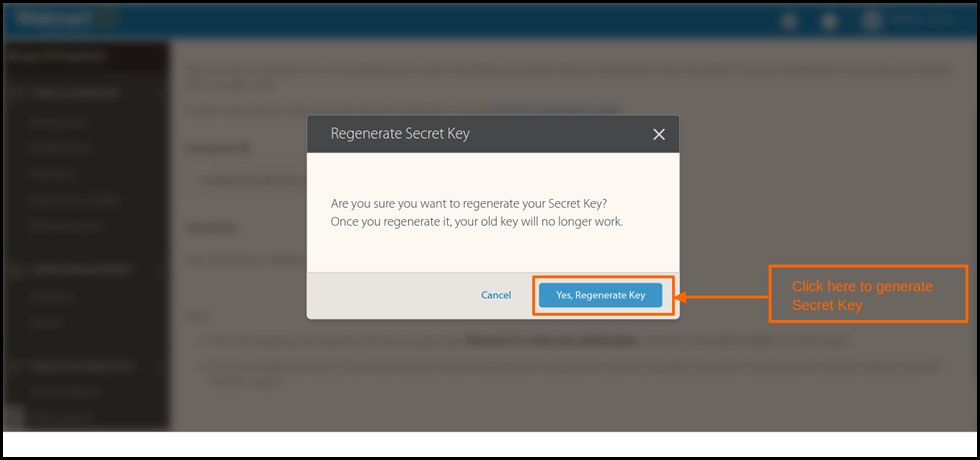
- Click the Yes, Regenerate Key button.
The key is generated. Copy the generated key.
- To update the Walmart Configuration Setting of the extension
- Go to the Magento Admin panel.
- On the top navigation bar, point to the Walmart.ca menu, and then click Configuration.
- Go to the Magento Admin panel.
The Walmart.ca Configuration page appears as shown in the following figure:

- On selecting Yes in the Enabled section, the tab gets expanded and looks like the figure below:
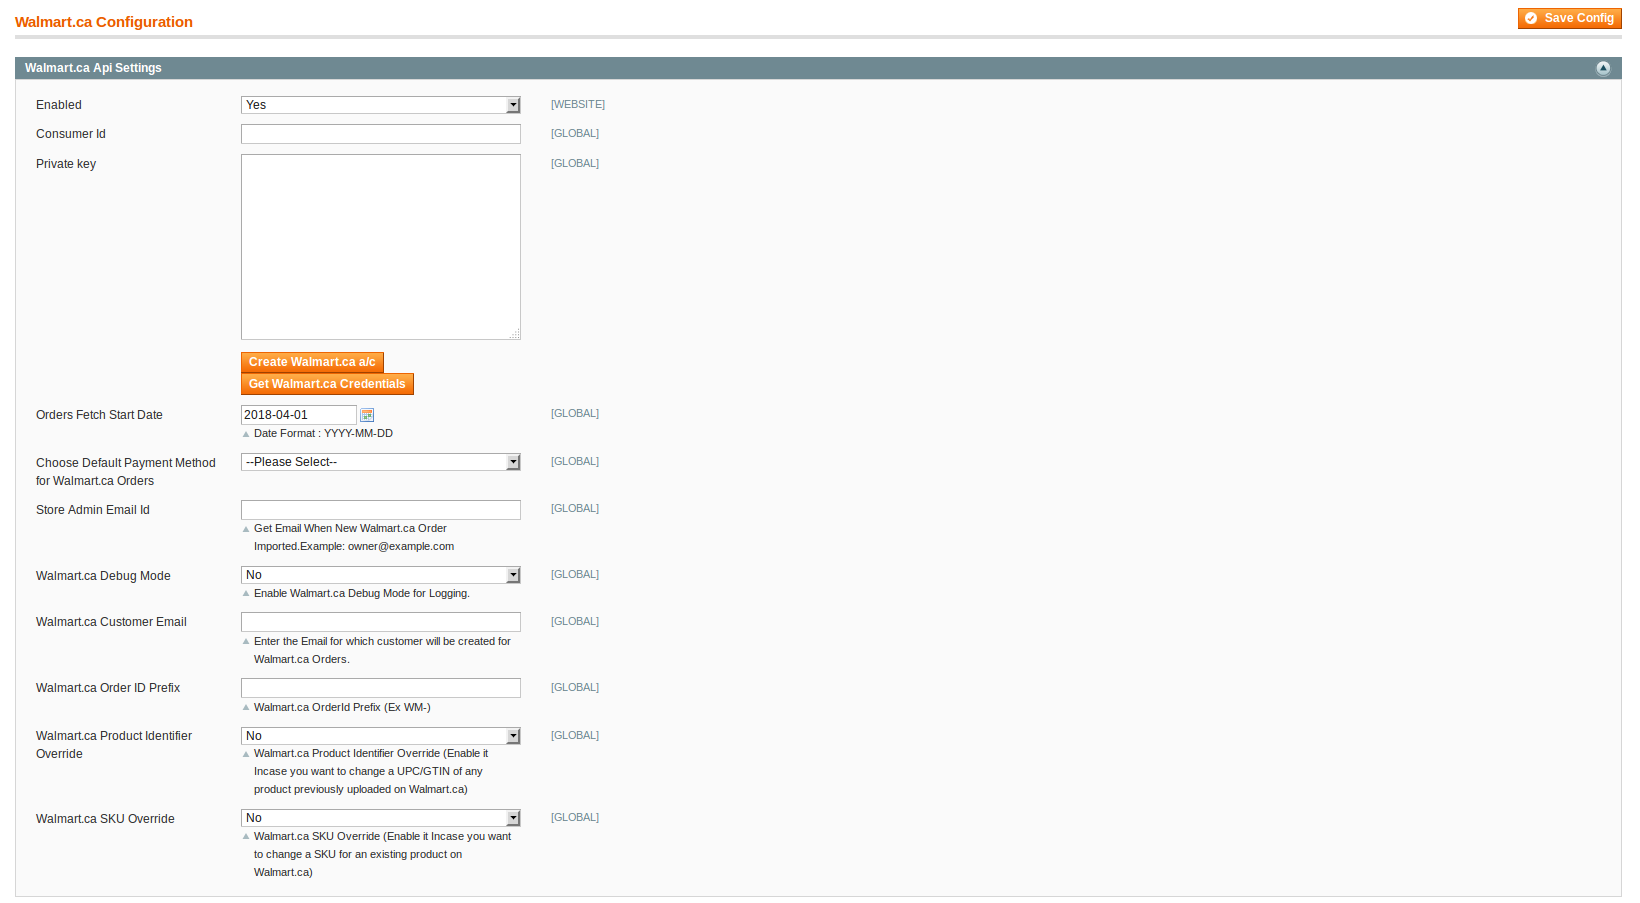
- Under Walmart.ca API Settings, do the following steps:
- Now in the Consumer Id box, paste the corresponding Consumer ID copied from the Consumer IDs & Private Keys page of the Walmart Seller Account.
- In the Private Key box, paste the corresponding Private Key copied from the Consumer IDs & Private Keys page of the Walmart Seller Account.
- Click the Get Walmart Credentials button to to obtain the API credentials from the existing Walmart partner account.
OR
Click the Create Walmart Account button to create the account to obtain the API credentials. - In the Orders Fetch Start Date box, click the calendar icon, and enter the date.
The date from when the user starts to fetch the order. - In the Choose Default Payment Method for Walmart Orders list, select the required option.
- In the Store Admin Email Id box, enter the email-id where the admin wants to send the mail whenever new Walmart order is Imported.
- In the Walmart Debug mode list, select Yes.
Note: Enable it to start Walmart Integration in the debug mode. It captures the log for the debug process. - In the Walmart Customer Email box, enter the customer email-id .
- In the Walmart Order ID Prefix box, enter the prefix that the admin wants to add before the Walmart order Id.
- In the Walmart Product Identifier Override list, select Yes.
Note: Enable it to change a UPC/GTIN of any product previously uploaded on Walmart. - In the Walmart SKU Override list, select Yes.
Note: Enable it to change an SKU of an existing product previously uploaded on Walmart.
- Click the Save Config button.
The API settings are validated and the success message appears. If the entered ids and keys or any other API settings are not valid then an error message appears.
- Click the Walmart Product Global Settings tab.
The Walmart Product Global Settings tab is expanded as shown in the following figure:
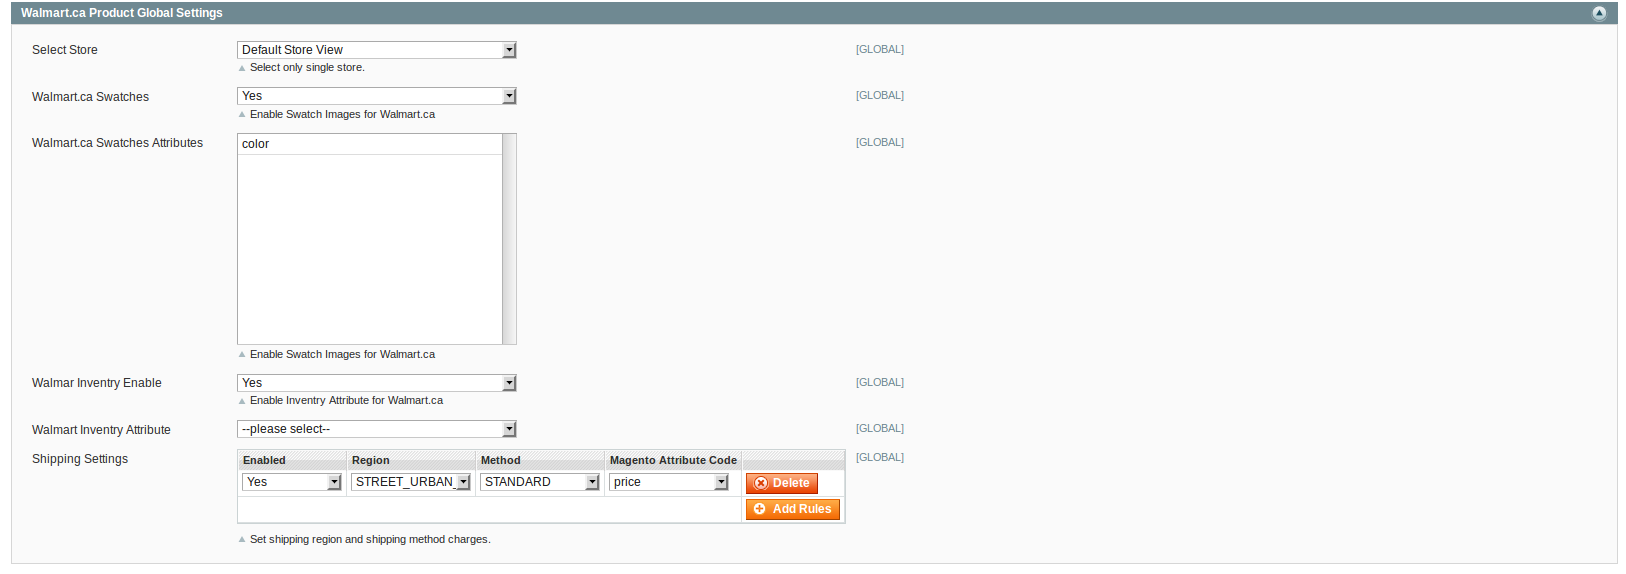
- Under Walmart.ca Product Global Settings, do the following steps:
- In the Select Store list, select the single store.
- In the Walmart.ca Swatches tab, if you select Yes like done in the figure above, your product attributes get visible here as above. After this, you may enable Swatch images for Walmart.ca like done in the figure above.
- You may also enable the Walmart Inventory by selecting Yes in the concerned tab and then select the Walmart Inventory Attribute in the next tab’s drop down menu.
- To configure the shipping settings, click the Add Rules button.
The field is expanded and appears as shown in the following figure:- In the Enabled list, select Yes.
- In the Region list, select the required region.
- In the Method list, select the required shipping method.
- In the Magento Attribute Code list, select the corresponding attribute code.
Note: Click the Add Rules button to add more shipping settings. To delete the rule, click the Delete button.
- Now click Walmart.ca Product Advanced Price Settings tab.
The Walmart.ca Product Advanced Price Settings tab is expanded as shown in the following figure:

- Under Walmart.ca Product Advanced Price Settings, you may choose the option to either increase or decrease the amount of the product. For example, upon selecting Increase by Fixed Price, the section expands with two more tabs as shown in the figure below:

- As Walmart.ca Product Price is to set a different price for all the products, user can set the price on the following basis: –
- Increase by Fixed Price: If selected, then the Enter Amount field appears. If you enter a particular amount here, your product will be featured on Walmart by adding that amount to the amount of your product on your own store. For example, if you enter 10 here and your product on Magento is for 100, your product will be featured on Walmart with the price of 110.
- Increase by Fixed Percentage: If selected, then the Enter Percentage field appears.
Enter the numeric value to increase the price of the Walmart product price by the entered value % of Magento price
For Example: Magento price + 5% of Magento price.
Magento Price = 100
Select Increase By Fixed Percentage option
Enter Percentage = 5
100 + 5% of 100 = 100 + 5 = 105
Thus, Walmart Product Price = 105 - Decrease by Fixed Price: If selected, then the Enter Amount field appears. If you enter a particular amount here, your product will be featured on Walmart by decreasing that amount from the amount of your product on your own store. For example, if you enter 10 here and your product on Magento is for 100, your product will be featured on Walmart with the price of 90.
- Decrease by Fixed Percentage: If selected, then the Enter Percentage field appears.
Enter the numeric value to decrease the price of the the Walmart product price by the entered value % of Magento price
For Example: Magento price – 5% of Magento price.
Magento Price = 100
Select Decrease By Fixed Percentage option
Enter Percentage = 5
100 – 5% of 100 = 100 – 5 = 95
Thus, Walmart Product Price = 95
- Fullfillment Lag Time: Enter Fullfillment Lag Time for products on Walmart.
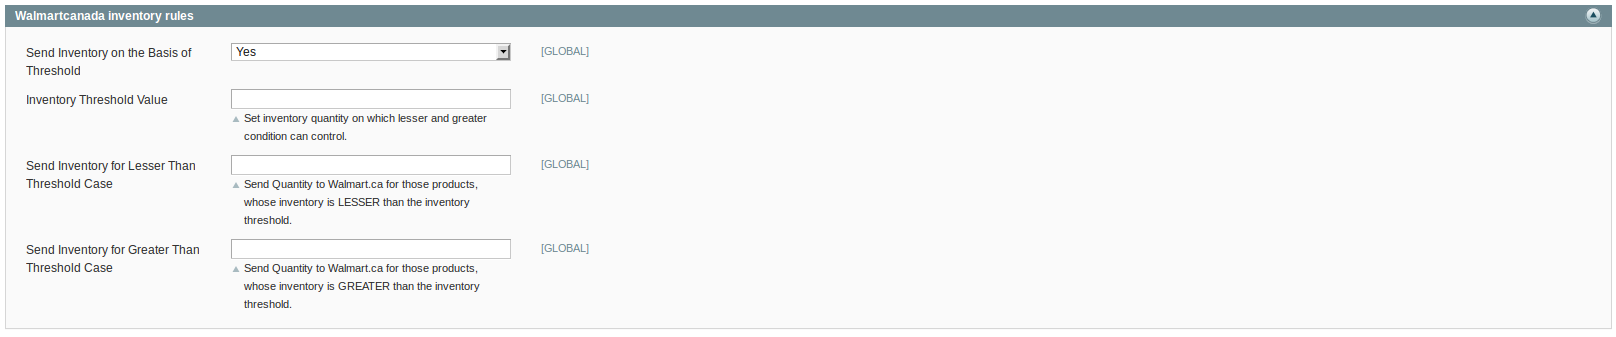
After done till the above step, next is the Walmartcanada inventory rules. Here, you need to click on this tab and you will see the section expanded as below:

- In the Send Inventory on the Basis of Threshold list, select Yes to send the inventory based on threshold.
Note: Only when the admin selects Yes, the other fields appear. Threshold Inventory is the minimum count of an item that the store owner wants to keep in stock.
The section appears as shown in the following figure:
-
- In the Inventory Threshold Value box, enter the required value.
- In the Send Inventory for Lesser Than Threshold Case box, enter the required value.
- In the Send Inventory for Greater Than Threshold Case box, enter the required value.
- Click the Save Config button.
- Now, Click the Cron Settings tab.
The Cron Settings tab is expanded as shown in the following figure:

Under Cron Settings, do the following steps:
- In the Cron Settings Override list, select Yes to enable the cron settings. The figure below shows how it will look to you:
Note: Only when the admin selects Yes, the other fields appear.
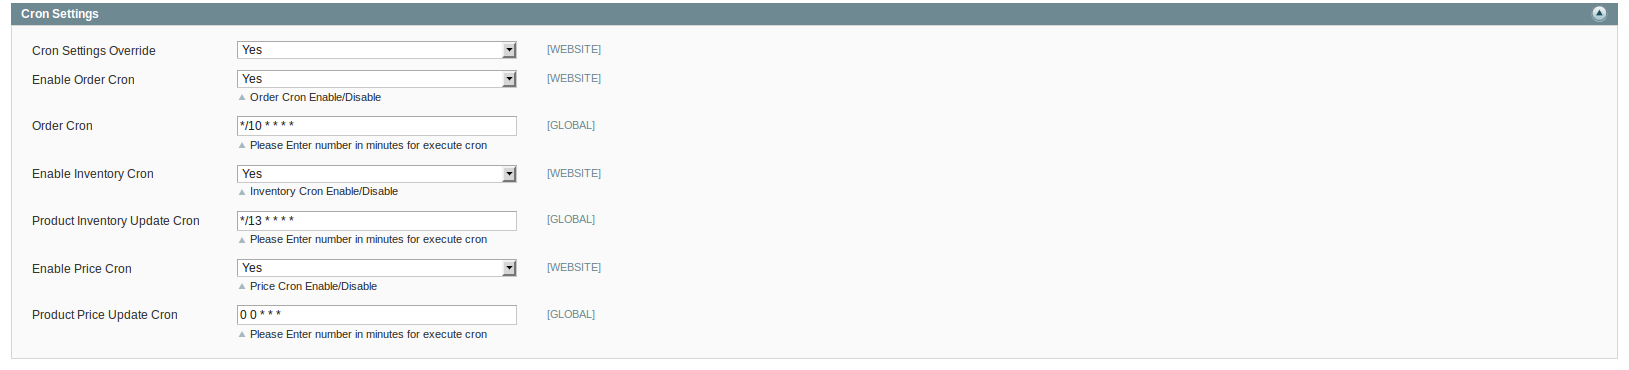
- In the Enable Order Cron list, select Yes to enable the order cron.
The Order Cron field appears.- In the Order Cron box, enter the required value.
- In the Enable Inventory Cron list, select Yes to enable the order cron.
The Product Inventory Update Cron field appears.- In the Product Inventory Update Cron box, enter the required value.
- In the Enable Price Cron list, select Yes to enable the order cron.
The Product Price Update Cron field appears.- In the Product Price Update Cron box, enter the required value.
Once you gone through every step shown in this section, click on the Save Config button on the right side of the page.


