3.Configuration ↑ Back to Top
Once you have installed the Facebook Store Integration for Magento in your Admin Panel, you need to complete the Configuration process as shown in this section of the guide.
To Complete the Configuration:
- Go to the Magento Admin Panel.
- On the top navigation bar, you can see the FB Store.
- Take the cursor to it and the menu will appear to you as shown in the image below:

- Now click on Configuration. Upon doing so, you will be navigated to the page as shown below:

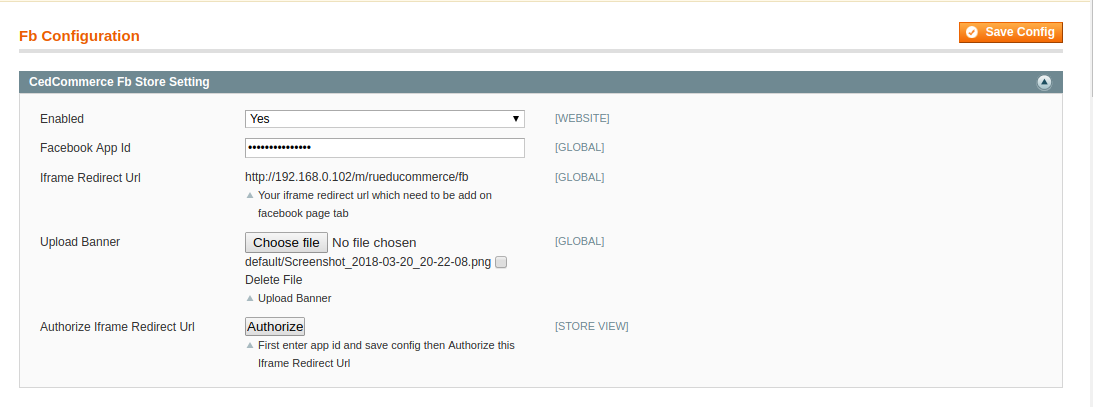
- In CedCommerce FB Store Setting tab:
- Select Yes to enable the extension.
- Note: By selecting NO, you disable the extension.
- In Facebook App Id Enter the app Id of your Facebook Store.
How to get the Facebook App Id?
- Go to developer.facebook.com
- Click on the Log In Icon to Login your Account.
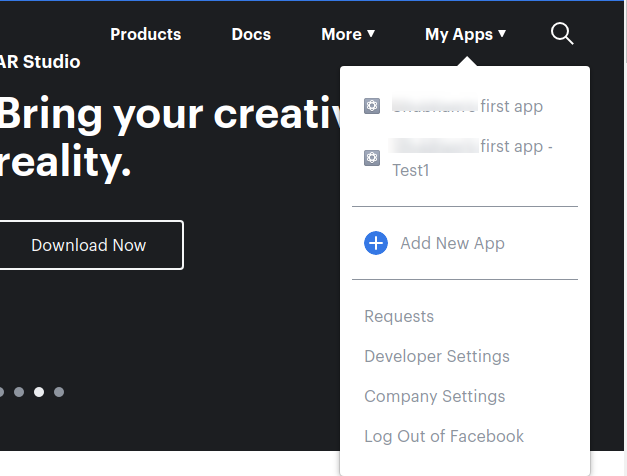
- After login click on the My Apps Icon to Create an App.
- Click on Add new Apps, as you can see in the following image.

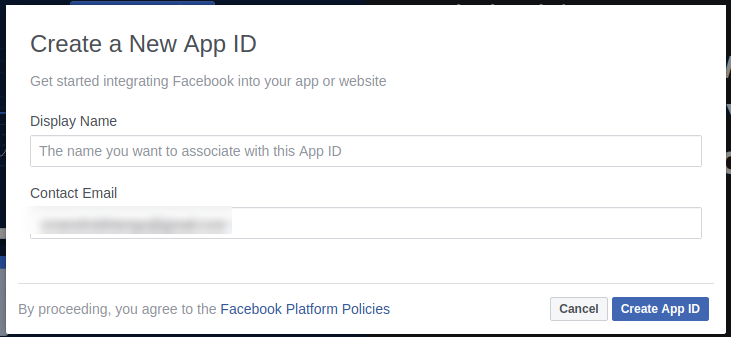
A page will be displayed to enter the App name and your email Id as given in the below figure. 
- In Display Name, Enter the name of your App Id which you want to create.
- In Contact Email, Enter your Email Id.
- After Entering the details click on the button Create App ID
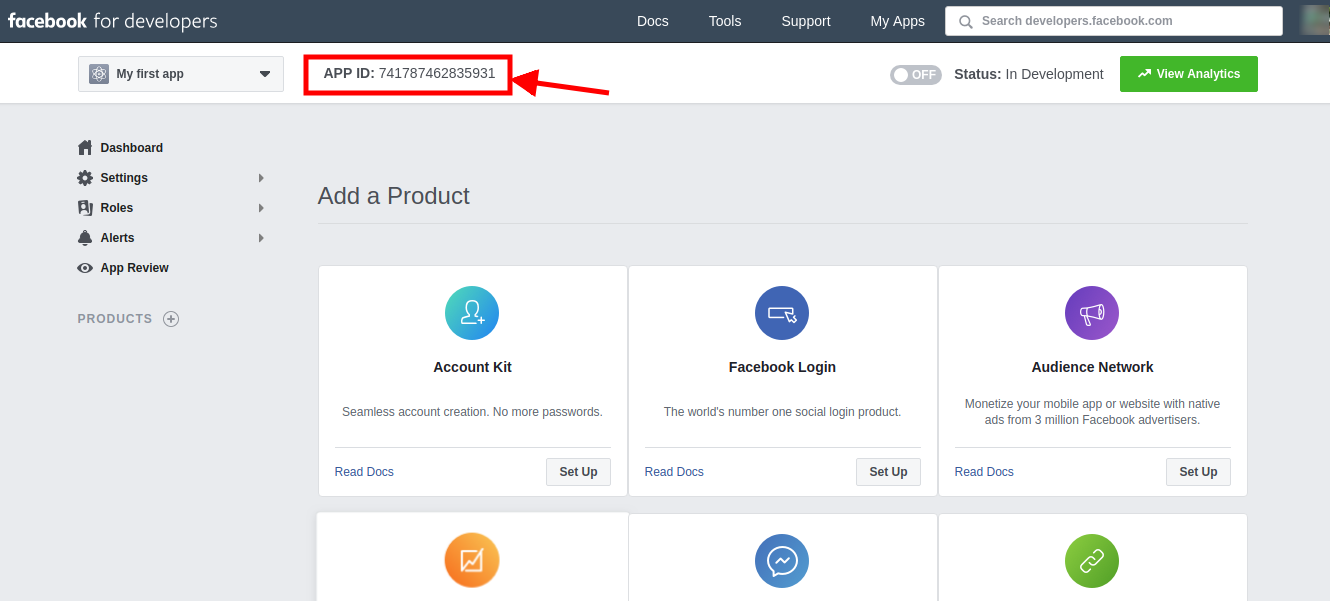
After submitting the form, you can see your App ID in the given below figure. 
- Copy the App ID and paste it, in the configuration setting of the Facebook Store as given in the following figure.

- Now, in Upload Banner, browse the Banner Image that you want to use as your Facebook page’s banner image, from your system.
- Click on the Authorize button after entering the App ID, to validate your App ID.
- Once you’ve authorized, click on the Save Config button on the top right side of the page.
- Your configuration settings will be saved and you are now done with the Configuration Process.
×


