4.Manage Accounts ↑ Back to Top
To manage multiple accounts,
- Go to the Magento 2 admin panel.
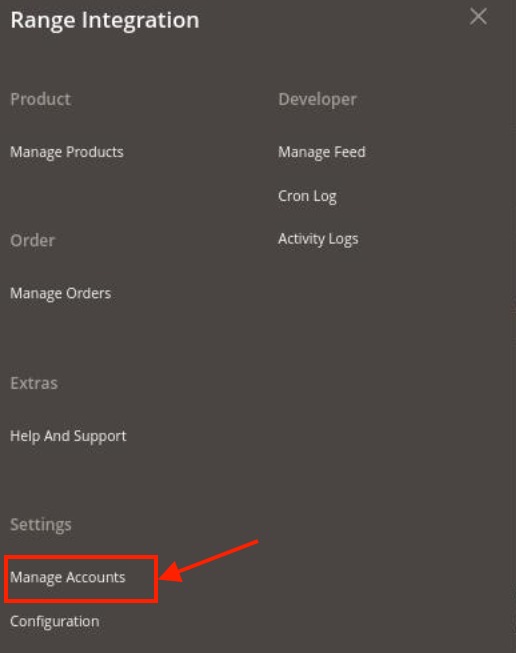
- On the left navigation bar, click on the Range Integration menu.
The appears as shown below:

- Click on Manage Accounts.
The Manage Account page appears as shown below:

- To create a new account, click on Add Account.
The new account click on the Add New Account page appears as shown below:

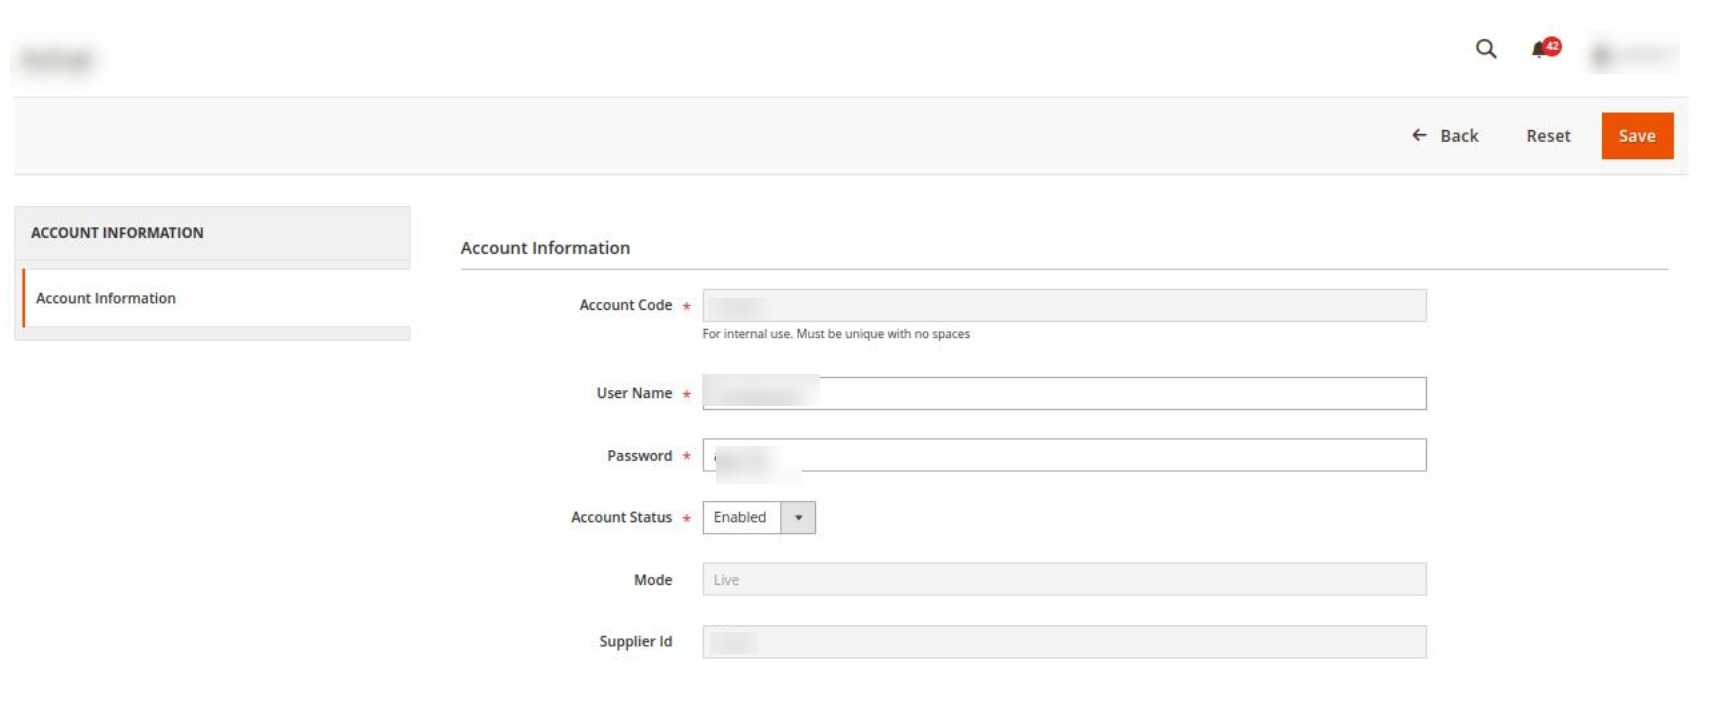
- Under Account Information, do the following steps:
- In Account Code, enter the code for your account.
- In Username, enter the account username.
- In Password, enter the account password.
- In Environment, select the type of the store, i.e. Live or Sandbox.
- In the Account store, select the store view of the account from the drop-down list.
- In Account Status, select Enable for enabling the status of your account.
- In Mode and Supplier Id, will be fetched automatically if the above details entered are correct.
- Click on the Save button.
New Account will be created and shown on the Manage Account grid.
To Edit Account,
- On the Manage Accounts Page under the Actions column, click on the Edit button.

- After clicking you will be redirected to the page:

- You can edit the required information and then click on the Save button.
The details will be saved.
To Perform Actions in Bulk-
- In the Manage Accounts page, select the desired accounts you want to perform the Actions.
- Then click on Actions on the left side of the page:

- Click on Delete.
- The selected accounts will be deleted in bulk.
×


