3.Configuration Settings ↑ Back to Top
To Set up the Configuration Settings,
- Go to the Magento 2 admin panel.
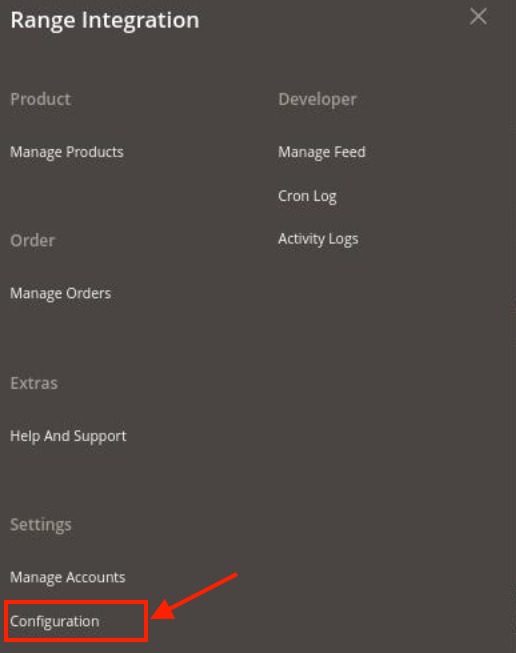
- On the left navigation bar, click on the Range Integration menu.
The appears as shown below:

- Click on the Configuration.
The Configuration page appears as shown below:

- n the right panel, click the Range Settings tab.
The Range Settings tab is expanded and the relevant fields appear as shown in the following figure:

- Under Range Settings, do the following steps:
- In the Enabled, select Yes to enable the settings.
- In Primary Account, select the account that you want to set as primary.
- Now scroll down and click on Range Cron Settings. The section is expanded as:

- Under Range Cron Settings, do the following steps:
- In the Order Cron, select Yes if you want to enable the orders through cron.
- In Order Cron Time, select the duration at which the order cron will run.
- In Inventory Cron, select Yes if you want to enable the inventory sync through cron.
- In Inventory Cron Time, select the duration at which the inventory cron will run.
- Scroll down and click on Range Product Settings. The section is expanded as shown below:

- Under Range Product Settings, do the following steps:
- In the Product Auto Inventory Sync, select Yes if you want to sync the products inventory automatically.
- Now Scroll down and click on Range Product Settings, the section is expanded as:

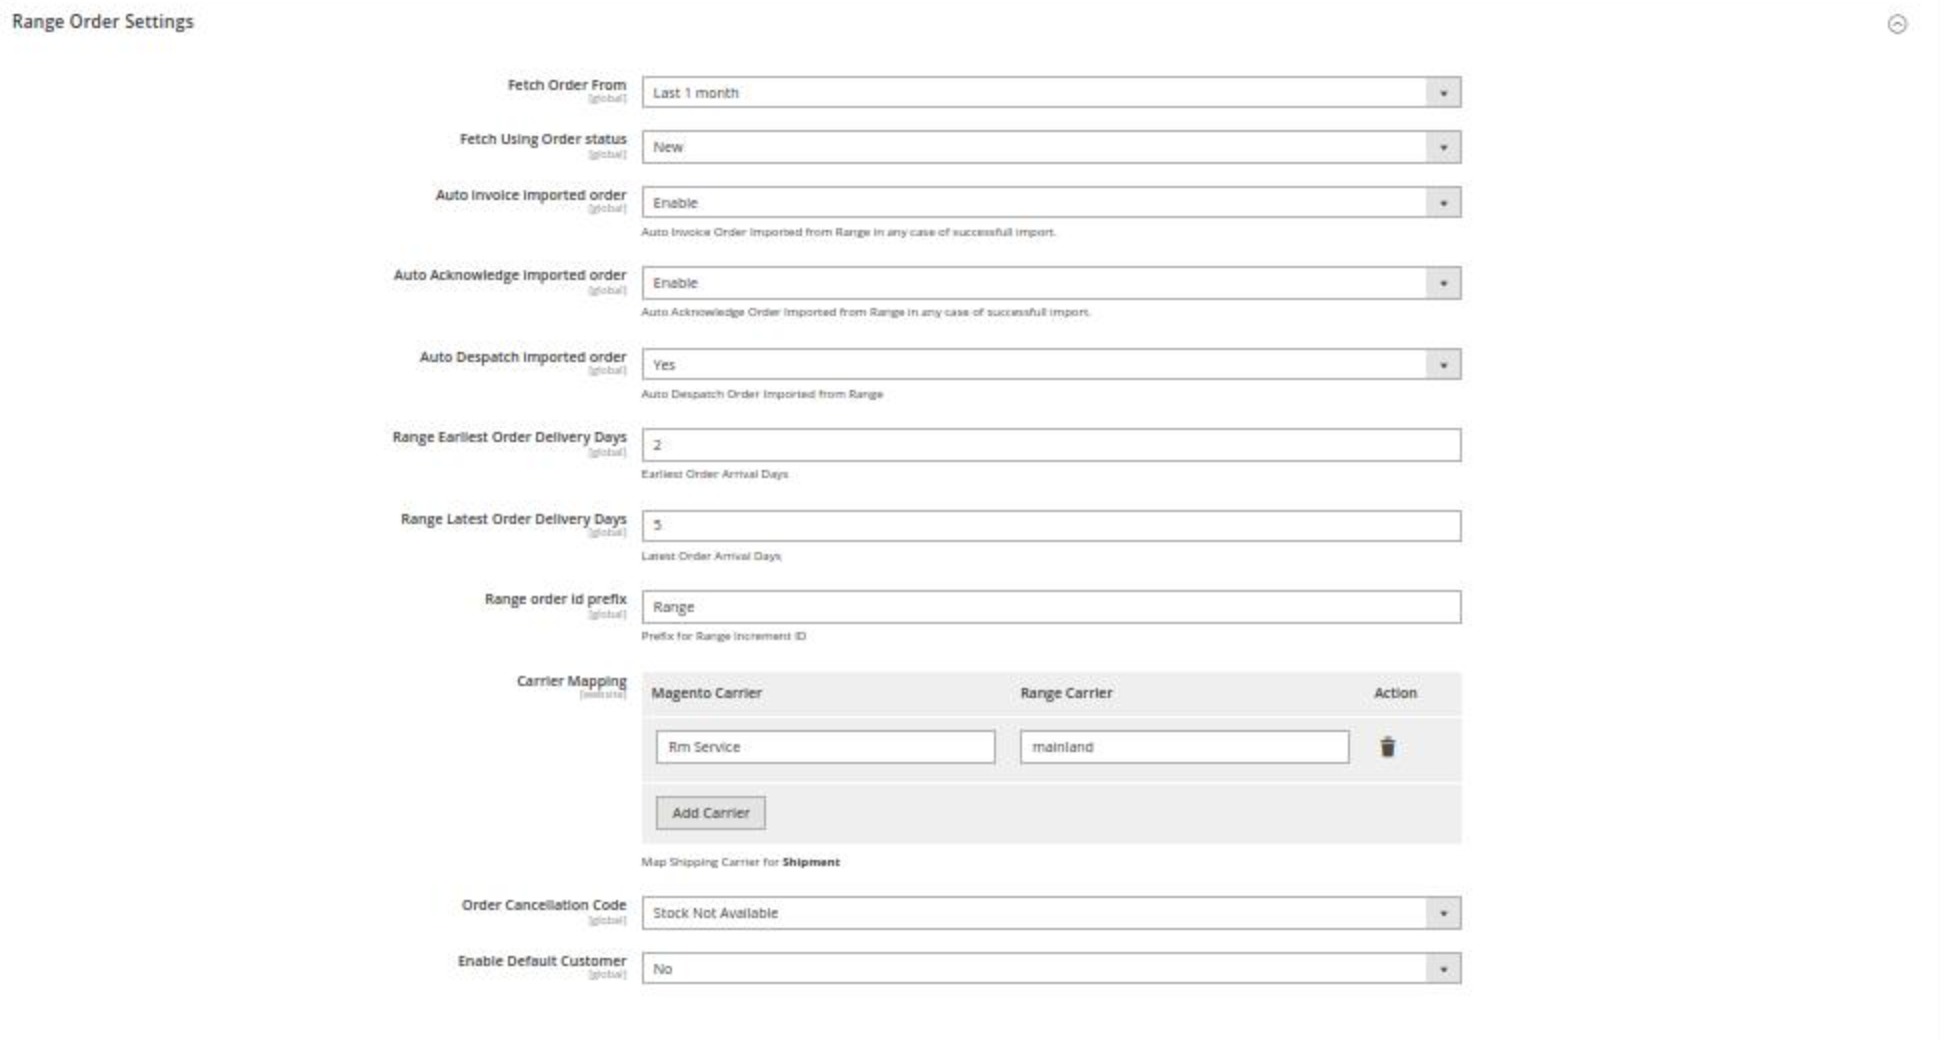
- Under Range Product Settings, do the following steps:
- In Fetch Order From, select the duration from which you want to fetch the order.
- In Fetch Using Order Status, select the option from the dropdown if you want to fetch order based on its status.
- In Auto Invoice Imported Order, select Enable if you want to use seller information & seller address will set to order shipping address.
- In Auto Acknowledge imported order, select Enable if you want to acknowledge imported orders automatically.
- In Auto Despatch imported order, select Yes if you want to automatically dispatch the imported order.
- In Range Earliest Order Delivery Days, enter the number of days for early order arrival.
- In Range Latest Order Delivery Days, enter the latest order arrival days.
- In your Range order id prefix, enter the prefix id for order.
- In Carrier Mapping, map the Magento carrier with Range carrier.
- In Order Cancellation Code, select the reason for order cancellation.
- In Enable Default Customer, select Yes if want to create a default customer for the orders.
- Click the Save Config button to save the entered values and information.
The configuration will be saved.
×


