6.1.Add A New Notification ↑ Back to Top
To add a new notification
- Go to the Admin panel.
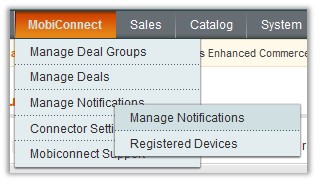
- On the top navigation bar, point to the Mobiconnect menu.
The menu appears as shown in the following figure:

- Point to the Manage Notifications menu, and then click Manage Notifications.
The Notification Manager page appears as shown in the following figure:

- Click the Add Notification button.
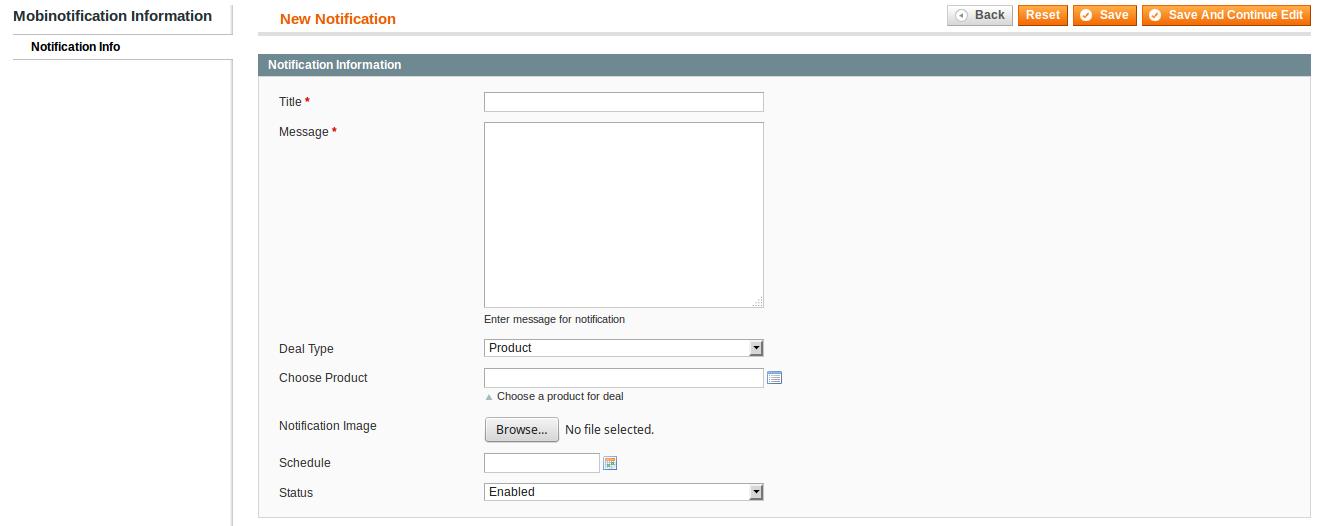
The New Notification page appears as shown in the following figure:

- In the Title box, enter the name of the notification.
- In the Message box, enter the notification content.
- In the Deal Type list, select the required type of deal from the following options:
- Product: To redirect the user to the Products page available in the Front-end view of the app.
Note: When the admin selects the Product option, then the Choose Product field appears below the field.- In the Choose Product list, select the product to redirect the user to the selected product page.
- Category: To redirect the user to the Category page available in the Front-end view of the app.
Note: When the admin selects the Category option, then the Choose Category field appears below the field.- In the Choose Category list, select the category to redirect the user to the selected category page.
- Static: To redirect the user to the specific link provided.
Note: When the admin selects the Static option, then the Static Deal Link field appears below the field.- In the Static Deal Link box, enter the required link to redirect the user to that particular page.
- Product: To redirect the user to the Products page available in the Front-end view of the app.
- Click the Browse button next to the Notification Image field to upload the image relevant to the notification.
- In the Schedule box, click the Calendar icon to enter the date and time to schedule the notification.
- In the Status list, select the required status.
- Click the Save button.
×


