
Add A New Banner Image
To add a new banner image
- Go to the Admin panel.
- On the top navigation bar, point to the Mobiconnect menu.
The menu appears as shown in the following figure:
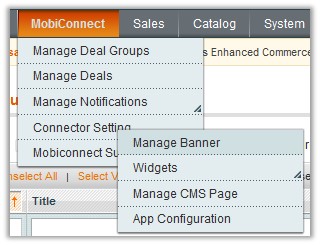
- Point to the Connector Setting menu, and then click Manage Banner.
The Manage Banner Images page appears:
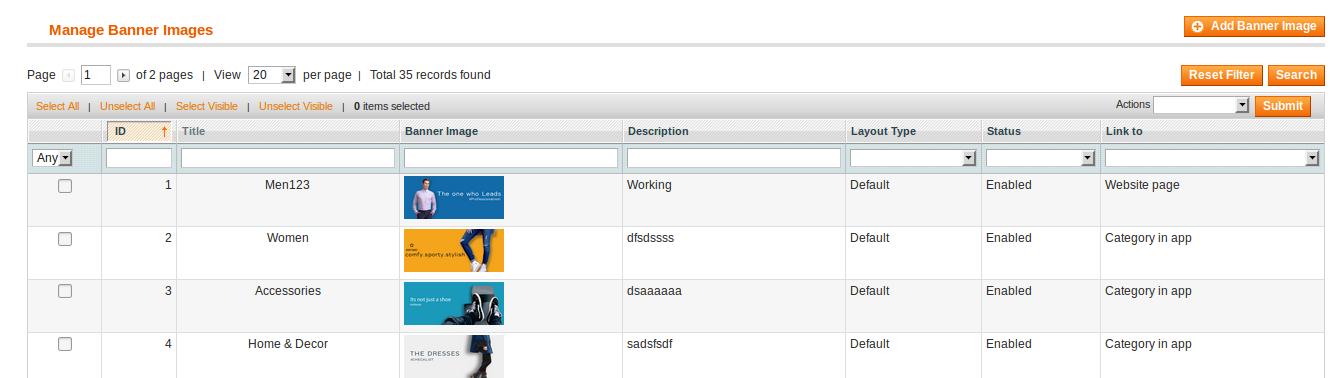
- Click the Add Banner Image page.
The page appears as shown in the following figure:
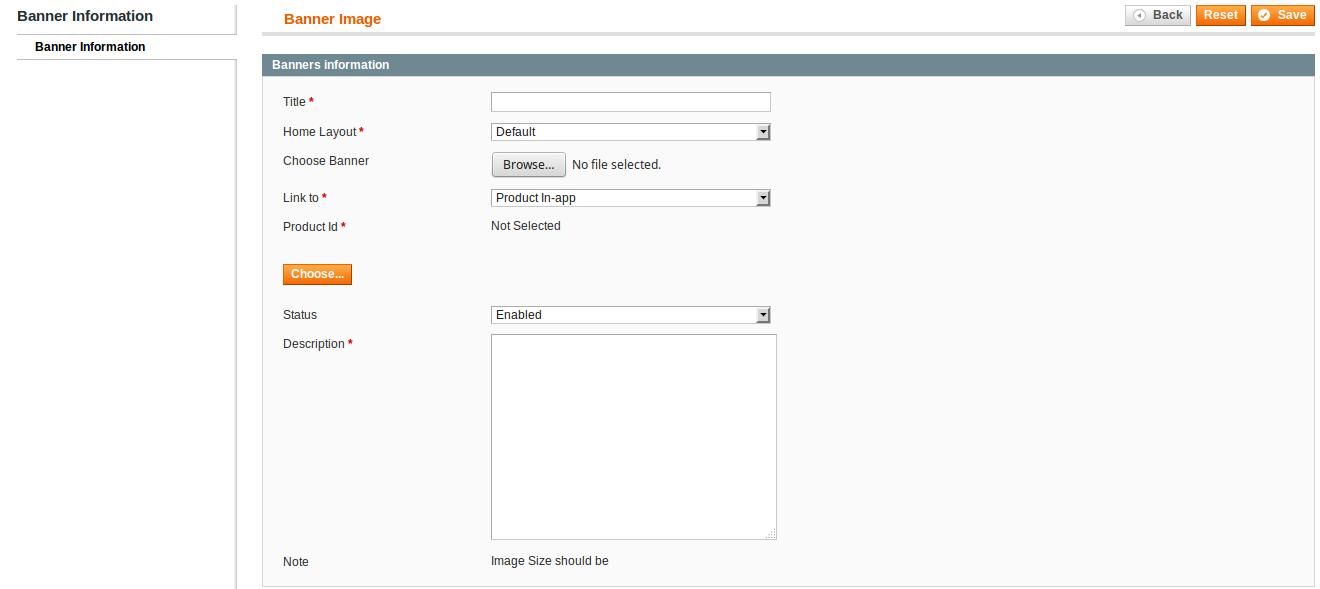
- In the Title box, enter the name of the new banner.
- In the Home Layout list, select the required layout.
- Click the Browse button next to the Choose Banner field to select the banner image.
- In the Link to list, select one of the following options:
- Product in app: To redirect the user to the Products page available in the Front-end view of the app.
Note: When the admin selects the Product in app option, then the Product Id field appears below the field.- Click the Choose button displayed below the Product Id field to select the product to redirect the user to the selected product page.
- Category in app: To redirect the user to the Category page available in the Front-end view of the app.
Note: When the admin selects the Category in app option, then the Category Id field appears below the field.- Click the Choose button displayed below the Category Id field to select the category to redirect the user to the selected category page.
- Website Page: To redirect the user to the specific link provided.
Note: When the admin selects the Website Page option, then the Url field appears below the field.- In the Url box, enter the required link to redirect the user to that particular page.
- Product in app: To redirect the user to the Products page available in the Front-end view of the app.
- In the Status list, select the required option to enable or disable the banner image.
- In the Description box, enter the description of the banner.
- Click the Save button.
The banner image is created and a success message appears.
×


