
Creating Appointment Booking Product - Vendor Panel
To add an Appointment Based Product, the Vendor needs to navigate to New Product > Add Appointment Product, as shown in the screenshot below.

A page consisting of an information form will appear
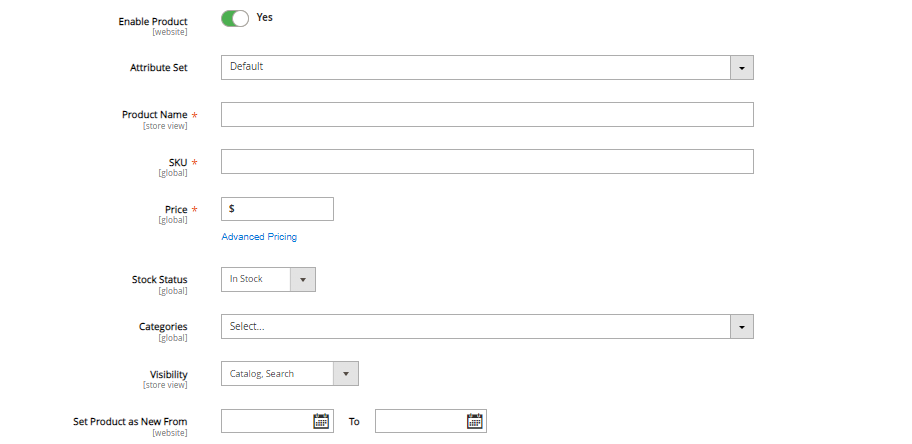
Fill in the details:
- Enable Product – Drag the toggle button from left to right to Enable or Disable
- Attribute Set – From the dropdown, select the required attribute set
- Product Name – Enter the name in the given space
- SKU – Fill in the unique SKU
- Price – Enter the price in the provided space
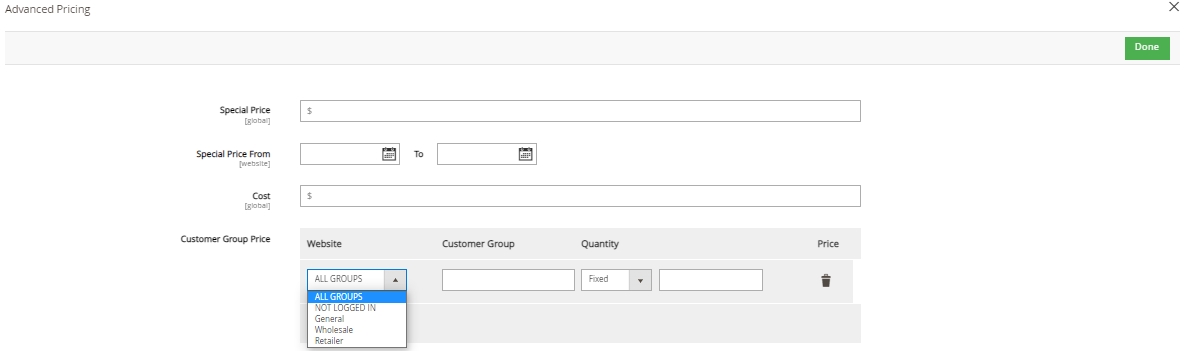
- Advance Pricing – The vendor will have an advance pricing option for the services.
- Special Price – Enter the special price here that you want to offer to your specific users
- Special Price From – To – Select the start/end date from the calendar icon
- Cost – Fill in the general cost of the service here
- Customer Group Price – Add Website, customer group name, quantity (fixed/discount), and price of the service for the added group
- Click on the Save button at the top of the page to save advance pricing settings made by the vendors
- Stock Status – From the dropdown select either in the stock or out of the stock means available or unavailable at all
- Categories – Click on the default category checkbox and the category
- Visibility – From the dropdown select where the appointment booking product will be displayed in the catalog, search, in both or not visible individually
- Set Product as New From – Select the start and end date from the calendar
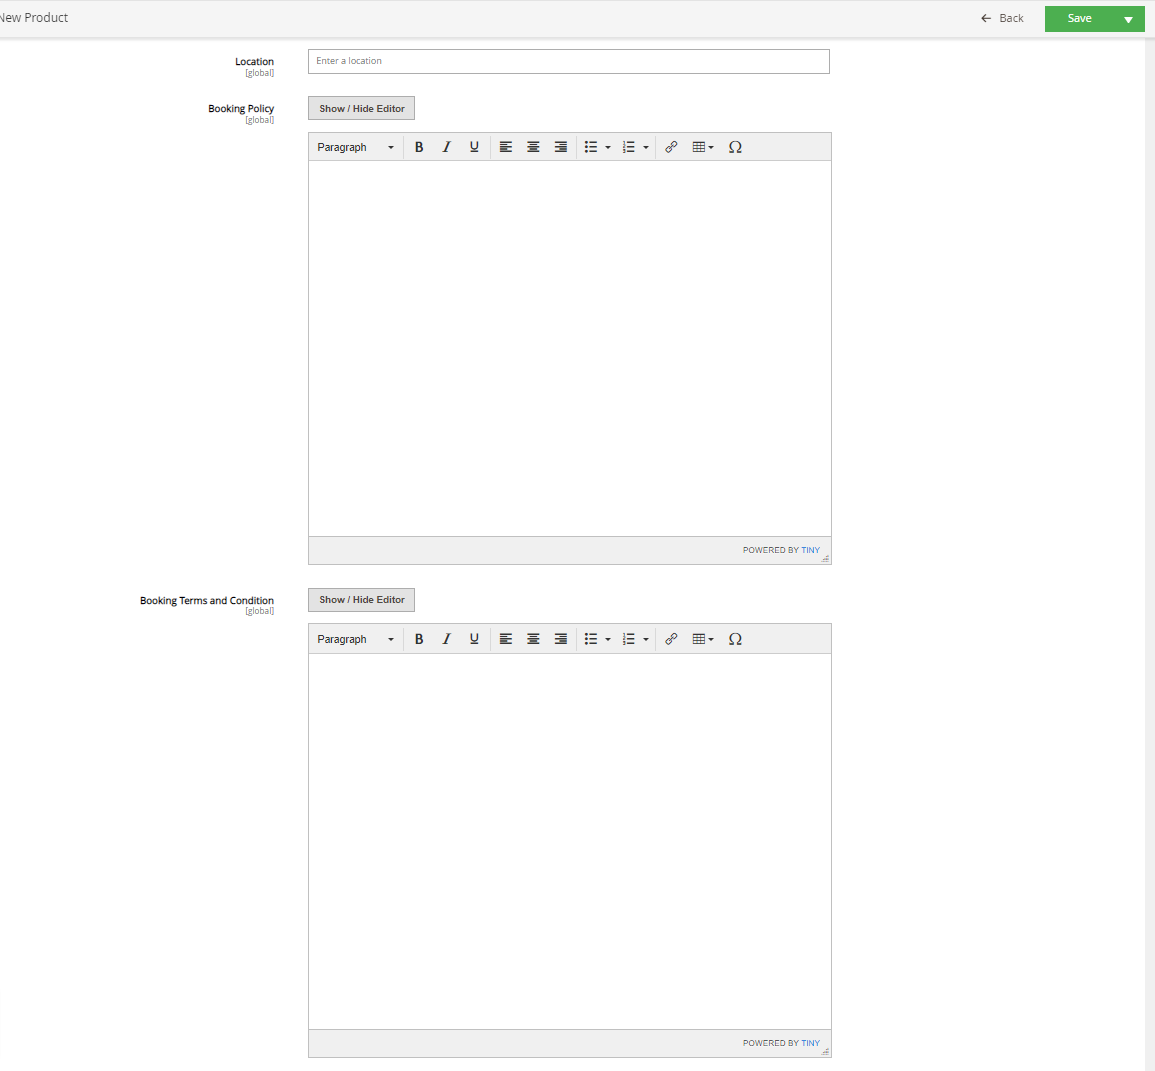
Now, Add Booking General Information:
- Location – Enter the location of Service
- Booking Policy – Add a booking policy
- Booking Terms and Conditions – Include terms and conditions
Fill in the Appointment Slots details:
-
- Service Type – from the dropdown choose the service type that customers can have. The service type can be a branch, at home, or both.
- Duration – Select the duration of the service type
- Qty per slot – Here select the number of people allowed per appointment
- Same Slot for all the weekdays –
- If No – Fill in the start and end time of each day individually per the requirement.
- If Yes – Add start time and end time as shown in the below screenshot for all weekdays

Add Non-Working Dates by filling in Start and End Date. To add dates click on the ADD button

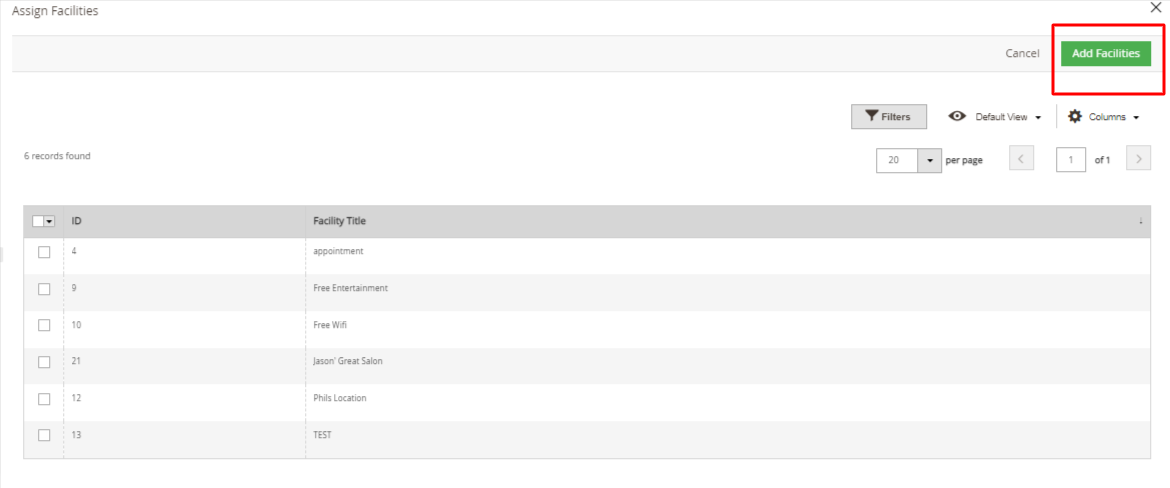
Booking Facilities dropbox consists of an Assign facilities button using which vendors can assign numerous facilities to the customers.

- Next, a page listed with facilities will be displayed
- Click on the checkbox to choose facilities and then Click on the Add Facilities button as shown in the below screenshot
- Upload an Image or Video (Youtube API keys should be filled by Admin)
- In the Content section, add a short description and description of the product
- Fill in the URL Key, Meta titles, Meta keywords, and Meta descriptions to rank your appointment booking product. So that while searching, it is easily visible to the users.
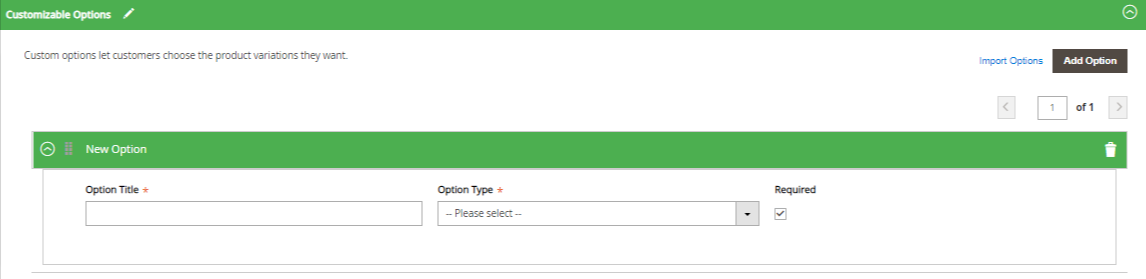
- Add Customizable Options. This lets the customers choose the variants they want.
- Click on the Add Option button to add variants. Select title, type and select the required checkbox.
- After filling in all the details, click on the Save button at the top of the page.
- The New Appointment Booking Product is now created
×


